
Main Courses
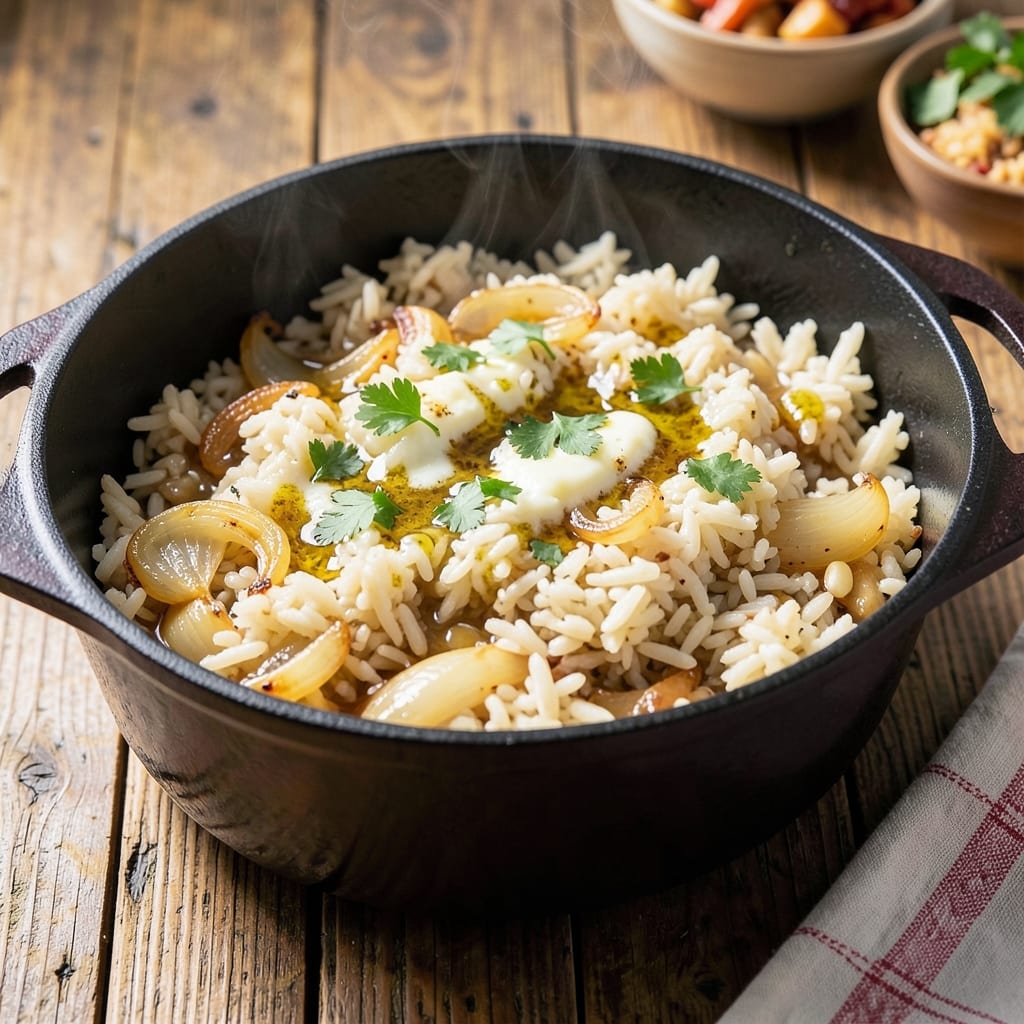
This one-pot rice recipe delivers restaurant-quality results with a crispy golden bottom that requires zero stirring—just one pan and 30 minutes of hands-off cooking. The secret lies in a simple technique that transforms ordinary rice into a flavorful, textured masterpiece with minimal effort and cleanup. Perfect for weeknights when you want a satisfying meal without the fuss of multiple dishes.
What sets this method apart is the crispy bottom layer, achieved by cooking the rice in a single pot with a precise rice-to-liquid ratio and a touch of butter or oil. This creates a flavorful crust that adds depth to every bite, while the rice itself remains tender and fluffy. The recipe is designed to be adaptable—add your favorite protein or vegetables to customize it for any meal.
The beauty of this approach is its simplicity: no complicated steps, no constant attention, and no extra pots to wash. You'll start with basic ingredients—rice, broth, and a few pantry staples—and end up with a dish that's hearty enough for dinner but easy enough for any day. The aroma alone will have everyone gathering around the table.
Once mastered, this technique opens the door to endless variations—think Spanish paella, Middle Eastern pilaf, or even a quick stir-fry. The crispy bottom becomes a signature feature, proving that great food doesn't require complicated methods. Let's get started with this foolproof one-pot solution.
Ingredients for 1 pot rice
Basic pantry staples transform into restaurant-quality rice with a crispy golden crust—no stirring required.
| Ingredient | Amount | Notes |
|---|---|---|
| Long-Grain White Rice 🍚 | 1 ½ cups | Uncooked, medium grain preferred |
| Chicken Broth 🥫 | 2 ½ cups | Low-sodium preferred, homemade or quality store-bought |
| Unsalted Butter 🧈 | 2 tbsp | Cold, cut into small pieces |
| Garlic Cloves 🧄 | 3 cloves | Minced, for aroma |
| Yellow Onion 🧅 | 1 whole | Diced, medium size |
| Olive Oil 🫒 | 1 tbsp | Light, for crispy bottom |
| Salt 🧂 | 1 tsp | Kosher or sea salt |
| Black Pepper 🌶️ | ½ tsp | Freshly ground preferred |
| Fresh Thyme Leaves 🌿 | ¼ tsp | Or 1/8 tsp dried thyme |
| Bay Leaf 🍃 | 1 whole | For depth of flavor |
| Optional Protein 🍗 | 1 cup | Chicken, shrimp, or tofu (chopped) |
| Optional Vegetable 🥕 | 1 ½ cups | Peas, carrots, or bell peppers (diced) |
The rice is the star, so choose medium-grain white rice for that perfect balance of texture. Bob's Red Mill or Lundberg are reliable brands, but any long-grain variety works. The chicken broth should be flavorful—Pacific Foods or Swanson are solid choices, but homemade elevates it further. For the crispy bottom, cold butter is non-negotiable (the good stuff, not margarine). The garlic and onion should be fresh—no pre-minced jars here. Pro tip: Toast the rice in the pot with olive oil for 30 seconds before adding liquid to build flavor. Diamond Crystal kosher salt is ideal, but any fine grain works.
No chicken broth? Vegetable broth works just as well, though the flavor will differ slightly. Short on thyme? Dried thyme at one-third the amount gets you close, but fresh is ideal. The bay leaf adds subtle depth—skip it if you prefer a cleaner flavor. For the optional protein, chicken thighs stay juicier than breasts, while tofu absorbs the flavors beautifully. Vegetables? Frozen peas work in a pinch, but fresh is better. The crispy bottom is the magic—don’t skip the butter or oil, and resist stirring once the liquid starts simmering. If you’re feeling adventurous, add a splash of white wine or soy sauce for extra umami.
This keeps 3-4 days in the fridge, though it reheats best when fresh. For leftovers, cover with a damp paper towel to prevent drying. The crispy bottom softens when reheated, but a quick toast in the oven restores its magic. Freeze portions for up to 3 months—just thaw overnight in the fridge. Portion into single servings before freezing for easy meals. The aroma alone will have your kitchen smelling like a restaurant, so plan accordingly.
Why You'll Love This Recipe
- Here’s what sold me: that first bite where the toasted garlic meets the creamy butter melting into the rice. It’s rich but not heavy, and honestly? The onion caramelizes just enough to make you want to eat it straight from the pot.
- I’ll be real: this recipe costs me pennies per serving. Chicken broth stretches forever, rice is cheap, and butter in small doses keeps it from breaking the bank. Plus, it’s the kind of dish that makes even a simple meal feel special.
Step-by-step instructions for golden crispy bottom rice
Master this foolproof one-pot technique for perfect rice every time.
Sauté Aromatics and Build the Crispy Base
Heat the 1 tablespoon olive oil in a heavy-bottomed pot with a tight-fitting lid over medium heat. Add the 1 whole yellow onion and cook for 5 minutes until softened and translucent. This foundational step develops flavor and prevents the rice from sticking later.
Add the 3 cloves garlic and cook for 30 seconds until fragrant—don't let it brown. Immediately stir in the 2 tablespoons cold unsalted butter and let it melt completely. The butter will create that coveted crispy bottom when combined with the olive oil. Keep the heat at medium throughout this process to avoid burning the garlic.
Toast the Rice for Enhanced Texture
Add the 1.5 cups long-grain white rice and stir to coat evenly in the butter-oil mixture. Cook for 2 minutes, stirring constantly, until the rice grains become translucent at the edges. This brief toasting step, called "blooming," removes excess surface starch that would otherwise make the rice gummy.
I press down gently on the rice with a wooden spoon during this time—this prevents it from sticking to the bottom and ensures even contact with the fat. You'll know it's ready when the rice looks slightly glossy and the edges begin to turn opaque.
Add Liquids and Seasonings
Pour in the 2.5 cups chicken broth and bring to a boil over high heat. Add the 1 teaspoon salt, ½ teaspoon black pepper, ¼ teaspoon fresh thyme leaves, and 1 whole bay leaf. Stir once to distribute the seasonings evenly, then add the 1 cup optional protein and 1.5 cups optional vegetable if using.
Real talk: don't skip the seasoning step. The broth carries all the flavor, and these aromatics infuse the rice thoroughly. If you're using dried thyme instead of fresh, crush the leaves between your fingers first to release their oils—this makes a noticeable difference in flavor.
Simmer and Develop the Crispy Bottom
Reduce heat to low and cover with the lid. Let it cook undisturbed for 15 minutes. Here's the thing—this is where the magic happens. The lid creates steam that cooks the rice evenly, while the direct heat at the bottom caramelizes the butter and oil, creating that golden crust.
After 15 minutes, check for doneness. The rice should be tender but still have a slight bite in the center. If it's not quite done, cover and cook for another 5 minutes. If it's perfect, proceed to the crispy step. Don't peek or stir—the rice needs that undisturbed environment to develop properly.
Finish with Crispy Perfection
Once the rice is tender, remove the pot from heat and carefully slide it onto a cooling rack or trivet. Let it sit uncovered for 5 minutes—this allows any remaining steam to escape while the bottom continues to crisp up.
For the final touch, return the pot to low heat for 1-2 minutes to crisp the bottom further. You'll see it transform from golden to deep mahogany brown. This crispy layer is what makes this one-pot rice stand out—it adds texture contrast and prevents soggy bottoms. Serve immediately while the crispy bottom is at its peak.
Pro Tips For Making 1 Pot Rice
- TOAST THE RICE FIRST: Dump the dry rice in your pot and set it over medium heat for 2-3 minutes before adding anything else. You’ll hear it pop and smell the grains toast slightly—this builds flavor faster than you’d think, especially when you’re using just butter and broth.
- MINCE GARLIC FINE: I used to chop garlic cloves roughly, but this dish needs the flavor to bloom properly. Smash the cloves flat with the side of your knife, then mince them into a paste—it melts into the butter and infuses the broth way better than chunks.
- DON’T STIR AFTER BOILING: Once the broth comes to a full boil, resist the urge to stir. Let it cook undisturbed for 5 minutes so the rice absorbs the liquid evenly—stirring now just makes it gummy. After that, you can fluff it gently.
- USE COLD BROTH: Cold chicken broth might seem counterintuitive, but it prevents the rice from overcooking while the pot heats up. Start with broth straight from the fridge, and you’ll avoid mushy rice even if you’re distracted (we’ve all been there).
Regional styles of this recipe
Spanish Paella Style
Transform this one-pot rice into a vibrant Spanish paella by adding 1 cup diced chicken thighs, ½ cup frozen peas, and ½ cup sliced bell peppers with the broth. Sauté the chicken separately in 1 tbsp olive oil> until golden before adding it to the pot. Finish with 1 tsp smoked paprika> and a pinch of saffron steeped in 2 tbsp warm water>. Serve with a sprinkle of fresh parsley and lemon wedges. 🌶️
Thai-Inspired Coconut Rice
For a Thai twist, replace the chicken broth with 2.5 cups coconut milk> and add 1 tbsp fish sauce>, 1 tbsp brown sugar>, and 1 stalk lemongrass> (bruised and tied). Stir in ½ cup chopped cilantro> at the end. Garnish with sliced red chili and lime wedges. This version pairs perfectly with grilled shrimp or tofu. 🌿
Mexican-Style Arroz Rojo
Create Mexican red rice by cooking the rice with 1 cup tomato sauce> (or blended canned tomatoes) and adding ½ cup corn kernels>, ½ cup black beans>, and 1 tsp cumin>. For extra depth, stir in 1 minced jalapeño> with the aromatics. Top with avocado slices and cilantro. This version is a game-changer for tacos or bowls. 🌶️
Japanese-Inspired Yakimeshi
For a Japanese-inspired crispy rice, use 2 cups dashi broth> instead of chicken broth and add ½ cup sliced shiitake mushrooms> and 1 tbsp soy sauce> with the seasonings. After cooking, press down firmly on the rice with a spatula to create a crispy crust. Serve with a drizzle of ponzu sauce and pickled ginger. 🍱
Italian Risotto Fusion
Turn this into a creamy risotto-style rice by using 2.5 cups vegetable broth> and stirring in ½ cup grated Parmesan cheese> and 1 tbsp white wine> with the broth. Add ½ cup diced mushrooms> and 1 tsp lemon zest> at the end. For extra richness, fold in 2 tbsp heavy cream> off the heat. Perfect with roasted chicken or shrimp. 🍷
Middle Eastern Pilaf
For a Middle Eastern pilaf, replace the thyme with 1 tsp ground cumin> and ½ tsp cinnamon>. Add ½ cup diced carrots> and ½ cup chopped parsley> with the vegetables. Finish with a squeeze of lemon and a sprinkle of sumac. This version pairs beautifully with grilled lamb or falafel. 🌿
Nutrition facts
Frequently asked questions
Why does this recipe create a crispy bottom without stirring?
The magic happens from the butter-oil mixture at the bottom. When you toast the rice in the fat and then simmer covered, the direct heat caramelizes the butter while steam cooks the rice. The 5-minute rest off heat lets residual moisture evaporate, creating that perfect golden crust. No stirring means no broken crust!
Can I use short-grain rice instead of long-grain?
Short-grain rice will work but won't get as crispy—it's naturally stickier and absorbs more liquid. For best results, stick with medium or long-grain white rice. If you must use short-grain, reduce the broth by ¼ cup and let it cook 2-3 minutes longer uncovered at the end to crisp the bottom.
What if my rice turns out mushy?
Overcooking or too much liquid causes mushiness. Always use the 1:1.66 ratio (rice to liquid)—1.5 cups rice to 2.5 cups broth. If using optional ingredients, reduce broth by ¼ cup per cup of added veggies/protein. For future batches, check doneness at 15 minutes and remove from heat when rice still has a slight bite.
How do I make this vegetarian?
Swap chicken broth for vegetable broth and use tofu, chickpeas, or mushrooms as protein. Boost flavor with 1 tbsp soy sauce or 1 tsp nutritional yeast when adding broth. For extra umami, stir in ½ cup blended white beans at the end. The crispy bottom technique works perfectly with plant-based ingredients!
Can I double this recipe in the same pot?
Not recommended—this pot size is designed for 1.5 cups rice. For larger batches, use a 5-6 quart pot with 3 cups rice and 5 cups broth, maintaining the same ratio. The crispy bottom technique works best in smaller pots where heat can concentrate. For parties, make multiple small batches instead.