
Side Dishes
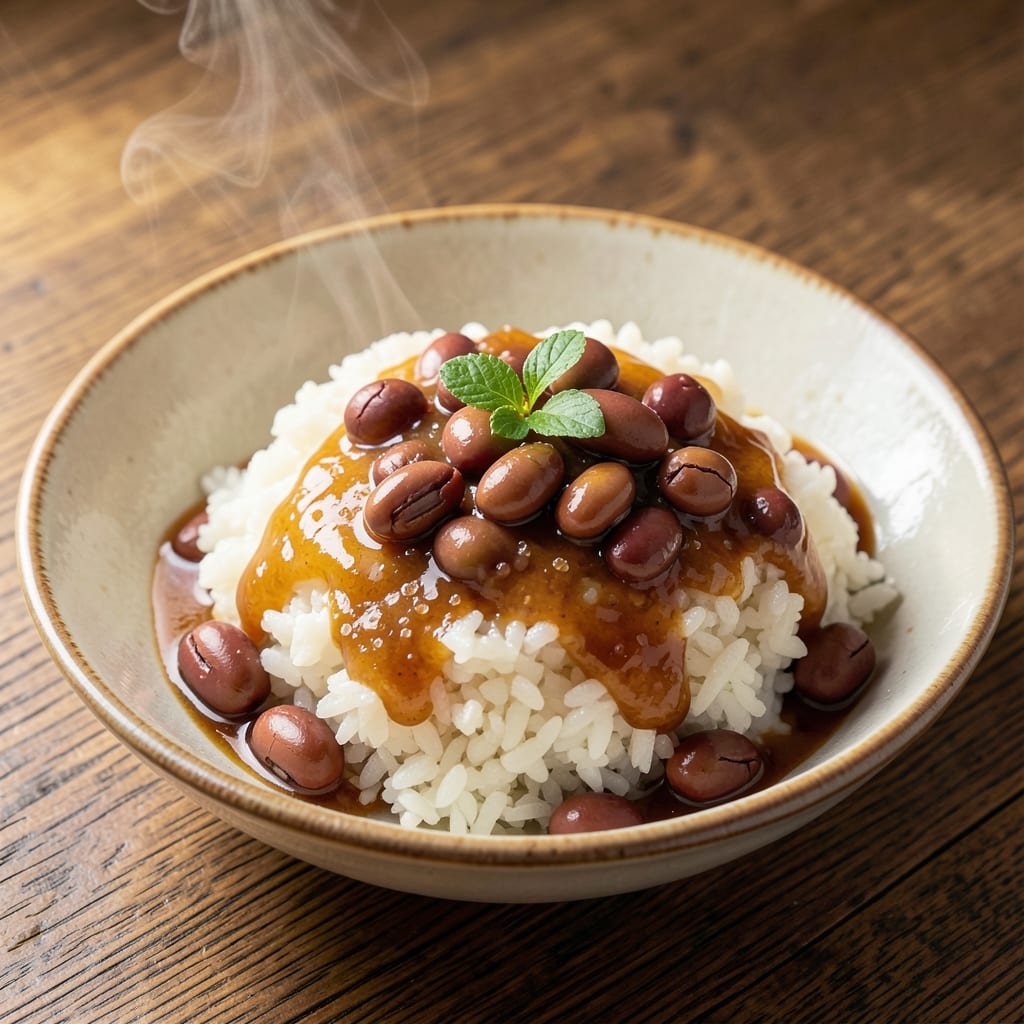
This Japanese-style adzuki beans and rice recipe delivers a sweet-savory harmony in every bite, blending tender short-grain rice with naturally sweetened beans for a vegetarian-friendly one-bowl meal. The secret lies in balancing traditional Japanese flavors—like soy sauce and mirin—with the earthy depth of adzuki beans, creating a dish that’s both comforting and elegant. Perfect for meal prep or a quick weeknight dinner, this recipe transforms simple ingredients into something restaurant-worthy.
The beauty of this dish is its versatility—it works as a standalone meal or pairs beautifully with grilled fish, tofu, or a fresh salad. The adzuki beans add a subtle sweetness that complements the rice’s mild flavor, while a touch of sesame oil and pickled ginger elevates it to something special. No fancy techniques required—just a pot, patience, and a few pantry staples.
What you’ll end up with is a creamy, slightly sticky rice infused with the rich, nutty flavor of adzuki beans, all tied together with a savory-sweet sauce. The texture is tender yet satisfying, and the aroma alone will have everyone at the table asking for seconds. This is the kind of dish that feels indulgent but is actually simple to make.
For extra flair, garnish with toasted sesame seeds or a drizzle of soy glaze, and serve with steamed greens or a side of miso soup. The recipe is also easily adaptable—swap in coconut milk for a vegan twist or add a sprinkle of furikake for extra umami. Let’s get cooking!
Ingredients for adzuki beans and rice
Japanese short-grain rice and adzuki beans create a sweet-savory harmony with just twelve ingredients.
| Ingredient | Amount | Notes |
|---|---|---|
| Japanese Short-Grain Rice 🍚 | 1 ½ cups | Uncooked, rinsed thoroughly |
| Adzuki Beans 🌱 | 1 cup | Dried, soaked overnight |
| Water 💧 | 2 ½ cups | For soaking beans |
| Light Soy Sauce 🍶 | 2 tbsp | Kikkoman preferred |
| Mirin 🍶 | 2 tbsp | Sweet rice wine |
| Sugar 🍚 | 2 tbsp | Granulated or white |
| Sesame Oil 🫒 | 1 tbsp | Toasted for aroma |
| Pickled Ginger 🍋 | 2 tbsp | Finely chopped |
| Toasted Sesame Seeds 🌾 | 1 tbsp | For garnish |
| Salt 🧂 | ½ tsp | Kosher or sea salt |
| Dashi Stock 🍲 | 1 ½ cups | Vegetarian version |
| Rice Vinegar 🍶 | 1 tbsp | For brightness |
The adzuki beans are the heart of this dish—dried beans develop the best texture, but canned work in a pinch (rinse well). Japanese markets carry the best quality, or check the bulk section at Whole Foods. For the rice, Koshihikari or Calrose varieties are ideal, but any short-grain rice will do. The key is rinsing it thoroughly to remove excess starch. Mirin and soy sauce can be found at any Asian grocery, or in the international aisle of larger supermarkets—Kikkoman and Marukyu are reliable brands. Dashi stock is vegetarian-friendly and adds depth; Hondashi is a great powdered option if fresh isn't available.
No mirin? Substitute 1 tbsp sugar plus 1 tbsp water—it won't taste identical, but it works. Short on pickled ginger? Fresh ginger marinated in rice vinegar and sugar for 10 minutes does the trick. For a vegan twist, swap the dashi for vegetable broth with a dash of kombu powder. Sesame oil can be replaced with neutral oil plus a pinch of sesame seeds, though the flavor won't be as rich. The sugar can be swapped for maple syrup or agave, but reduce by 1 tsp to account for moisture. If you're using canned beans, add 1 extra tbsp water to the cooking liquid to balance the texture.
Rice and beans keep well—4-5 days in the fridge, or 3 months frozen. Portion into airtight containers for easy reheating. The flavors meld beautifully overnight, so leftovers often taste even better. For extra freshness, store the sesame seeds separately and toast them fresh when serving. If making ahead, skip the sesame oil and pickled ginger until reheating—they'll keep their flavor better. Garnish with extra sesame seeds or a drizzle of soy glaze right before serving for that restaurant touch.
Why You'll Love This Recipe
- Five-Ingredient Magic: I swear, this is the kind of dish where you measure, pour, and wait—no chopping, no fuss. The rice and beans soak up that light soy and mirin like a sponge, turning into something rich without a single extra pan.
- Sweet-Savory Balance: That little splash of mirin? It’s the secret weapon. The adzuki beans bring natural sweetness while the soy adds depth, and together they create a flavor that’s weirdly addictive—like dessert for breakfast.
- Lunchbox Hero: Between us, this is my go-to for packed lunches. Cold or at room temp, it’s still satisfying, and the rice stays fluffy for days. Add a soft-boiled egg or quick pickles, and you’ve got a meal that feels fancy but costs next to nothing.
- Budget Meal Stretch: A single batch feeds four, and leftovers? They taste even better the next day. I’ve reheated this for work lunches all week, and honestly, no one ever guesses how cheap the ingredients are.
Step-by-step instructions for adzuki beans and rice
This Japanese-style one-bowl meal delivers perfect texture and balanced flavor with minimal effort.
Prepare the Adzuki Beans
Drain the soaked adzuki beans and rinse them thoroughly under cold water. Place them in a medium pot and cover with the 2.5 cups of water. Bring to a boil over medium-high heat, then immediately reduce to a simmer. Cook for 45-60 minutes until the beans are tender but not mushy—you should be able to crush them slightly between your fingers with gentle pressure.
I like to skim off any foam that rises to the surface during the first 10 minutes of cooking. This ensures a cleaner-tasting final dish. The beans are done when they've absorbed most of the water but still retain their shape. Drain and set aside, reserving the cooking liquid for later if needed.
Cook the Japanese Short-Grain Rice
In a separate pot, combine the 1.5 cups of Japanese short-grain rice with 2.5 cups of fresh water. Bring to a boil over medium-high heat, then immediately reduce to low heat. Cover tightly with a lid and cook for 15 minutes without lifting it. This steaming method creates fluffy, separate grains perfect for this dish.
After 15 minutes, turn off the heat and let the rice sit covered for another 10 minutes. This resting period allows the steam to redistribute, resulting in perfectly cooked grains. Fluff the rice gently with a fork before transferring it to a serving bowl.
Create the Sweet-Savory Sauce
In a small saucepan, combine the 1.5 cups of dashi stock, 2 tablespoons of light soy sauce, 2 tablespoons of mirin, 2 tablespoons of sugar, and 0.5 teaspoon of salt. Bring to a gentle simmer over medium heat, stirring occasionally until the sugar dissolves completely—this should take about 5 minutes.
Remove from heat and let cool slightly. The sauce should be smooth and slightly syrupy. Taste and adjust seasoning if needed, adding a bit more soy sauce for saltiness or sugar for sweetness. This balanced sauce is the heart of the dish, tying all the flavors together.
Combine and Finish the Dish
Gently fold the cooked rice and adzuki beans together in a large bowl. Pour the warm sauce over the mixture and toss carefully to distribute evenly. The heat from the sauce will help steam the rice slightly, creating a cohesive texture.
Drizzle with the 1 tablespoon of sesame oil and 1 tablespoon of rice vinegar, then fold in the 2 tablespoons of finely chopped pickled ginger. Sprinkle with the 1 tablespoon of toasted sesame seeds just before serving for added texture and aroma. The contrast of sweet, savory, and slightly tangy flavors makes this dish uniquely satisfying.
Pro Tips For Making Adzuki Beans And Rice
- SOAK BEANS 4 HOURS MINIMUM: I learned this the hard way—rushing the soak leaves your adzuki beans tough and mealy. Use 3 cups water per 1 cup beans, soak overnight or at least 4 hours, then drain and rinse. The longer they soak, the creamier they’ll get when cooked.
- COOK BEANS UNTIL TENDER: Don’t just simmer—adzuki beans need to break down. Start with a rolling boil, then reduce to a gentle simmer and cook until they’re almost falling apart (about 45-60 minutes). Overcooking turns them mushy, so taste-test at 40 minutes.
- USE 1:1 RICE TO WATER: Japanese short-grain rice is finicky—stick to the 1:1 ratio (rice to water) for perfect texture. If your rice cooker has a "sweet" setting, use it; otherwise, bring to a boil, then reduce to low and steam covered for 15 minutes. Don’t peek!
- SWEETEN SOY SAUCE WITH MIRIN: Skip the salt in your soy sauce—mirin’s the real flavor booster here. Mix 2 tablespoons light soy with 1 tablespoon mirin per cup of cooked beans, then simmer for 2 minutes. This balances the sweetness without overpowering the rice.
Dietary considerations for these flavors
Vegetarian-Friendly Base
This dish is naturally vegetarian thanks to its core ingredients—adzuki beans and Japanese short-grain rice—both plant-based powerhouses. The recipe avoids meat entirely while delivering protein (about 15g per serving from beans) and fiber. For a vegan twist, simply swap the dashi stock for vegetable broth or a kombu-based broth to maintain umami depth. 🌱
Gluten-Free Adaptations
Standard soy sauce contains gluten, but you can easily adapt this recipe by using tamari (a gluten-free soy alternative) or coconut aminos. For the dashi stock, opt for a gluten-free version (like Hondashi powder or vegetable-based dashi). The rest of the ingredients are naturally gluten-free, making this a safe bet for those avoiding gluten. Always check labels on mirin and rice vinegar for hidden gluten.
Low-Sodium Options
If you're watching your sodium intake, reduce the soy sauce to 1 tablespoon and replace the rest with low-sodium soy sauce or coconut aminos. Skip the dashi stock (which is high in sodium) and use extra water or vegetable broth instead. The mirin and sugar already provide sweetness, so the dish won’t lose flavor—just balance the saltiness with a splash of rice vinegar for brightness. 🧂
Protein Boost
To make this dish even more protein-rich, stir in toasted edamame (½ cup) or crumbled tofu (¼ cup) when combining the rice and beans. For a nutty crunch, add chopped peanuts or pumpkin seeds (2 tbsp) at the end. These additions keep the dish vegetarian while boosting nutritional value—perfect for a hearty, balanced meal.
Sweetness Control
If you prefer less sweetness, reduce the sugar to 1 tablespoon and enhance the natural flavors of the adzuki beans (which are mildly sweet on their own). For a savory-leaning version, cut the sugar in half and add 1 extra teaspoon of soy sauce or a pinch of white miso paste (½ tsp) to deepen the umami. The pickled ginger and rice vinegar will keep the dish bright and tangy. 🍶
Allergen Awareness
This recipe contains sesame (in sesame oil and seeds), so avoid if allergic. For a sesame-free version, replace the oil with neutral oil (like avocado or grapeseed) and omit the seeds, or use poppy seeds for garnish instead. Always check labels on soy sauce and mirin for potential cross-contamination with wheat or tree nuts. When in doubt, opt for certified allergen-free brands like San-J Tamari for soy sauce. ✨
Nutrition facts
Frequently asked questions
Can I use canned adzuki beans instead of dried?
Yes, but with adjustments! Canned beans save time, but they're much softer than dried. Drain and rinse them well, then add 1 extra tablespoon of water to the cooking liquid to prevent the rice from drying out. For best texture, mash about 20% of the beans lightly with a fork before mixing with rice—this mimics the natural creaminess of dried beans.
How do I make this recipe vegan?
Swap the dashi stock for vegetable broth or a kombu-based broth to maintain umami depth. Use tamari instead of soy sauce for gluten-free vegan soy. The rest of the ingredients are already plant-based! For extra richness, stir in 1 tbsp coconut milk with the sauce.
Why does my rice turn out mushy?
Mushy rice usually means too much liquid or lifting the lid too soon. For perfect texture, use a 1:1.5 rice-to-water ratio and cook on low heat after the initial boil. Never stir the rice while cooking—let it steam undisturbed for 15 minutes before resting. If it's still too soft, spread it on a tray to dry out slightly.
Can I prep this ahead of time?
Cook the rice and beans separately, then store them in airtight containers for up to 4 days in the fridge. When ready to serve, reheat with a splash of water and mix with the sauce. For best flavor, add the sesame oil and pickled ginger fresh—they'll keep their aroma better. Freeze for 3 months by portioning into containers with parchment between layers.
What's the best way to serve this dish?
This versatile dish works as a standalone meal or pairs beautifully with grilled tofu, miso soup, or steamed greens. For extra flair, serve in bancha bowls with a side of tsukemono (pickles). The sweet-savory flavors also complement light salads or seaweed snacks. In Japan, it's often enjoyed with green tea for a refreshing contrast.