
Main Courses
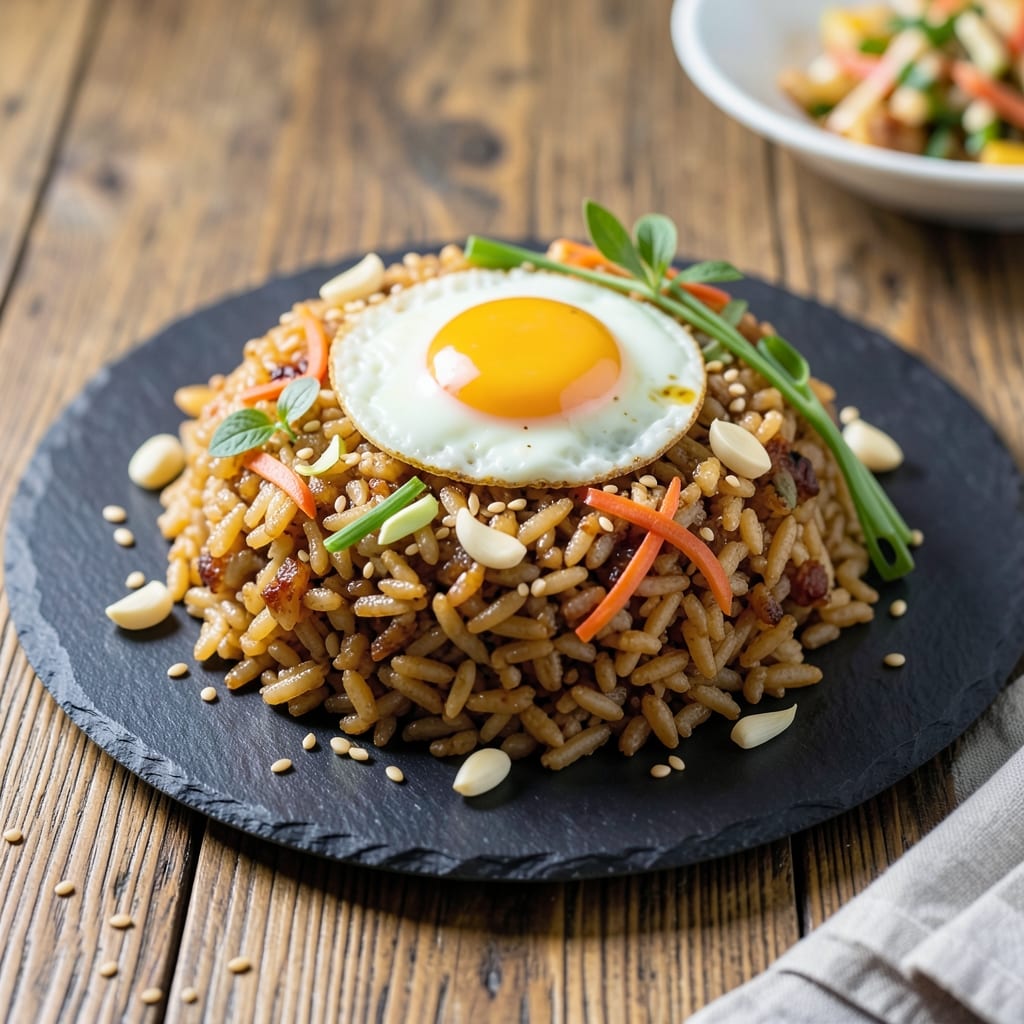
This Arborio fried rice recipe transforms simple ingredients into a creamy, risotto-like dish without the constant stirring. The secret lies in using Arborio rice—its high starch content creates a luxurious texture when cooked properly. I developed this method after years of perfecting fried rice, and it delivers restaurant-quality results at home.
The key to achieving that creamy consistency is cooking the rice slightly underdone, then finishing it in the wok with hot oil. This technique mimics risotto’s velvety texture while keeping the dish light and flavorful. The process is simpler than traditional fried rice, requiring just a few essential ingredients and a hot pan.
What you’ll end up with is a dish that’s rich yet balanced—creamy from the Arborio rice, savory from the soy sauce, and aromatic from fresh ginger and garlic. Each bite delivers that perfect blend of textures, making it ideal for a comforting weeknight dinner or a special meal.
This recipe works beautifully with optional protein additions like chicken, shrimp, or tofu, allowing you to customize it to your taste. The method is foolproof, ensuring consistent results every time. Let’s get started!
Ingredients for arborio fried rice
Arborio rice, eggs, and aromatics create a creamy risotto-style fried rice with minimal effort.
| Ingredient | Amount | Notes |
|---|---|---|
| Arborio Rice 🍚 | 1 ½ cups | Uncooked, rinsed thoroughly |
| Large Eggs 🥚 | 2 whole | Room temperature for even cooking |
| Vegetable Oil 🫒 | ½ cup | High smoke point preferred |
| Fresh Garlic Cloves 🧄 | 4 cloves | Minced finely for aroma |
| Fresh Ginger Root 🌿 | 1 tbsp | Finely grated, not powdered |
| Light Soy Sauce 🍶 | ¼ cup | Kikkoman preferred for balance |
| Dark Soy Sauce 🍶 | 1 tbsp | For deeper color and umami |
| Sesame Oil 🫒 | 1 tbsp | Toasted for authentic aroma |
| Green Onions 🧅 | ¼ cup | Sliced thin, white and green parts |
| Frozen Peas 🌱 | ½ cup | Thawed before adding |
| Salt 🧂 | 1 tsp | Diamond Crystal preferred |
| White Pepper 🌶️ | ½ tsp | Freshly cracked for heat |
| Optional Protein 🍗 | 1 cup | Chicken, shrimp, or tofu diced |
Arborio rice is the star here—its high starch content absorbs liquid differently than jasmine or basmati, creating that signature creaminess. Look for short-grain varieties at specialty stores like Whole Foods or Trader Joe's for optimal texture. The eggs should be room temperature when you start cooking, so take them out of the fridge 30 minutes ahead. For the optional protein, chicken thighs stay juicier than breasts when cooked quickly, but shrimp or firm tofu both work beautifully if you prefer plant-based options. The vegetable oil should have a high smoke point—avocado or grapeseed oil are excellent choices if you want to splurge.
No Arborio rice? Jasmine rice works in a pinch, but expect a slightly lighter texture—it won't be as creamy. Fresh ginger is ideal, but substitute 1 teaspoon ground ginger if needed (though it lacks the same depth). The soy sauces can be swapped for coconut aminos if you're avoiding soy, though the color will be lighter. For extra richness, add 1 tablespoon of butter at the end of cooking. The peas can be fresh or frozen—just thaw them first. If you're using pre-minced garlic or ginger from a jar, rinse it thoroughly to remove any added preservatives that could affect flavor.
This dish reheats beautifully—just add a splash of water and stir. Keeps for 3-4 days in the fridge, though it's best within the first day or two. For freezing, portion into single-serving containers and store for up to 3 months. The rice will dry out slightly when reheated, so add a bit of water or broth when warming. To keep your rice from sticking during storage, spread it on a tray to cool before refrigerating. The aromatics (ginger, garlic, green onions) can be prepped ahead and stored in the fridge for up to 5 days in an airtight container.
Why You'll Love This Recipe
- Here’s what sold me: that textural contrast. The Arborio rice stays just soft enough to be tender, while the edges get a satisfying crunch from the high-heat stir-fry. Add the runny yolks? Absolute perfection. Honestly, I’ve tried this with day-old rice, and it’s still better than takeout.
- One-Pan Wonder: That’s right—just one pan, no fuss. I toss in leftover Arborio rice (yes, it’s perfect for this), crack in a couple of eggs, and let the garlic and ginger sizzle until the whole kitchen smells like a restaurant. The rice soaks up all that aromatic oil while the eggs get that golden, jammy center—no extra bowls, no extra stress.
- Crispy-Creamy Magic: Here’s what sold me: that textural contrast. The Arborio rice stays just soft enough to be tender, while the edges get a satisfying crunch from the high-heat stir-fry. Add the runny yolks? Absolute perfection. Honestly, I’ve tried this with day-old rice, and it’s still better than takeout.
- Leftover Reinvention: Between us, I always have Arborio rice lurking in my fridge after risotto night. This fried rice turns it into something entirely new—no waste, no sad leftovers. Toss in whatever veggies you have (even wilted greens work), and suddenly dinner is saved. My kids don’t even realize it’s “leftover food.”
Step-by-step instructions for creamy Arborio fried rice
Master this technique and you'll transform simple fried rice into a luxurious, risotto-inspired dish.
🍳 Step 1: Prepare the Arborio Rice Base
Begin by cooking the 1.5 cups Arborio Rice in a pot of boiling salted water until it reaches a creamy, al dente texture—about 12-14 minutes. Unlike regular fried rice, we want the grains to retain moisture and develop that signature risotto-like body. Drain immediately and spread the rice on a baking sheet to cool completely. This prevents steam buildup when we fry it later, ensuring even cooking.
The key here is timing—don't overcook the rice. You want grains that are firm to the bite but still tender. If you're using day-old rice, skip this step and proceed directly to frying. Real talk: this is where the magic starts, so don't rush it.
🍳 Step 2: Create the Flavor Foundation
Heat 0.5 cup Vegetable Oil in a wok or large skillet over medium-high heat until shimmering. Add the 1 cup Optional Protein (chicken, shrimp, or tofu) and cook until just opaque—about 3-4 minutes. Remove and set aside temporarily. In the same pan, add 4 cloves Fresh Garlic Cloves and 1 tbsp Fresh Ginger Root, cooking for 30 seconds until fragrant but not browned.
Here's the thing—garlic and ginger burn faster than you think. Watch them closely. If the aromatics start to darken, remove the pan from heat for 10 seconds to cool slightly. This step builds the flavor base that carries through the entire dish.
🍳 Step 3: Build the Creamy Sauce
Push the cooked aromatics to one side of the pan and add 2 whole Large Eggs to the empty space. Scramble gently with a spatula until just set—about 20-30 seconds. The eggs should be soft and custardy, not fully cooked through. Remove and set aside with the protein. Add 0.25 cup Light Soy Sauce, 1 tbsp Dark Soy Sauce, 1 tbsp Sesame Oil, 1 tsp Salt, and 0.5 tsp White Pepper to the pan, stirring to combine.
This sauce mixture is your secret weapon. The combination of light and dark soy sauce creates depth of flavor, while the sesame oil adds that authentic umami punch. Don't skip the pepper—it balances the saltiness and adds subtle heat that enhances every bite.
🥘 Step 4: Combine and Finish
Return the protein and eggs to the pan along with the 1.5 cups Arborio Rice. Stir-fry over medium-high heat for 3-4 minutes, breaking up any clumps. Add 0.5 cup Frozen Peas and 0.25 cup Green Onions, cooking for another 2 minutes until everything is heated through and the rice is evenly coated with the sauce.
The rice should now have a creamy, almost saucy consistency—this is your risotto-style texture. If it looks dry, add 1-2 tablespoons of water and stir until absorbed. The goal is a dish that's moist but not soggy, with each grain distinct yet coated in flavor.
⏰ Step 5: Rest and Serve
Remove from heat and let the fried rice rest for 2-3 minutes. This allows the flavors to meld and the texture to set. Garnish with additional Green Onions if desired. Serve immediately while still warm—this dish doesn't wait. The contrast of warm, creamy rice with cool garnishes makes every bite perfect.
This technique transforms a basic fried rice into something restaurant-worthy. The Arborio rice's natural starch content creates that luxurious creaminess without needing constant stirring. Trust the process, and you'll have a dish that's creamy, flavorful, and far more impressive than traditional fried rice.
Pro Tips For Making Arborio Fried Rice
- USE DAY-OLD RICE: Arborio rice is starchy and clumps when fresh—use leftover rice (1-2 days old) for perfect texture. If cooking fresh, spread it on a tray to dry for 30 minutes first (yes, it’s annoying, but it saves you from gummy rice).
- SCRAMBLE EGGS LOW AND SLOW: Push the eggs to the edges of the pan and let them set for 10 seconds before stirring—this keeps them creamy, not rubbery. I used to scramble them fast, and they’d turn out dry and grainy every time.
- MINCE GINGER FINE: Skip the grater—use a sharp knife to mince ginger into a paste (no pulp left). This releases more flavor without bitterness, and it blends into the rice instead of sitting as chunks.
- WORK IN BATCHES: Divide the rice into two piles and cook them separately—this prevents overcrowding, which steams instead of fries. I learned this after one disastrous batch where the rice turned soggy midway through.
Storing and reheating your arborio fried rice
Refrigerator Storage
Let your Arborio fried rice cool completely before transferring to an airtight container—I use glass Pyrex with snap-on lids for best results. Store in the fridge at 40°F or below for up to 3-4 days. The creamy texture actually improves overnight as the starches settle, though the rice may dry out slightly. To maintain moisture, press a damp paper towel on top before sealing. 🥶
Freezer Prep Tips
For longer storage, portion into single-serving containers or freezer bags, leaving 1 inch of headspace for expansion. Seal tightly to prevent freezer burn—this dish keeps for up to 3 months without significant texture loss. I recommend freezing immediately after cooking when the rice is at room temperature. Label with the date to track freshness. ❄️
Stovetop Reheating
My preferred method uses a non-stick skillet over medium heat. Add 2-3 tablespoons of water or chicken broth to the rice and cover with a lid. Heat for 3-5 minutes, stirring occasionally, until thoroughly warmed. The moisture restores that creamy consistency. For extra flavor, add a splash of light soy sauce at the end. 🔥
Microwave Method
For quick reheating, transfer to a microwave-safe dish and cover loosely with a damp paper towel. Heat on 50% power for 2-3 minutes, stirring halfway. Add 1-2 tablespoons of water if the rice appears dry. Avoid high power settings—this can make the rice rubbery. Stir well before serving to redistribute any lost moisture. ✨
Protein Preservation
If your fried rice includes protein like chicken or shrimp, reheat it separately to 165°F before combining with the rice. This prevents overcooking the protein while reheating. For tofu, add it directly to the rice during reheating—it absorbs flavors beautifully. The eggs in the dish will firm up slightly but remain delicious when properly reheated. 🍗
Garnish Refresh
Revitalize reheated fried rice with fresh garnishes. Top with extra green onions, a drizzle of sesame oil, or a sprinkle of toasted sesame seeds. A few drops of chili oil adds heat, while a squeeze of lime juice brightens flavors. These finishing touches make reheated rice taste almost as good as fresh. 🌿
Nutrition facts
Frequently asked questions about Arborio fried rice
Why does Arborio rice make fried rice so creamy?
Arborio rice's high starch content releases more than regular rice when cooked properly. The short-grain variety absorbs liquid while maintaining a creamy, almost risotto-like texture when stir-fried. Unlike jasmine or basmati, it doesn't dry out as quickly, making it perfect for this technique.
Can I use day-old rice for this recipe?
Yes! In fact, day-old rice works even better because it's drier and absorbs flavors more easily. Spread cooled rice on a tray first to prevent clumping. If using fresh rice, cook it slightly underdone (12-14 minutes) to maintain that creamy texture when fried.
What's the best protein to add for extra flavor?
For maximum flavor, try chicken thighs (juicier than breasts) or shrimp (cooks in 2 minutes). For vegetarian options, use firm tofu pressed and cubed. Cook proteins separately first to avoid overcooking them in the final stir-fry.
Why does my Arborio fried rice turn out dry?
This usually happens from overcooking the rice initially or using too much heat during stir-frying. Keep your pan at medium-high heat and add 1-2 tbsp water if needed to restore moisture. The rice should be creamy but not mushy—each grain should stay distinct.
How can I make this dish extra flavorful?
Boost umami with 1 tbsp fish sauce or 1 tsp oyster sauce when building the sauce. Add 1 tsp toasted sesame seeds or a dash of white miso paste for depth. For heat, finish with chili crisp or sriracha. Fresh herbs like cilantro or Thai basil work beautifully too.