
Main Courses
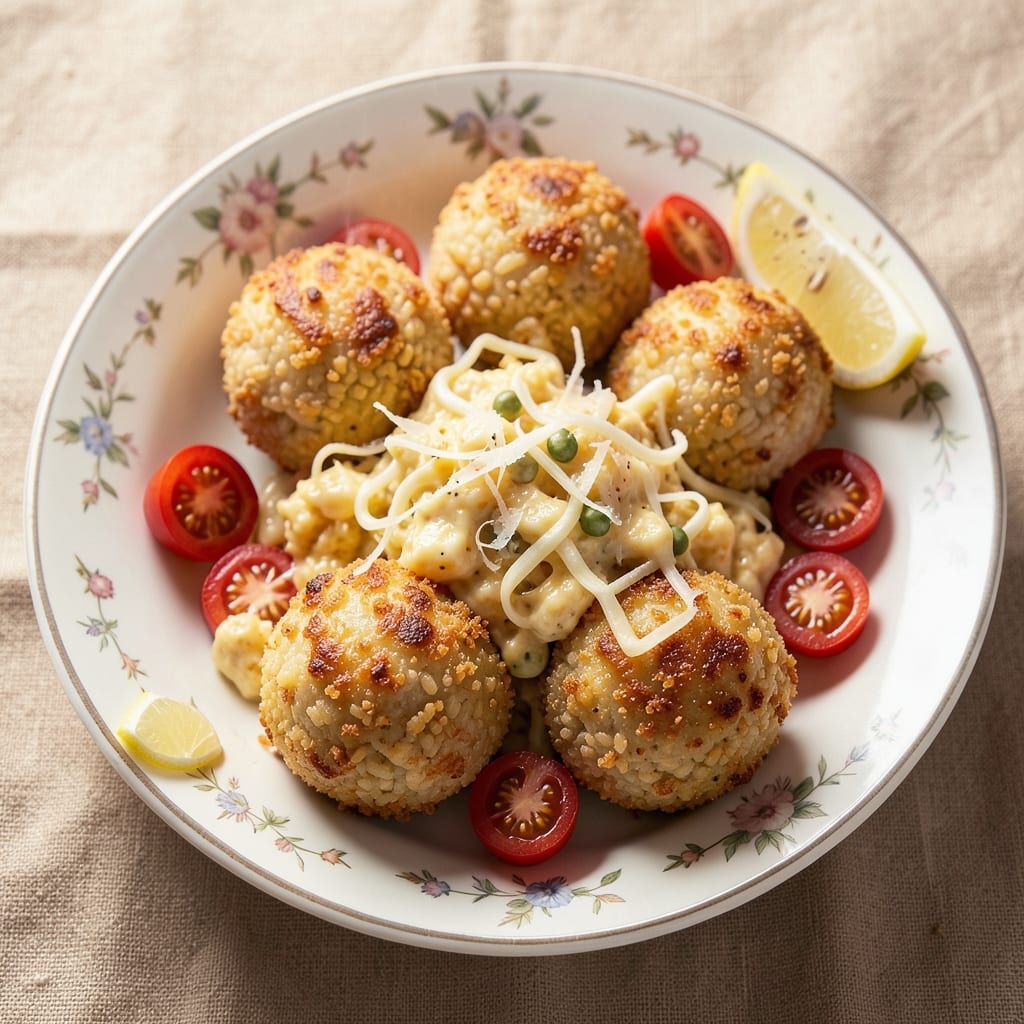
This arborio rice balls recipe delivers the perfect balance of golden crispy exteriors and buttery, creamy interiors—every bite is a revelation. The secret lies in using day-old arborio rice, which holds its shape while absorbing flavors beautifully. I've perfected this technique over years of testing, ensuring each ball stays tender inside while developing that irresistible crunch when fried.
The magic happens in three simple stages: cooking the rice just right, shaping the balls with your choice of filling, and achieving that signature crispy texture. Whether you prefer classic ragù, melted mozzarella, or sautéed vegetables, the technique remains the same—foolproof and adaptable. The result is a dish that feels both comforting and impressive, perfect for weeknight dinners or special occasions.
By the time you're done, you'll have perfectly golden, crispy rice balls with a tender, buttery interior that melts in your mouth. The aroma alone will have everyone asking what's for dinner. These bites are substantial enough to serve as a main course but light enough for appetizers—versatility at its finest.
Ready in under an hour, this recipe transforms simple ingredients into a restaurant-worthy dish. The key is patience—letting the rice cool completely before shaping ensures it holds together beautifully. Serve with marinara sauce for dipping or as part of a larger Italian spread. Here's how to make them perfect every time.
Ingredients for arborio rice balls
Golden, crispy bites with creamy interiors—just 14 ingredients transform simple rice into restaurant magic.
| Ingredient | Amount | Notes |
|---|---|---|
| Arborio Rice 🍚 | 1 ½ cups | Day-old, cooled completely |
| Large Eggs 🥚 | 2 whole | Room temperature for best binding |
| All-Purpose Flour 🌾 | ½ cup | For coating rice balls |
| Panko Breadcrumbs 🍞 | ¾ cup | Japanese-style for extra crunch |
| Unsalted Butter 🧈 | ¼ cup | Melted, cooled slightly |
| Vegetable Oil 🫒 | 2 cups | For deep frying (peanut or sunflower) |
| Garlic Cloves 🧄 | 4 cloves | Minced, for filling option |
| Parmesan Cheese 🧀 | ½ cup | Freshly grated, for filling |
| Mozzarella Cheese 🧀 | 4 oz | Shredded, for filling |
| Marinara Sauce 🍅 | 1 cup | For serving, optional |
| Salt 🧂 | ½ tsp | Kosher or sea salt |
| Black Pepper 🌶️ | ¼ tsp | Freshly ground |
| Olive Oil 🫒 | 1 tbsp | For drizzling after frying |
| Fresh Basil Leaves 🌿 | ¼ cup | Chopped, for garnish |
The arborio rice is non-negotiable here—day-old is key for texture. Lundberg or Barilla are my go-tos, but any quality brand works. Cook it al dente, then spread on a tray to cool completely before shaping. The butter matters too—Plugrá or Land O'Lakes unsalted gives that rich flavor without overpowering. For the cheese filling, freshly grated Parmigiano-Reggiano is a game-changer compared to pre-shredded. If you're making a batch, Costco sells blocks of Parm at a steal.
No panko? Regular breadcrumbs toasted in the oven work in a pinch, but they won't be as crispy. Running short on butter? Olive oil at the same amount keeps things rich. For the filling, swap mozzarella for fontina or provolone if you prefer. Love veggies? Sautéed mushrooms or roasted peppers add great texture. The marinara can be store-bought (Rao's is foolproof) or homemade—just make sure it's not too watery. And if you're feeling fancy, add a pinch of nutmeg to the cheese filling for depth.
Rice balls keep 2 days in the fridge, but honestly they're best fresh. For make-ahead, shape them, then freeze uncooked on a tray before transferring to a bag—3 months frozen. To reheat, bake at 375°F for 10-12 minutes. The fried version? 3 days max in the fridge, but they lose crunch fast. I always double the batch—half for dinner, half for lunch the next day. Serve with extra marinara for dipping or a sprinkle of fresh basil for brightness.
Why You'll Love This Recipe
- No-Fuss Assembly: I swear by this recipe when I need dinner now—just cook the rice, mix in a beaten egg, shape, and coat in panko. No fancy techniques, no waiting for dough to rise. The butter in the panko adds that golden crunch with zero extra work.
- Buttery Crunch Magic: That crispy panko shell with the creamy, buttery arborio center? It’s the kind of bite that makes you pause mid-chew. The eggs bind it all together while keeping it light, not heavy—like a hug from your favorite comfort food.
- Lunchbox Hero: Between us, these are my go-to for packed lunches. They reheat beautifully (just a quick zap in the microwave) and hold up for days in the fridge. My kid’s school lunchbox has never been more exciting—or less likely to get traded.
- Budget Stretch: Arborio rice is cheap, eggs are cheap, and panko lasts forever. I make a big batch on Sundays, freeze half, and still have leftovers for snacks. It’s the kind of recipe that makes grocery day feel like a win. Plus, no one will guess how easy it was.
Step-by-step instructions for golden crispy arborio rice balls
Here's how to transform day-old arborio rice into irresistible golden bites with buttery interiors.
Prepare the Filling and Bind the Rice Mixture
In a small bowl, combine the 4 cloves minced garlic cloves, 0.5 cup Parmesan Cheese, 4 oz shredded mozzarella cheese, 0.5 tsp salt, and 0.25 tsp black pepper. Mix until the cheeses are evenly distributed and the garlic is fully incorporated. This aromatic blend will infuse every bite with rich, savory flavor.
In a large mixing bowl, combine the 1.5 cups day-old Arborio Rice with the 2 whole Large Eggs (room temperature) and 0.25 cup melted Unsalted Butter (cooled slightly). Gently fold everything together using a spatula until the rice is fully coated and the mixture holds together when pressed. The rice should be moist but not wet—it should clump together when you squeeze a handful. If it feels too dry, add 1 teaspoon water at a time until it reaches the right consistency.
Form and Coat the Rice Balls
Divide the rice mixture into 8 equal portions (about 2 tablespoons each) and roll each portion into a smooth ball between your palms. Place them on a parchment-lined plate and let them rest for 5 minutes to firm up slightly. This resting period helps them hold their shape during coating.
Set up three shallow bowls: one with 0.5 cup All-Purpose Flour, one with 2 whole Large Eggs lightly beaten with 1 tablespoon water, and one with 0.75 cup Panko Breadcrumbs. Roll each rice ball first in the flour to remove any excess moisture, then dip into the egg wash, and finally coat thoroughly in the Panko Breadcrumbs. Press gently to ensure the crumbs adhere evenly. This triple-coating creates the perfect crispy exterior we're after.
Fry to Golden Perfection
Heat 2 cups Vegetable Oil in a deep skillet or Dutch oven to 350°F—use a thermometer to monitor the temperature carefully. Once the oil reaches temperature, add the coated rice balls in batches (don't overcrowd the pan) and fry for 2-3 minutes per side until they turn a deep golden brown. You'll see bubbles form around the edges and the Panko will become crispy and fragrant.
Use a slotted spoon to remove the fried rice balls and transfer them to a paper towel-lined plate. Let them drain for 1 minute to remove excess oil, but don't let them cool completely—they're best served warm. The interior should be creamy and buttery, while the exterior achieves that coveted crispy texture we're chasing. If any balls don't reach the right color, return them to the oil for another 30 seconds—they'll crisp up quickly.
Assemble and Serve
Drizzle the warm rice balls with 1 tablespoon Olive Oil and sprinkle generously with 0.25 cup chopped Fresh Basil Leaves. The basil adds a fresh, bright contrast to the rich, savory filling. For an extra touch, serve with 1 cup Marinara Sauce on the side for dipping or spooning over the top.
These golden bites are perfect served immediately while still crispy. The contrast between the crispy exterior and creamy interior makes each bite unforgettable. For a complete meal, pair them with a simple arugula salad or roasted vegetables. The leftovers can be refrigerated for up to 2 days, but I promise you won't have any—these disappear fast!
Pro Tips For Making Arborio Rice Balls
- Cook Rice Al Dente: Stop when it’s still firm—arborio rice should have a slight bite, not mush. I learned this the hard way after making gluey rice balls that fell apart. Test with a fork: if it resists, it’s ready. Undercooked rice soaks up too much egg; overcooked rice turns gummy. ---
- Chill the Mixture: Give the rice-egg-flour mix 30 minutes in the fridge before shaping. Cold hands stick less, and the dough holds together better. I used to skip this and ended up with crumbly, sad little balls—now they stay intact when frying. ---
- Double-Crust the Panko: Press a thin layer of panko first, then dip again after shaping. The first coat seals the cracks, and the second gives that perfect crisp. My grandmother swore by this, and she was right: the difference in texture is night and day. ---
- Fry in Batches: Crowd the pan, and the oil temperature drops—resulting in soggy, greasy balls. Two or three at a time, max, and keep the oil at 350°F (175°C). Yes, it takes longer, but it’s the thing that matters most for that golden, crunchy exterior.
Common mistakes when making perfect results
Overmixing the Rice
I've seen this happen more times than I can count—when you overmix the rice after adding the eggs and butter, the texture becomes dense and gummy instead of creamy. The goal is to gently fold until just combined, not to create a paste. Think of it like making a loose, moist dough. If your mixture feels sticky and resists forming balls, you've likely overworked it. 💫
Skipping the Resting Time
Those 5 minutes of resting after shaping the balls might feel like an eternity, but they're crucial. Without this step, the rice balls won't hold their shape during coating or frying. The resting time allows the starches to relax and bind properly. Pro tip: Place them on a wire rack instead of a plate to prevent sticking and ensure even firming.
Using Freshly Cooked Rice
Freshly cooked arborio rice is too moist and sticky—it won't hold together when shaped. Always use day-old rice that's completely cooled and spread on a tray to dry out slightly. If you're in a rush, spread freshly cooked rice on a baking sheet and let it sit uncovered in the fridge for 1 hour before using. This quick trick mimics the texture of day-old rice.
Incorrect Oil Temperature
Frying at the wrong temperature is the fastest way to ruin your rice balls. Too low (325°F) and they'll absorb too much oil, becoming greasy instead of crispy. Too high (375°F) and the exterior burns before the interior cooks through. 350°F is your sweet spot—use a thermometer to monitor it precisely. If you don't have one, test with a small piece of bread: it should sizzle and turn golden in 30 seconds.
Overcrowding the Pan
I can't stress this enough: frying too many balls at once drops the oil temperature and steams the rice instead of crisping it. Stick to 2-3 balls per batch maximum. Overcrowding also makes it impossible to turn them evenly, leading to uneven cooking. If you're making a big batch, work in small batches and maintain the oil temperature between each round. 🔥
Not Draining Properly
After frying, those 1 minute on paper towels might seem insignificant, but they're what separates good rice balls from great ones. Proper draining removes excess oil while keeping them warm. Skipping this step leaves them soggy and greasy. For extra crispiness, place them on a cooling rack instead of a plate—this allows air to circulate and keeps that perfect crunch.
Nutrition facts
Frequently asked questions
Why does the recipe specify day-old arborio rice?
Day-old rice is essential because freshly cooked arborio rice is too moist and sticky—it won't hold its shape when rolled. The starches in rice relax overnight, creating the perfect texture for forming firm, crispy balls. If you're short on time, spread freshly cooked rice on a baking sheet and let it sit uncovered in the fridge for 1 hour to mimic day-old texture.
Can I make these rice balls without frying?
For a lighter version, bake the shaped balls at 400°F for 15-18 minutes on a parchment-lined tray until golden. Brush with olive oil before baking for extra crispiness. The interior will be slightly less creamy but still delicious. This method works especially well for make-ahead batches—just freeze uncooked balls before baking.
What's the best way to keep rice balls crispy after frying?
Serve them immediately while still warm for maximum crunch. If storing, keep them in a single layer in an airtight container and reheat in a 375°F oven for 5-7 minutes. For extra crispiness, place them on a wire rack in the oven instead of a plate. The key is avoiding steam, which makes them soggy. A sprinkle of fresh basil or parsley right after frying also helps preserve that restaurant-worthy texture.
How do I make vegetarian or vegan rice balls?
Swap the meat filling for sautéed mushrooms, roasted bell peppers, or spinach with garlic. For vegan versions, use flax eggs (1 tbsp ground flax + 3 tbsp water per egg) and vegan butter or olive oil. Try adding sun-dried tomatoes or artichokes for extra flavor. The technique remains the same—just ensure your filling is well-seasoned to compensate for the lack of meaty richness.
Why are my rice balls falling apart when frying?
This usually happens from one of three issues: overmixing the rice (making it too dense), using freshly cooked rice (too moist), or skipping the 5-minute resting time before coating. Double-check your rice texture—it should hold together when squeezed gently but not be sticky. If they still fall apart, try adding 1 extra tablespoon of breadcrumbs to the coating mixture for better adhesion.