
Main Courses
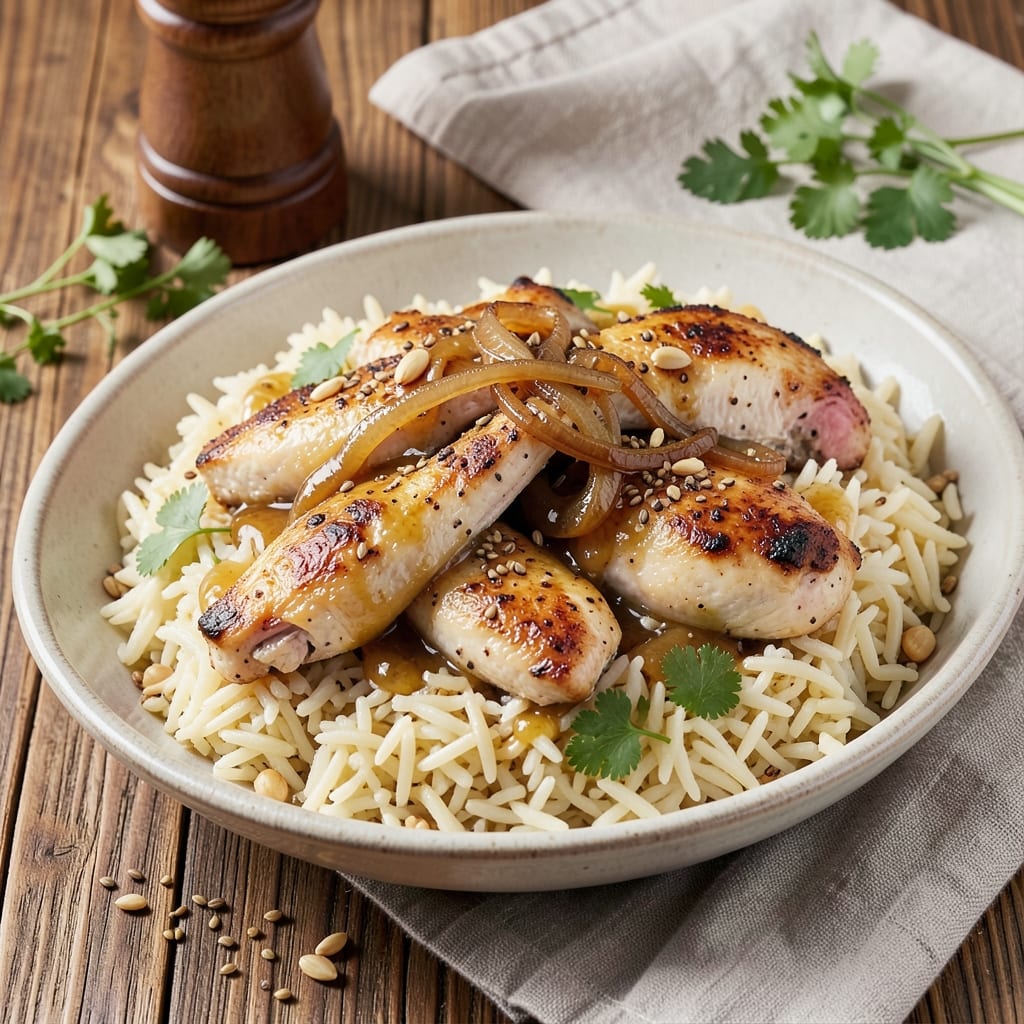
This aroma rice cooker pilaf recipe transforms simple basmati rice into a fragrant, one-pot masterpiece with minimal effort. The secret lies in layering spices and aromatics before cooking, letting the rice cooker do the rest. I developed this method after realizing how much flavor gets lost when skipping the toasting step—crispy edges and deep, toasty notes make all the difference.
The beauty of this recipe is its versatility and simplicity. You’ll start with toasted spices and onions, then add rice and broth, letting the cooker handle the rest. The result is perfectly fluffy rice infused with warm aromas, ready in about 30 minutes with almost no active time. This method works equally well with chicken, vegetables, or even just rice for a vegetarian version.
What sets this pilaf apart is the toasted spice crunch—a textural contrast that elevates every bite. The rice cooker ensures even cooking and ideal texture, while the layered flavors develop naturally during the process. No fancy techniques required, just a few simple steps and patience for the best results.
Whether you're feeding a family or meal prepping for the week, this pilaf delivers restaurant-quality flavor with minimal cleanup. The one-pot approach means less work and more time enjoying the meal. Here’s how to make it perfectly every time.
Ingredients for aroma rice cooker pilaf
Toasted spices and aromatic layers transform simple rice into a fragrant, restaurant-style pilaf.
| Ingredient | Amount | Notes |
|---|---|---|
| Long-Grain Basmati Rice 🍚 | 1 ½ cups | Uncooked, rinsed thoroughly |
| Chicken Broth 💧 | 2 cups | Low-sodium preferred |
| Yellow Onion 🧅 | 1 whole | Diced small, about 1 cup |
| Garlic Cloves 🧄 | 4 cloves | Minced finely |
| Cumin Seeds 🌿 | 1 tbsp | Toasted until fragrant |
| Ground Cumin 🌿 | 1 tsp | For additional depth |
| Ground Coriander 🌿 | 1 tsp | Freshly ground preferred |
| Turmeric Powder 🌶️ | ½ tsp | Bright yellow color |
| Ghee 🧈 | 2 tbsp | For toasting spices |
| Fresh Ginger 🌿 | 1 tbsp | Grated finely |
| Dried Apricots 🍑 | ¼ cup | Chopped small, optional |
| Salt 🧂 | ½ tsp | Adjust to taste |
| Fresh Parsley 🌿 | ¼ cup | Chopped for garnish |
| Chicken Breast 🍗 | 1 lb | Boneless, skinless, diced |
The spices are the heart of this dish—toast the cumin seeds in ghee first until they sizzle and release their aroma. Whole Foods or Indian grocery stores carry the best quality whole spices, but the regular grocery store works too. For the onion, yellow onions have the best balance of sweetness and sharpness. If you're using dried apricots, soak them in warm water for 10 minutes first to soften them. The chicken should be cut into small, even pieces so it cooks perfectly with the rice. Freshly ground spices make a noticeable difference—Penzeys or Spicewalla are great options if you want to invest in quality.
No ghee? Olive oil or butter works in a pinch, though ghee adds a nutty richness. Running short on chicken? Swap for diced mushrooms or chickpeas for a vegetarian version. The broth can be bouillon cubes if you're in a hurry, but homemade or high-quality store-bought makes a world of difference. If you can't find fresh ginger, ground ginger at half the amount will do. The dried apricots are optional but add a lovely sweetness—raisins or dried cranberries work too if you prefer. For extra crunch, toast the ground coriander and cumin together with the garlic for an intensified flavor.
The rice cooker does all the work, but a few prep steps ensure perfect texture. Rinse the basmati thoroughly to remove excess starch—this prevents mushiness. If you're meal prepping, store in airtight containers for 4-5 days or freeze for up to 3 months. The flavors actually improve overnight as everything melds together. For a quick meal, double the recipe—this pilaf reheats beautifully and tastes even better the next day.
Why You'll Love This Recipe
- One-Pot Magic: I swear by this—just toss the rice, broth, and spices into the rice cooker, press start, and walk away. No pots, no pans, no stress. That cumin alone transforms basic rice into something special while you sip your coffee.
- Garlic Bomb Flavor: Between us, the garlic and onions caramelize right in the broth until they’re almost sweet, with that deep, toasty cumin kick. It’s the kind of taste that makes you pause mid-bite—like a restaurant-quality dish without the fuss.
- Weeknight Hero: This feeds four for under $10 and reheats like a dream. Pack it for lunch, serve it with roasted veggies for dinner, or let the kids grab it cold for school lunches. Honestly, it’s my go-to when I’m too tired to think.
- Leftovers That Don’t Suck: The rice stays separate, so every reheat is perfect—no mushy clumps, no sad texture. I make a double batch Sunday nights and eat it all week. Budget-friendly? Absolutely. Boring? Never.
Step-by-step instructions for one-pot fragrant basmati pilaf
This method transforms simple ingredients into restaurant-quality pilaf with minimal effort.
Toast Spices and Sauté Aromatics
In a rice cooker, melt the 2 tablespoons ghee over medium heat. Add the 1 tablespoon cumin seeds and toast for 30 seconds until fragrant and lightly golden. Immediately add the 1 whole diced yellow onion and 4 minced garlic cloves, cooking for 5 minutes until softened and translucent.
The cumin seeds should sizzle audibly when first added—this indicates proper heat. Stir frequently to prevent burning. Once the onions turn golden, add the 1 tablespoon grated fresh ginger, 0.5 teaspoon turmeric powder, 1 teaspoon ground cumin, and 1 teaspoon ground coriander, stirring for 1 minute to bloom the spices. This aromatic base forms the flavor foundation of your pilaf.
Cook Chicken and Add Apricots
Push the aromatics to one side of the rice cooker and add the 1 pound diced chicken breast to the empty space. Cook for 5-6 minutes until the chicken is no longer pink in the center. Stir occasionally to ensure even cooking. Once fully cooked, add the 0.25 cup chopped dried apricots and cook for an additional 2 minutes to rehydrate them slightly.
I like to break the chicken into bite-sized pieces as it cooks for even distribution. The apricots will soften but retain their texture, adding natural sweetness to balance the savory spices. If the chicken releases too much liquid, let it evaporate before proceeding—this prevents a watery pilaf.
Add Rice and Broth
Stir in the 1.5 cups rinsed long-grain basmati rice and 0.5 teaspoon salt, coating each grain with the spiced chicken mixture. Pour in the 2 cups chicken broth and stir gently once to distribute the liquid. Avoid overmixing—this prevents the rice from clumping and ensures even cooking.
Here's the thing—don't worry if the rice doesn't look fully submerged. The rice cooker's steam will distribute the moisture perfectly. The rice should be just covered with liquid at this stage. If you're concerned, you can add 1-2 tablespoons extra broth from your ingredients, but the rice cooker's steam will handle the rest.
Cook and Rest
Close the rice cooker lid and select the white rice setting. Cook until the rice cooker automatically switches to keep warm mode, which typically takes 20-25 minutes. The rice should be tender with a slight bite, and the liquid should be completely absorbed. If any liquid remains, let it sit covered for an additional 5 minutes to steam.
Real talk: the rice will continue cooking slightly during the resting period, so it's better to pull it off heat when it's slightly underdone. Once fully cooked, fluff the rice gently with a fork and let it rest for 5 minutes before serving. This resting period allows the flavors to meld and the rice to reach its perfect texture.
Garnish and Serve
Transfer the pilaf to a serving dish and stir in the 0.25 cup chopped fresh parsley. The parsley adds freshness and brightens the dish's overall presentation. Serve immediately while hot, garnished with additional parsley if desired. Each bite should deliver perfectly cooked rice with tender chicken, fragrant spices, and bursts of sweet apricots.
This one-pot method ensures minimal cleanup while delivering restaurant-quality results. The ghee-toasted spices create an aromatic crust on the bottom of the rice cooker that adds incredible depth to every bite. For best results, serve with a side of yogurt sauce or a simple cucumber salad to complement the rich flavors.
Pro Tips For Making Aroma Rice Cooker Pilaf
- Bloom the Cumin First: I learned this the hard way—tossing whole cumin seeds into the rice cooker just before cooking means you’ll taste them, not smell them. Dry-toast them in a separate pan for 30 seconds until fragrant, then crush lightly with the side of your knife before adding to the broth. That’s how you get the real aroma working for you.
- Toast the Onions Low: Skip the high-heat rush—slow-cook the onions over medium-low until they’re deep golden, not browned. I used to burn them every time, and it made the whole dish taste bitter. Once they’re soft and sweet, add the garlic at the very end—just 30 seconds to perfume the broth without turning it harsh.
- Rinse the Rice Twice: Don’t skimp on this step. Swirl the basmati in cold water, let it sit 30 seconds, then drain. Repeat. I know it feels tedious, but unrinsed rice turns gluey in the cooker, and you’ll end up with a sad, dense pilaf. The starch washes out, and the grains stay separate—trust me, it’s worth the extra minute.
- Use Hot Broth Directly: Cold broth from the fridge? Big mistake. Heat it to a simmer first, then pour it into the cooker with the rice. The temperature jump kickstarts the cooking process evenly, and you won’t get that half-steamed, half-raw texture. Yes, even if you’re impatient like me—just do it.
Storing and reheating this recipe
Refrigerator Storage
Let your pilaf cool completely before transferring to an airtight container—I use glass Pyrex with snap-on lids for best results. Store at 40°F or below for up to 5 days. The flavors actually deepen overnight as the spices meld together. For extra freshness, press plastic wrap directly on the surface before sealing the lid to minimize drying. 💫
Freezer-Friendly Tips
Portion pilaf into quart-sized freezer bags or glass containers for easy reheating. Leave ½-inch headspace to prevent expansion cracks. Freeze for up to 3 months—the rice cooker's gentle cooking preserves texture better than stovetop methods. Label bags with the date to track freshness. Thaw overnight in the fridge for best texture.
Stovetop Reheating
For restaurant-quality texture, use a heavy-bottomed pot on medium-low heat. Add 2-3 tablespoons water or broth per cup of pilaf to prevent sticking. Cover and heat for 8-10 minutes, stirring occasionally. If the chicken seems dry, add a splash more liquid. The steam helps restore the rice's fluffiness while keeping the chicken moist. 🔥
Microwave Method
Transfer pilaf to a microwave-safe dish and cover loosely with a damp paper towel. Heat on 50% power for 3 minutes, stir, then continue in 1-minute intervals until reaching 165°F. The damp towel prevents drying while allowing steam to escape. For best results, reheat only what you plan to eat immediately—pilaf reheats better fresh from the fridge.
Meal Prep Pro Tips
Double the recipe for easy lunches—this pilaf reheats beautifully with minimal texture loss. Store components separately if possible: rice in one container, chicken in another—this prevents sogginess. When reheating, combine just before eating. For extra flavor, sprinkle ½ teaspoon toasted cumin seeds on top before serving to revive the aromatic crust from the original cook. ✨
Nutrition facts
Frequently asked questions
Can I make this pilaf without a rice cooker?
Yes! Use a heavy-bottomed pot instead. Sauté your aromatics as directed, then add rice and broth, bringing to a boil. Reduce heat to low, cover, and simmer for 15-18 minutes until liquid is absorbed. The key is keeping heat gentle to prevent burning—just like with a rice cooker.
How do I adjust the recipe for vegetarian pilaf?
Swap the chicken for 1.5 cups diced mushrooms or 1 can chickpeas (drained). Add them with the apricots and cook for 3-4 minutes until heated through. For extra protein, stir in ½ cup cooked lentils before adding rice. The spices will still shine!
Why does my rice cooker pilaf turn out mushy?
Overmixing the rice or using too much liquid causes mushiness. Rinse your basmati thoroughly to remove excess starch, and stir only once after adding broth. The rice cooker's steam does the work—don't peek! Also, avoid adding extra water unless absolutely necessary.
Can I use brown rice instead of basmati?
Brown rice works but requires adjustments. Use 1.75 cups uncooked and 2.5 cups broth, then cook on the brown rice setting (or 40 minutes total). The texture will be chewier, but the flavor remains rich. Toast the spices longer to compensate for the longer cook time.
What's the secret to extra flavor in rice cooker pilaf?
Toast your spices in ghee until fragrant, and don't skip the 5-minute rest after cooking. The crust that forms at the bottom of the rice cooker packs intense flavor—stir it in before serving! For deeper aroma, add 1 bay leaf with the broth and remove before serving.