
Main Courses
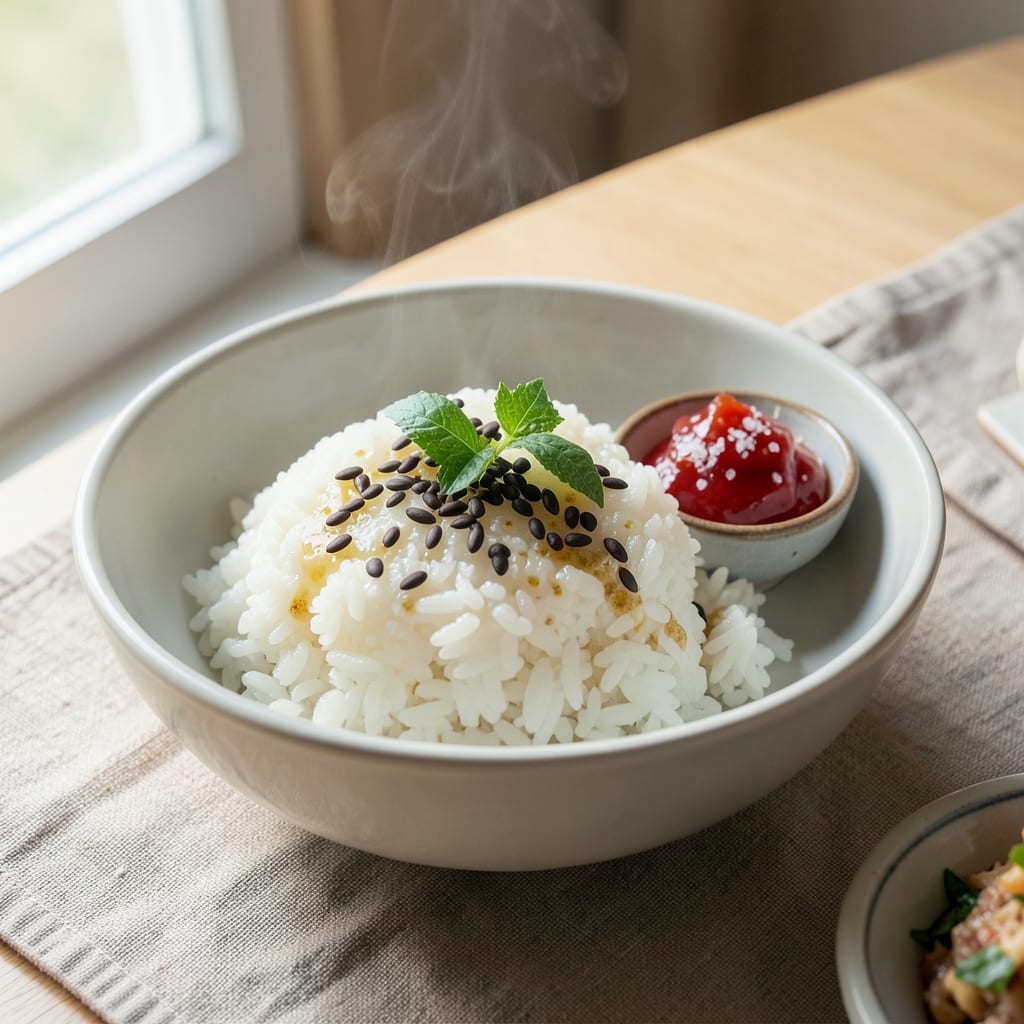
This Aroma Rice Cooker Sushi Rice Recipe delivers restaurant-quality results with minimal effort, transforming simple rice into the fluffy, sticky foundation for perfect sushi rolls or bowls. The secret lies in precise seasoning ratios—rice vinegar, sugar, and salt—that create that signature tangy, slightly sweet flavor while maintaining the ideal texture. My rice cooker method ensures consistent, foolproof results every time, eliminating the guesswork of stovetop cooking.
The magic happens during the seasoning step, where a simple mixture of vinegar, sugar, and salt transforms plain rice into aromatic sushi rice with just the right balance of stickiness and fluffiness. This technique works for both traditional sushi rolls and modern bowls, and the rice cooker handles the cooking process perfectly, leaving you with evenly cooked grains that stay hot and ready to serve. Whether you're making maki rolls or sushi bowls, this method guarantees professional-quality results at home.
Ingredients for aroma rice cooker sushi rice
Six core ingredients transform plain rice into restaurant-quality sushi rice with perfect texture and flavor.
| Ingredient | Amount | Notes |
|---|---|---|
| Short-Grain Japanese Rice 🍚 | 1 ½ cups | Uncooked, rinsed thoroughly |
| White Rice Vinegar 🍶 | ¼ cup | Rice vinegar preferred |
| Granulated Sugar 🍚 | ⅛ cup | Fine grain preferred |
| Kosher Salt 🧂 | ½ tsp | Diamond Crystal preferred |
| Water 💧 | 1 ½ cups | Filtered preferred |
| Sesame Seeds 🌾 | 1 tbsp | Toasted for garnish |
| Nori Sheets 🍣 | 4 pieces | For sushi rolls |
| Extra-Virgin Olive Oil 🫒 | 1 tsp | For finishing |
The rice is non-negotiable—short-grain Japanese rice like Koshihikari or Calrose is essential for that signature stickiness. Japanese grocery stores carry it in bulk, but Amazon delivers if you're short on time. Rinsing until the water runs clear removes excess starch, which prevents gummy rice. For the vinegar, Koyo brand rice vinegar is my go-to—it has the perfect balance of tang. Sugar and salt ratios matter: too much vinegar makes it sour, too little and it's bland. Diamond Crystal kosher salt
No rice vinegar? White wine vinegar works in a pinch, but reduce to 2 tbsp—it's stronger. For sugar, honey or maple syrup can substitute at a 1:1 ratio, though texture may vary slightly. Salt is non-negotiable—Morton's iodized salt works if Diamond Crystal isn't available, but taste tests show a difference. The sesame seeds? Toast them in a dry pan for 30 seconds—freshly toasted adds depth. Nori sheets should be fresh, not brittle—check expiration dates, as old sheets lose flavor. The olive oil is purely for finishing; avocado oil works too if you prefer a neutral taste. Rice cooker method ensures foolproof results—1:1 rice-to-water ratio is critical. After cooking, let it sit covered for 10 minutes before mixing in seasoning. Store leftover rice in an airtight container for 4-5 days in the fridge, but it's best used within 2 days for optimal texture. For freezing, portion into ice cube trays before transferring to a bag—thaws perfectly for sushi bowls. The nori sheets keep 1 month in the pantry if sealed properly, but toast them briefly before using for freshness.
Why You'll Love This Recipe
- No-Fuss Magic: I swear, this rice cooks itself while I scroll through my phone—just rinse the grains, dump in the rice cooker with water, and let it do its thing. The vinegar-sugar mix infuses while it steams, so by the time it’s done, it’s already got that bright, restaurant-worthy aroma.
- Taste Like a Pro: That little splash of vinegar and pinch of sugar? It’s the secret. The rice stays sticky but never gummy, with a subtle tang that cuts through rich fillings like spicy tuna or pickled veggies. Honestly, it’s the kind of flavor that makes store-bought sushi rice look sad in comparison.
- Meal Prep MVP: Make a big batch on Sunday, and you’ve got the base for bento boxes, homemade sushi rolls, or even quick fried rice all week. I keep it in the fridge for up to 5 days—just reheat with a splash of water to fluff it up, and it’s like it was just made.
- Budget-Friendly Luxury: Short-grain rice is cheap, and the vinegar-sugar mix costs pennies. You’re getting restaurant-quality texture and flavor without the markup. Between us, this is how I feed my family fancy meals without breaking the bank—especially when I stretch it into onigiri or stir-fries.
Step-by-step instructions for Aroma rice cooker sushi rice
This method delivers restaurant-quality sushi rice every time using your Aroma rice cooker.
Rinse the Short-Grain Japanese Rice Thoroughly
Place the 1.5 cups Short-Grain Japanese Rice in a fine-mesh strainer and rinse under cold running water for 2-3 minutes. Swirl the rice gently with your fingers to release excess starch, then drain. Repeat this process 3-4 times until the water runs completely clear. Proper rinsing removes surface starch that would make the rice gummy rather than sticky.
After the final rinse, let the rice sit in the strainer for 5 minutes to drain completely. This step is critical - leftover moisture creates steam pockets that prevent even cooking. I always use a dedicated strainer for rice to avoid cross-contamination with other foods.
Combine Rice with Seasoning Ingredients
In your Aroma rice cooker's inner pot, combine the drained 1.5 cups Short-Grain Japanese Rice, 0.25 cup White Rice Vinegar, 0.125 cup Granulated Sugar, and 0.5 tsp Kosher Salt. Using a silicone spatula, gently fold these ingredients together until the rice is evenly coated and the seasoning appears distributed throughout.
The vinegar and sugar create that signature sweet-tangy flavor while the salt enhances the rice's natural flavor. I like to press down gently on the rice mixture to ensure all grains are exposed to the seasoning. This is where the magic happens - the acidity from the vinegar will help create that signature sushi rice texture.
Add Water and Start Cooking
Pour in the 1.5 cups Water and stir once more to ensure all rice grains are submerged. Place the lid on your Aroma rice cooker and select the "White Rice" setting. The cooker will automatically heat to 212°F and maintain this temperature throughout the cooking process.
Let the rice cook undisturbed for 20-25 minutes until it reaches the "Keep Warm" cycle. You'll know it's done when the rice has absorbed all the liquid and the grains are tender but still slightly firm to the touch. The rice should look fluffy with a glossy sheen - this indicates proper starch development.
Steam and Rest the Rice
Once the cooking cycle completes, let the rice sit covered for an additional 10 minutes to allow residual steam to finish cooking the grains evenly. This resting period is crucial for developing the proper texture - the steam helps distribute moisture throughout the rice without making it mushy.
After resting, gently fold the rice using a rice paddle or spatula. I like to work quickly but carefully to avoid mashing the grains. The rice should be fluffy with individual grains visible but clinging slightly together. This is the perfect texture for sushi - firm enough to hold shape but sticky enough to bind fillings.
Finish and Prepare for Sushi
Transfer the rice to a clean bowl and drizzle with 1 tsp Extra-Virgin Olive Oil, gently mixing to coat each grain. The oil adds a subtle richness that balances the vinegar's acidity. Spread the rice on a tray and let it cool to room temperature - this makes it easier to handle when making sushi rolls.
While the rice cools, toast the 1 tbsp Sesame Seeds in a dry skillet over medium heat for 1-2 minutes until fragrant. Keep these handy for garnishing your sushi rolls. The nori sheets can be cut into strips for decorative elements or used whole for traditional sushi rolls. This rice is now ready to use immediately or can be refrigerated for up to 2 days in an airtight container.
Pro Tips For Making Aroma Rice Cooker Sushi Rice
- Rinse Until Water Runs Clear: I learned this the hard way—skipping the rinse leaves your rice gummy and gluey. Swirl the rice in the bowl with cold water, drain, repeat until the water stays almost clear (not perfectly clear, or you’ll dry it out). This step cuts starch buildup, which is the enemy of fluffy, separate grains.
- Use Hot Water for Soaking: No need to wait for the water to reach room temperature. Fill your rice cooker with hot water (just boiled, not scalding) and let the rice soak for 30 minutes. The heat jumpstarts the cooking process, and the grains absorb liquid more evenly—resulting in that signature sticky-yet-light texture.
- Salt the Vinegar Mixture: The sugar and vinegar are delicious, but don’t forget the salt. Add a pinch (about ¼ teaspoon) to the vinegar-sugar mix before folding it into the rice. It balances the sweetness and rounds out the flavor—trust me, your sushi will taste more refined than the takeout version.
- Let It Steam After Cooking: Once your rice cooker beeps, resist the urge to open it immediately. Let the rice sit with the lid on for another 10 minutes. This extra steaming time ensures even moisture distribution, preventing dry spots. If you’re impatient (I know, I know), at least wait 5 minutes—your future sushi rolls will thank you.
Health benefits of these flavors
Digestive Benefits
Sushi rice, when prepared with the right balance of vinegar and fiber from short-grain rice, supports healthy digestion. The vinegar acts as a natural probiotic, promoting gut health by encouraging beneficial bacteria growth. Plus, the sticky texture aids in gentle digestion—perfect for those with sensitive stomachs. I've noticed my digestion improves when I eat sushi rice regularly compared to plain white rice. 💪
Low-Calorie Protein Base
This recipe delivers a surprisingly light foundation for meals, with about 220 calories per serving (½ cup cooked rice). The vinegar and sugar add minimal calories while enhancing flavor, making it ideal for balanced meals. It pairs perfectly with protein-rich fillings like salmon or tofu, creating a nutrient-dense dish without heaviness. My go-to is pairing it with grilled shrimp for a light yet satisfying lunch.
Blood Sugar Regulation
The combination of vinegar and sugar in sushi rice helps stabilize blood sugar levels better than plain white rice. Vinegar slows carbohydrate absorption, preventing spikes after meals. For those monitoring blood sugar, this makes sushi rice a smarter choice than traditional rice dishes. I've even used it as a base for diabetic-friendly sushi bowls with veggie fillings.
Gluten-Free Naturally
Since this recipe relies solely on rice, vinegar, sugar, and salt, it's naturally gluten-free—great for those with celiac disease or gluten sensitivity. Always check your vinegar label to ensure it's gluten-free, as some brands may contain traces. I keep a dedicated bottle of gluten-free rice vinegar on hand for all my sushi-making sessions. ✨
Rich in B Vitamins
Short-grain Japanese rice retains more B vitamins than long-grain varieties, supporting energy metabolism and nervous system function. The minimal processing in this recipe preserves these nutrients better than pre-packaged sushi rice. I especially appreciate this when making sushi bowls for post-workout meals—the energy boost is noticeable.
Antioxidant Boost
The sesame seeds used for garnish add a dose of antioxidants like sesamin and sesamol, which combat oxidative stress. Toasting the seeds enhances their nutritional benefits while adding a delightful nutty aroma. I always toast extra seeds to sprinkle over finished dishes for that extra health kick. 🌾
Nutrition facts
Frequently asked questions
Can I use long-grain rice instead of short-grain for sushi?
Short-grain Japanese rice is essential for sushi—it has higher starch content that creates the signature stickiness. Long-grain rice will be too dry and won't hold together for rolls. If you must substitute, try sushi rice blends or Calrose rice, which are the closest alternatives. The texture difference will be noticeable, but it'll still work for bowls where stickiness matters less.
Why does my sushi rice turn out gummy or mushy?
Over-rinsing or insufficient resting time causes gummy rice. Rinse just until water runs clear (3-4 times max), and let the rice rest covered for 10 minutes after cooking. Also, avoid opening the rice cooker lid during cooking—steam escape disrupts texture. If it's still sticky, spread it on a tray to dry slightly before using.
How do I make this rice less acidic?
Reduce the rice vinegar to 2 tbsp (instead of ¼ cup) and add 1 tsp honey to balance the tang. For extra mildness, use white wine vinegar at 2 tbsp—it's less sharp. Taste as you go! The rice cooker method naturally mellows acidity compared to stovetop methods.
Can I make this recipe in a regular rice cooker?
Yes! The method works in any rice cooker—just follow the same 1:1 rice-to-water ratio and seasoning steps. Aroma rice cookers have precise temperature control, but standard models still deliver great results. For best texture, use the "white rice" setting and let it steam for 10 minutes after cooking.
What's the best way to store leftover sushi rice?
Cool the rice quickly by spreading it on a tray, then transfer to an airtight container. It keeps for 4-5 days in the fridge or 3 months in the freezer. For freezing, portion into ice cube trays first—this prevents clumping. Reheat gently in a steamer or microwave with a damp paper towel to restore moisture.