
Main Courses
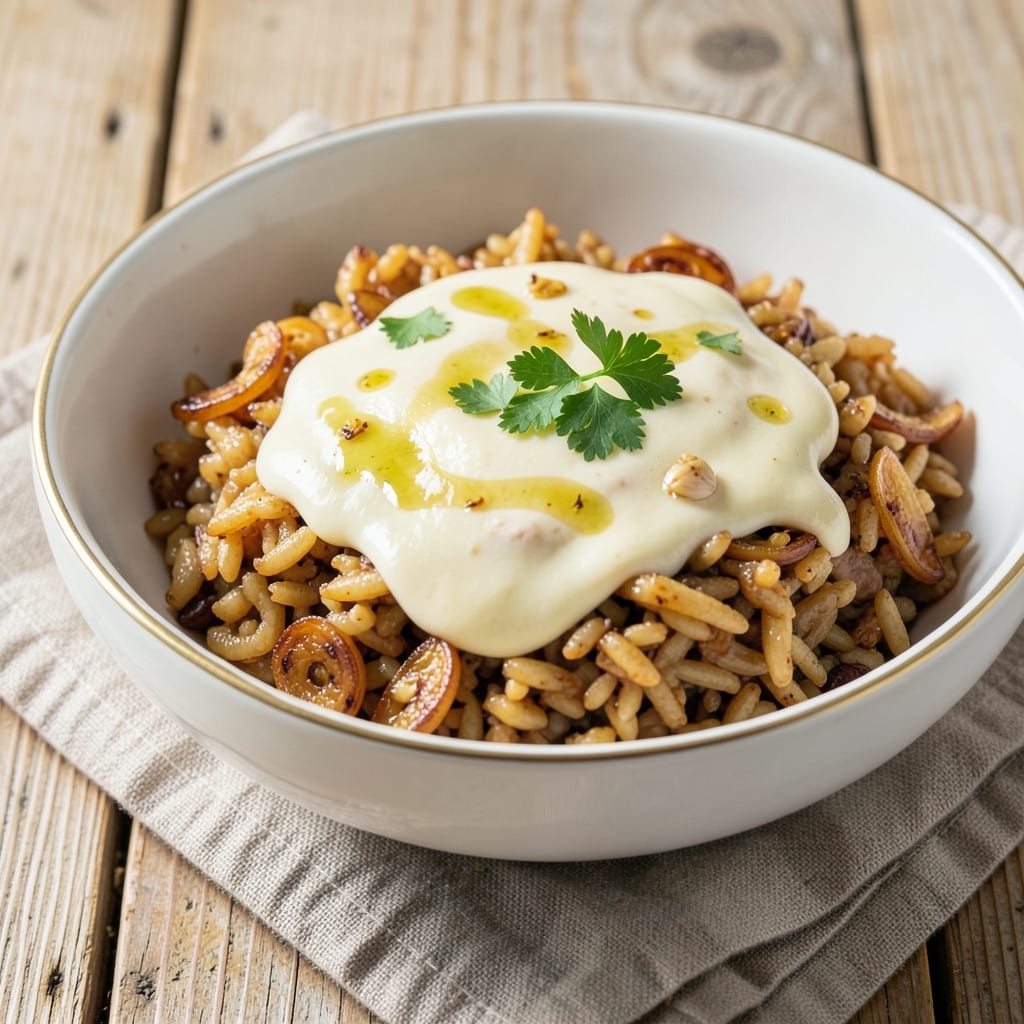
This Asiago rice recipe transforms simple Arborio into a luxurious dish where each bite delivers creamy, melty cheese and a satisfying crunch. The secret lies in toasting the rice perfectly before slowly building layers of rich Asiago flavor—no fancy techniques, just precise timing and attention. What starts as toasted grains becomes velvety rice with pockets of gooey cheese that cling to every grain.
The process begins with sautéing the rice until golden, then gradually incorporating warm broth while stirring constantly—this creates the signature al dente texture. Asiago cheese, with its nutty depth, melts into the rice during the final stages, creating a sauce-like consistency without needing heavy cream. The result is a dish that’s restaurant-worthy yet simple enough for weeknight dinners.
By the time you plate it, you’ll have perfectly cooked rice with a glossy finish and that coveted toasted crunch at the base. The Asiago cheese adds a luxurious touch, while the slow cooking process ensures each grain is tender yet holds its shape. This is the kind of rice dish that elevates any meal—simple ingredients, but a result that feels indulgent.
Pair it with grilled chicken, roasted vegetables, or a crisp green salad for a complete meal. The recipe scales easily, making it perfect for both intimate dinners and larger gatherings. Let’s get started on creating this creamy, cheesy masterpiece.
Ingredients for asiago rice
Toasted Arborio, nutty Asiago, and golden butter—simple ingredients for a luxurious rice dish.
| Ingredient | Amount | Notes |
|---|---|---|
| Arborio Rice 🍚 | 1 ½ cups | Uncooked, rinsed thoroughly |
| Asiago Cheese 🧀 | 1 ½ cups | Freshly grated, medium-sharp |
| Chicken Broth 🍲 | 4 cups | Homemade or high-quality low-sodium |
| Extra-Virgin Olive Oil 🫒 | ½ cup | For toasting rice |
| Garlic Cloves 🧄 | 4 cloves | Minced finely for depth |
| Shallot 🧅 | 1 whole | Finely diced, about 2 tbsp |
| Dry White Wine 🍷 | ½ cup | Sauvignon Blanc or Pinot Grigio |
| Unsalted Butter 🧈 | 2 tbsp | Cold, cubed for finishing |
| Salt 🧂 | 1 ½ tsp | Diamond Crystal preferred |
| Freshly Ground Black Pepper 🌶️ | ½ tsp | Freshly cracked for brightness |
| Fresh Parsley 🌿 | ¼ cup | Chopped, for garnish |
The Arborio rice is non-negotiable here—its high starch content creates that signature creamy texture. Lundberg Family Farms or Barilla are reliable brands, but any quality Arborio will work. Toast it until golden before adding liquid—this develops the nutty crunch at the base. Asiago cheese should be freshly grated (pre-grated gets clumpy) and medium-sharp for that perfect balance of nutty and tangy. If you can't find Asiago, Parmigiano-Reggiano works in a pinch, though the flavor will be slightly different. For the broth, homemade is ideal, but Pacific Foods low-sodium chicken broth is a solid store-bought option—just taste and adjust the salt later.
No white wine? Extra chicken broth works, though the dish will be slightly less bright. The shallot can be swapped for onion if needed, but shallots add a subtle sweetness that complements the Asiago beautifully. If you're using a wine you don't love drinking, save it for cooking—it's perfect here. The butter should be cold when added at the end to create those little pockets of richness. For extra depth, toast the garlic and shallot together until fragrant—this builds layers of flavor that make the dish sing. If you're short on time, a quick sauté in olive oil still works, but the aroma is what makes this dish special.
This rice reheats beautifully—just add a splash of broth and warm through gently. Store leftovers in an airtight container for up to 3 days in the fridge. The cheese will firm up slightly, but a quick stir with warm broth brings it back to perfection. For larger gatherings, double the recipe—just be sure to use a larger, heavy-bottomed pot to prevent scorching. The rice keeps its texture beautifully when reheated, making it ideal for meal prep. If you're serving with grilled chicken, cook the rice ahead and reheat just before plating to keep everything at its best.
Why You'll Love This Recipe
- No-Fuss Weeknight Win: I swear by this when I’m too tired to fuss—just toast the garlic in olive oil, stir in the Arborio rice, and let the broth do the work. The Asiago melts into that creamy, al dente perfection without a single layer of stress.
- Umami Bomb Combo: That garlic-toasted olive oil base? Chef’s kiss. The Asiago adds this nutty, sharp richness that turns ordinary rice into something you’ll fight over. Honestly, it’s the kind of flavor that makes you pause mid-bite.
- Lunchbox Hero: Between us, this is my go-to for meal prep—it reheats beautifully, keeps its texture, and even my picky-eating kid grabs it for school. Pack it cold or warm, and it’s still a hit (though I’ll admit, I eat half the batch first).
- Budget Cheat Code: Arborio rice and Asiago stretch like magic with chicken broth—feed four for the cost of two. Plus, the leftovers? Just as good the next day (if they last that long). My wallet and my family thank me weekly.
Step-by-step instructions for Asiago rice with toasted Arborio crunch
Transform simple Arborio rice into a rich, cheesy masterpiece with this foolproof method.
Toast the Rice in Olive Oil
Heat a heavy-bottomed pot over medium heat and add the 0.5 cup extra-virgin olive oil. Once the oil shimmers but isn't smoking, add the 1.5 cups arborio rice and stir constantly for 3-4 minutes until the grains are uniformly golden and fragrant. This toasting step develops nutty flavors and prevents gummy rice.
Watch the rice closely—it should smell toasty and aromatic. If it starts to brown too quickly, reduce the heat slightly. You're building flavor here, not cooking the rice yet. Remove from heat temporarily if needed, but aim for that golden hue before adding liquids.
Deglaze with Wine and Build the Base
Return the pot to medium heat and pour in the 0.5 cup dry white wine, scraping up any browned bits from the bottom with a wooden spoon. Let it simmer for 1-2 minutes until fully evaporated. This deglazing step removes alcohol and creates a flavorful foundation.
Add the 1 whole finely diced shallot and 4 cloves minced garlic, cooking for 1 minute until fragrant but not browned. Here's where the aromatics infuse the rice—don't rush this step. The garlic should smell pungent but not bitter.
Cook the Rice in Chicken Broth
Pour in the 4 cups chicken broth and add the 1.5 tsp salt and 0.5 tsp freshly ground black pepper. Bring to a gentle boil, then immediately reduce heat to low. Stir once to distribute the rice evenly, then let it cook undisturbed for 16-18 minutes.
This is the critical al dente stage—rice should be tender but still slightly firm to the bite. If the rice absorbs the broth too quickly, add 2-3 tablespoons of hot water at the 12-minute mark. The rice should be just tender enough that it holds its shape but has a slight bite.
Finish with Asiago and Butter
Remove the pot from heat and stir in the 1.5 cups freshly grated asiago cheese and 2 tbsp cold cubed butter. Let the mixture sit for 1-2 minutes to melt completely, stirring occasionally. The cheese should create a creamy, velvety texture that coats every grain.
For extra richness, cover the pot and let it rest for 5 minutes off the heat. This allows the residual heat to fully melt the cheese and develop that signature creamy consistency. If the rice seems dry, add 1-2 tablespoons of warm broth to loosen it.
Garnish and Serve Immediately
Transfer the rice to a serving dish and sprinkle with the 0.25 cup chopped fresh parsley. The bright green color contrasts beautifully with the golden cheese and toasted rice. Serve immediately while still warm—this dish doesn't keep well once the cheese cools.
Each bite should deliver a perfect balance of toasted rice, creamy asiago, and aromatic garlic-shallot flavors. The texture should be creamy yet slightly al dente, with a satisfying bite from the toasted grains. Pair with grilled meats or roasted vegetables for a complete meal.
Pro Tips For Making Asiago Rice
- TOAST THE GARLIC LOW: I used to burn the garlic in my rush to get flavor, but this rice isn’t about charred bits—it’s about nutty depth. Sauté the minced cloves over the lowest heat possible until they’re just golden, not brown. If they start to smell bitter, you’ve gone too far.
- STIR LIKE YOU MEAN IT: Arborio rice needs constant agitation to release its starch. That means every 30 seconds, not every 2 minutes. Use a wooden spoon and work it like you’re trying to polish the pan—this is how you get that creamy texture without gluey rice.
- GRATE THE ASIAGO FINE: Pre-shredded cheese has anti-caking agents that turn your rice into a dry, crumbly mess. Freshly grate the Asiago yourself—it melts better and coats every grain. Bonus: Save the leftover coarse bits for sprinkling on top.
- TEST THE BROTH TEMPERATURE: Cold broth shocks the rice and ruins the toasty crust. Heat it until it’s steaming but not boiling—just a few seconds off the boil. Pour it in slowly, letting the rice absorb it gradually. This is the thing that matters most for that perfect al dente finish.
Common mistakes when making your asiago rice
Skipping the Toast
Never skip toasting the rice—this is where the magic happens! The 3-4 minutes of toasting in olive oil creates that nutty crunch at the base and prevents gummy rice. I’ve seen many cooks rush this step, and the result is always mushy, flavorless grains. Use a heavy-bottomed pot to distribute heat evenly and watch closely—golden rice means success. 🔥
Adding Broth Too Fast
Dumping all the broth at once is a common mistake that leads to uneven cooking. Instead, add the broth gradually—about 1 cup at a time—and stir after each addition. This ensures every grain absorbs liquid evenly and develops the creamy texture properly. I like to add the first 2 cups of broth, let it absorb, then add the remaining 2 cups halfway through cooking.
Over-Stirring the Rice
Constant stirring releases too much starch too quickly, turning your rice into glue. Once the broth is added, stir only once to distribute the rice evenly, then let it cook undisturbed. I set a timer for 16-18 minutes and resist the urge to check—this is where patience pays off. Only stir again when you’re ready to check for doneness at the 12-minute mark.
Using Pre-Grated Cheese
Pre-grated Asiago cheese contains anti-caking agents that make it clumpy and dry. Always use freshly grated cheese—it melts smoothly and creates that velvety texture. If you must use pre-grated, pulse it in a food processor with 1 tbsp warm broth to break up clumps. I keep a microplane handy for quick grating—it’s worth the extra effort for that restaurant-quality finish. 🧀
Ignoring the Resting Time
Rushing to serve the rice right after adding the cheese is a big mistake. Let it rest for 5 minutes off the heat so the residual heat fully melts the cheese and develops that signature creamy consistency. This step is non-negotiable—skipping it leaves the cheese in uneven clumps. I cover the pot with a lid to trap the heat and let the flavors meld together.
Under-Salting the Broth
Low-sodium broth can leave your rice bland, even if you add extra salt later. Taste your broth before adding it to the rice and adjust the salt to match your preference. I like to add 1.5 tsp Diamond Crystal salt to the broth, then taste again after cooking—this ensures the rice is perfectly seasoned. Remember, you can’t fix under-seasoned rice later; it’s all about balancing the flavors from the start. 🧂
Nutrition facts
Frequently asked questions
Can I substitute Asiago with another cheese?
Yes, but the flavor will change. For a similar nutty profile, try Parmigiano-Reggiano or Pecorino Romano. For creaminess, Gruyère works well, though it's slightly sweeter. Avoid pre-shredded cheeses—they contain anti-caking agents that make the rice grainy. Freshly grating is key for that velvety texture!
How do I make this recipe vegetarian?
Swap the chicken broth for vegetable broth and add 1 cup mushrooms (finely chopped) with the shallot and garlic. For extra umami, stir in 1 tbsp soy sauce when adding the cheese. The dish will still be rich and satisfying without meat.
Why did my rice turn out mushy?
Mushy rice usually means either skipping the toasting step or over-stirring after adding broth. Toast the rice until golden (3-4 minutes) and stir only once after adding liquid. Let it cook undisturbed on low heat—this develops the creamy texture properly. If it's still too soft, check your cooking time (should be 16-18 minutes).
Can I make this ahead of time?
Yes, but not with the cheese. Cook the rice completely (without cheese), then refrigerate in an airtight container for up to 3 days. When ready to serve, reheat with 2 tbsp warm broth per cup of rice, then stir in the cheese off-heat. The texture won't be as creamy, but it's still delicious. For best results, make it fresh!
What's the best way to serve this dish?
This creamy rice pairs perfectly with grilled proteins like chicken or salmon, or roasted vegetables. For a complete meal, serve with a crisp arugula salad dressed with lemon and olive oil. The contrast of textures and temperatures makes every bite exciting. Garnish with extra parsley and cracked black pepper right before serving.