
Desserts
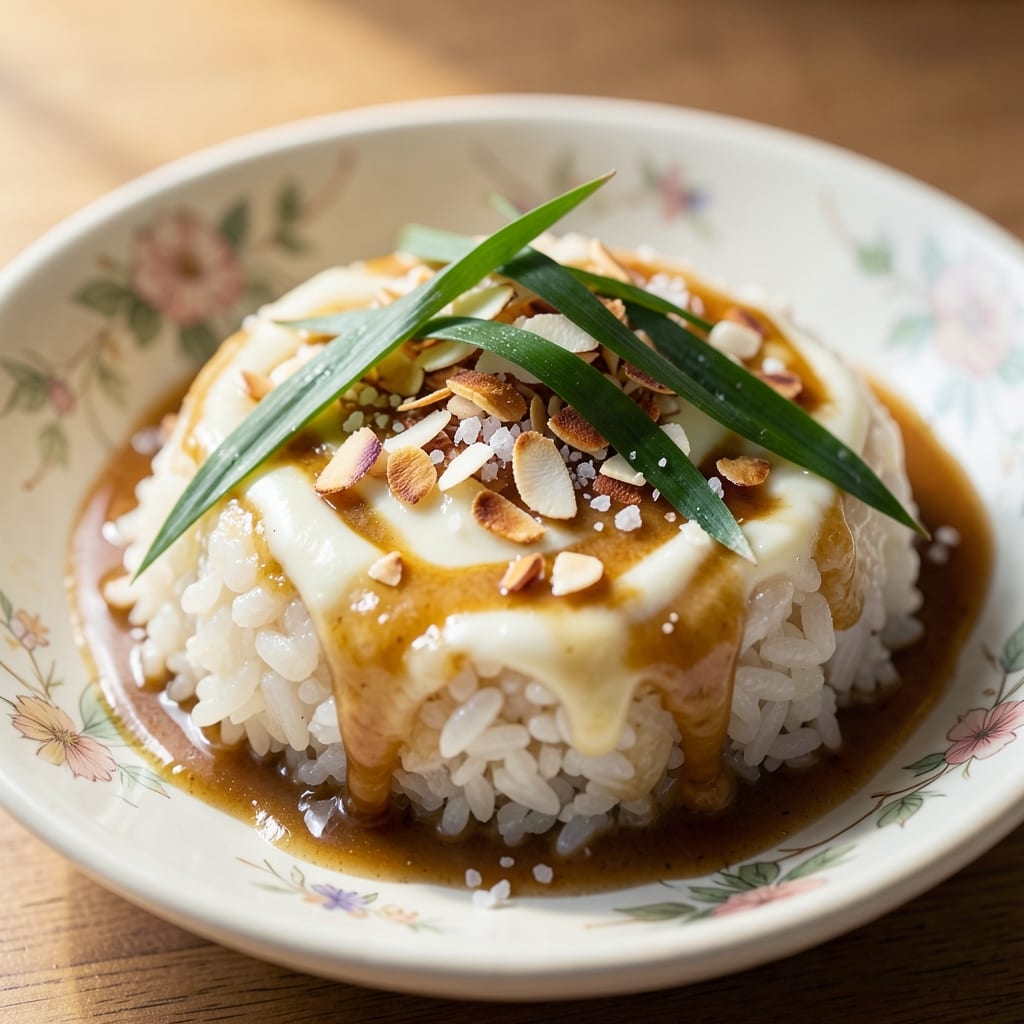
This Asian sweet rice recipe transforms simple ingredients into a sticky, coconut-kissed dessert that feels like a warm hug in every bite. 🌟 The secret lies in perfectly balanced coconut milk and caramelized sugar, creating that signature chewy texture and sweet-tangy flavor profile that makes this dish a staple across Southeast Asia. Whether you're recreating Thai mango sticky rice or Filipino bibingka, this method delivers authentic results with minimal effort.
The foundation of great sweet rice is properly cooked glutinous rice—the kind that develops that signature chewy, almost gelatinous texture when steamed just right. I've perfected a foolproof steaming technique that ensures every grain absorbs the coconut milk and sugar perfectly, creating that signature sticky consistency. The addition of pandan extract (or vanilla) adds an aromatic depth that elevates this dessert from simple to extraordinary.
What you'll end up with is a golden, fragrant dessert that's rich with coconut flavor and just the right amount of caramelized sweetness. The texture is irresistibly sticky yet firm enough to slice, making it perfect for serving warm with fresh mango or as a showstopping centerpiece for special occasions. This recipe serves 4-6, making it ideal for family gatherings or when you want to impress guests with restaurant-quality dessert at home.
While traditional versions often include toppings like toasted coconut or sesame seeds, I've included optional variations like a drizzle of reduced coconut cream or a sprinkle of crushed peanuts for added texture. The beauty of this recipe is its versatility—it works as a standalone dessert or pairs beautifully with tropical fruits. Let's get started on creating this beloved Asian sweet treat!
Ingredients for asian sweet rice
Transform simple pantry staples into a fragrant, golden dessert with these authentic Asian sweet rice ingredients.
| Ingredient | Amount | Notes |
|---|---|---|
| Glutinous Rice (Sweet Rice) 🍚 | 2 cups | Uncooked, rinsed thoroughly |
| Full-Fat Coconut Milk 🥥 | 1 can (13.5 oz) | Canned, no additives |
| Granulated Sugar 🍯 | 1 ½ cups | White or light brown |
| Pandan Extract 🌿 | 1 tsp | Or vanilla extract if unavailable |
| Salt 🧂 | ½ tsp | Fine sea salt |
| Unsalted Butter 🧈 | 2 tbsp | Cold, cubed |
| Ripe Mango 🍈 | 1 medium | Peeled, diced for topping |
| Toasted Coconut Flakes 🥥 | ¼ cup | For garnish (optional) |
| Sesame Seeds 🌰 | 1 tbsp | Toasted, for garnish (optional) |
| Reduced Coconut Cream 🥥 | ¼ cup | For drizzling (optional) |
| Crushed Peanuts 🥜 | ¼ cup | For garnish (optional) |
| Water 💧 | 1 ½ cups | For soaking rice |
Glutinous rice is non-negotiable here—Thai Kitchen or Asian markets carry it in bulk or pre-packaged. Look for 'sticky rice' or 'sweet rice' labels. The full-fat coconut milk from Thai Kitchen or Goya brands delivers that rich, creamy texture. If you can't find pandan extract, vanilla extract works beautifully—just double the amount. For the sugar, light brown sugar adds subtle caramel notes, but white sugar works fine if that's what you have. Toast your coconut flakes and sesame seeds separately in a dry pan for 1-2 minutes until fragrant—this elevates the dish instantly.
No ripe mango? Substitute with papaya or pineapple, both of which pair wonderfully with coconut. Running low on coconut milk? Coconut cream works at a 1:1 ratio, but the texture will be slightly thicker. For a vegan option, simply omit the butter and add 2 tbsp coconut oil instead. The reduced coconut cream can be made by simmering coconut milk until it thickens—about 10 minutes on medium heat. If you're short on time, store-bought coconut cream works perfectly. For the rice, soak it in water for at least 30 minutes before cooking to ensure that signature chewy texture.
Store leftover sweet rice in an airtight container for 3-4 days in the fridge. Reheat gently in the microwave with a splash of water to restore moisture. This dessert freezes beautifully—up to 3 months—though the texture may become slightly grainier. For best results, serve warm. Garnish just before serving to keep the toppings crisp. I always make a double batch—it disappears fast at family gatherings. The rice reheats beautifully, so portion it ahead if you're prepping for a crowd.
Why You'll Love This Recipe
- Here’s what sold me: that tiny bottle of pandan extract turns this into something special. A whisper of floral sweetness cuts through the richness, making it taste like a dessert you’d pay for at a café—not just something you threw together.
- No-Soaking Needed: I’ll admit, I used to dread the soaking part of glutinous rice—but this recipe skips it. Just rinse, steam, and fold in that velvety coconut milk. The texture? Chewy perfection without the fuss.
- Pandan Magic: Here’s what sold me: that tiny bottle of pandan extract turns this into something special. A whisper of floral sweetness cuts through the richness, making it taste like a dessert you’d pay for at a café—not just something you threw together.
- Leftover Luxury: Between us, this rice only gets better the next day. The coconut milk soaks in deeper, the sugar caramelizes just enough, and suddenly you’ve got a free, gourmet treat for breakfast or a snack. No waste, all win.
Step-by-step instructions for sticky coconut-caramelized rice
Transform simple ingredients into fragrant, melt-in-your-mouth sweet rice with this precise method.
👨🍳 Step 1: Soak and Prepare the Glutinous Rice
Place the 2 cups glutinous rice (sweet rice) in a large bowl and cover with the 1.5 cups water. Let it soak at room temperature for at least 4 hours—this is crucial for achieving that signature sticky texture. I like to soak mine overnight in the refrigerator for even better results, but at minimum, don't rush this step.
After soaking, drain the rice thoroughly using a fine-mesh strainer. Press down gently to remove all excess water, as any remaining moisture will prevent proper caramelization later. This step ensures your rice will be perfectly tender rather than gummy or undercooked.
🔥 Step 2: Cook the Rice with Coconut Milk
In a heavy-bottomed pot with a tight-fitting lid, combine the drained rice, 1 can (13.5 oz) full-fat coconut milk, 1.5 cups granulated sugar, 1 tsp pandan extract, and 0.5 tsp salt. Bring the mixture to a gentle boil over medium heat, then immediately reduce to the lowest possible heat setting—just enough to maintain a bare simmer.
Cover the pot and cook for 45-50 minutes, stirring gently every 10 minutes to prevent sticking. You'll notice the rice begins to thicken and release its natural starches, creating a glossy, translucent surface. The mixture should be thick and creamy, almost like a pudding, with no liquid remaining. If it looks too dry before 45 minutes, add 1-2 tablespoons water to maintain moisture.
🍳 Step 3: Incorporate Butter and Test for Doneness
Once the rice reaches the perfect creamy consistency, remove it from heat and stir in the 2 tbsp cold unsalted butter until fully melted and evenly distributed. This step adds richness and helps create that signature velvety texture. Let the rice sit covered for 10 minutes—this resting period allows the flavors to meld completely.
Test for doneness by pressing a spoonful of rice between your fingers. It should hold its shape when pressed gently but still feel soft and slightly sticky. If it crumbles too easily, return it to low heat for 2-3 minutes with an additional 1 tablespoon water to restore moisture. The rice should be tender yet firm enough to hold its shape when served.
🥘 Step 4: Assemble and Garnish
Transfer the cooked rice to a serving dish and spread it into an even layer. For the topping, arrange the 1 medium peeled and diced ripe mango evenly over the surface. The contrast of sweet, juicy mango against the caramelized rice creates the perfect balance of flavors and textures.
Drizzle the rice with the 0.25 cup reduced coconut cream and sprinkle evenly with the 0.25 cup toasted coconut flakes, 1 tbsp sesame seeds, and 0.25 cup crushed peanuts. These garnishes add visual appeal and complementary textures—crunchy peanuts, nutty sesame, and toasted coconut flakes elevate each bite. Serve immediately while still warm for the best experience.
Pro Tips For Making Asian Sweet Rice
- SOAK THE RICE LONGER: Glutinous rice needs at least 4 hours soaking—overnight if possible. I learned this the hard way when my rice turned gummy instead of creamy; the extra time breaks down the starch properly. Use room-temperature water, not cold, to speed up absorption.
- USE FULL-FAT COCONUT MILK: Skimping on the fat here ruins texture. Full-fat coconut milk (40%+) gives that signature richness—don’t substitute with light versions or coconut cream (it’s thicker, not the same). Open the can and stir the settled cream back in before measuring.
- STEAM DON’T BOIL: Simmering sweet rice in a pot turns it gluey. Steam it over boiling water in a bamboo basket or colander (with a tight lid) for 20–25 minutes—this keeps it light and fluffy. No basket? Use a heatproof bowl over a pot with a towel to prevent water dripping.
- SWEETEN GRADUALLY: Dump all the sugar at once and you’ll end up with a syrup. Start with half the amount, mix well, then add the rest after the rice has absorbed the first batch. Taste as you go—pandan extract is potent, so less sugar often works better than you’d think.
Pro cooking tips for asian sweet rice
Steaming Perfection
Forget the stovetop—steaming is the secret to achieving that signature chewy, translucent texture in Asian sweet rice. I use a bamboo steamer lined with parchment paper for even cooking, but a lasagna pan or steamer basket works too. The key is low, indirect heat—place your steamer over a pot of simmering water (not boiling) to prevent burning. If using coconut milk, pour it into the bottom of the steamer first to create a flavorful base. 🌿
Steam for 45-50 minutes until the rice is tender but still holds its shape when pressed. The rice should be glossy and slightly sticky to the touch. Pro tip: If your rice isn't releasing enough starch (common with cheaper brands), add 1 tbsp cornstarch to the coconut milk before steaming. This trick guarantees that signature velvety consistency every time.
Caramel Control
The sugar in this recipe isn't just for sweetness—it's for caramelization, which creates that deep, golden color and rich flavor. To prevent burning, cook the rice over low heat and stir gently every 10 minutes. If the mixture starts to stick or brown too quickly, reduce the heat further or add 1-2 tbsp water to maintain moisture. The goal is a thick, pudding-like texture with no dry spots.
For extra depth, I like to add 1 tsp coconut sugar along with the granulated sugar—it caramelizes faster and adds a toasted coconut note. If you're using a heavy-bottomed pot (like a Le Creuset Dutch oven), you can safely increase the heat slightly for faster caramelization. Just keep an eye on it to avoid burning!
Butter Matters
The 2 tbsp cold unsalted butter isn't just for flavor—it's for texture. Adding it at the end creates tiny pockets of richness that make the rice ultra-creamy and easy to slice. I always use European-style butter (like Plugrá) because it has a higher fat content, which enhances the coconut flavor. If you're vegan, coconut oil works perfectly—just make sure it's cold before adding to prevent greasiness.
Stir the butter in off the heat and let it melt completely before serving. This ensures even distribution without breaking down the rice's structure. For an extra-luxurious touch, I sometimes fold in 1 tbsp toasted coconut cream at this stage—it adds a silky, almost custard-like finish that guests rave about. 🥥
Doneness Test
Knowing when your sweet rice is perfectly cooked is all about texture. The rice should be tender but still hold its shape when pressed gently between your fingers. If it crumbles too easily, it needs 2-3 more minutes of cooking. If it's still too firm, cover it and let it rest for 5-10 minutes—the residual heat will finish the cooking process. Overcooking is the #1 mistake, as it turns the rice gummy instead of sticky.
For a foolproof test, cut a small piece and let it cool slightly. If it holds together when sliced but still feels soft and slightly springy, it's ready. If you're unsure, err on the side of undercooking—you can always reheat it later with a splash of coconut milk. The rice reheats beautifully, so don't stress if it's not perfect the first time!
Nutrition facts
Frequently asked questions
What's the difference between glutinous rice and regular rice?
Glutinous rice (also called sweet rice) has a higher starch content, making it naturally sticky and chewy when cooked. Regular rice stays firm and separate. For this dessert, glutinous rice is essential—it creates that signature creamy, elastic texture that holds together beautifully. You can find it in Asian markets or specialty stores labeled as "sticky rice" or "mochigome."
Can I make this recipe without coconut milk?
While coconut milk is traditional, you can substitute with 1 cup coconut cream + 1/2 cup water for a richer texture. For a non-coconut version, use 1 cup whole milk + 1/2 cup heavy cream, but reduce sugar to 1 cup—the flavor will be milder. The key is maintaining the same liquid-to-rice ratio to achieve that sticky consistency.
Why did my sweet rice turn out gummy instead of sticky? This usually happens from overcooking or insufficient soaking.
How do I store and reheat leftover sweet rice?
Store in an airtight container for 3-4 days in the fridge. To reheat, microwave with a splash of water or coconut milk for 30-45 seconds, then cover and let it steam for 1 minute. For best texture, reheat only until warm—overheating makes it gummy. This dessert also freezes well for up to 3 months, though the texture may become slightly grainier after thawing.
What are some creative variations for this recipe?
Try adding 1 tsp cardamom for Middle Eastern-inspired flavors or 1/2 tsp ube halaya (purple yam jam) for a Filipino twist. For a tropical version, fold in 1/2 cup diced pineapple while cooking. You can also make it savory by reducing sugar to 1 cup and adding 1 tsp soy sauce + 1/2 tsp ginger—perfect for breakfast with fried eggs!