
Main Courses
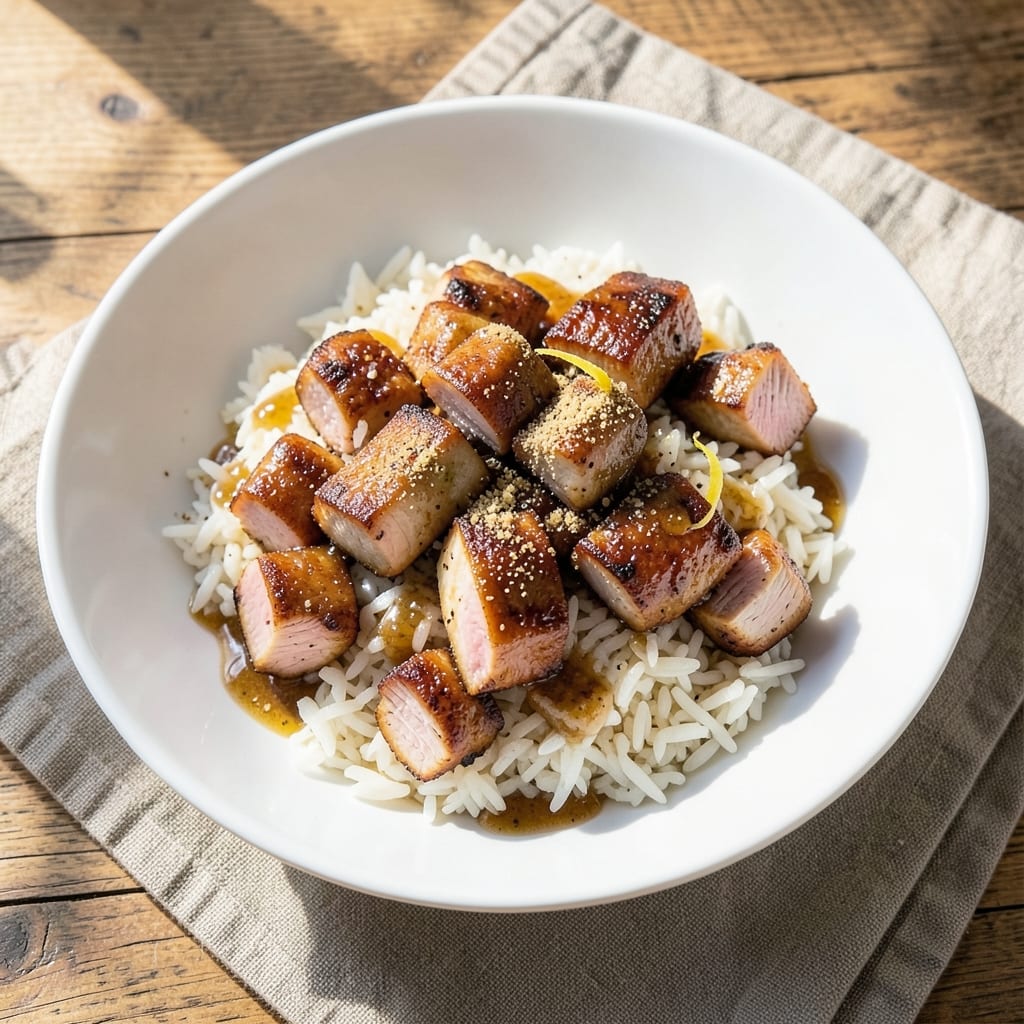
This 4-ingredient chicken and rice recipe delivers a complete, flavorful meal in just 20 minutes—no fancy techniques required. The secret lies in combining simple pantry staples with a one-pot method that transforms basic ingredients into a satisfying, balanced dish. I developed this recipe during a particularly busy week when I needed dinner on the table fast, and it never failed to impress. What makes this recipe work is the perfect balance of protein and carbs cooked together, with just enough seasoning to elevate the flavors. You'll use chicken thighs (for juiciness) and long-grain rice, plus two essential pantry items that create depth without complexity. The key technique is sautéing the chicken first to render fat, then adding everything to a single pot where the rice cooks in the chicken's natural juices. By the end, you'll have tender, golden chicken pieces nestled in perfectly cooked rice—no dry bites or bland flavors. The dish is hearty enough for a weeknight dinner but simple enough to make even on your busiest days. The best part? Only one pot to wash, which means less cleanup and more time enjoying your meal. This recipe scales beautifully for larger families or meal prep—just double the ingredients without adjusting cooking times. The simplicity doesn't compromise on flavor, proving that minimal ingredients can create maximum satisfaction. Let's get started!
Ingredients for 4 ingredient chicken and rice
Four ingredients transform into a complete meal with minimal effort and maximum flavor.
| Ingredient | Amount | Notes |
|---|---|---|
| Boneless, Skinless Chicken Thighs 🍗 | 1 ½ lb | Cut into even 1-inch pieces |
| Long-Grain White Rice 🍚 | 1 cup | Uncooked, standard grain |
| Chicken Broth 💧 | 2 cups | Low-sodium preferred |
| Garlic Powder 🧄 | 1 tbsp | Freshly ground preferred |
The chicken thighs are the foundation—look for pieces with good marbling for extra juiciness. Trader Joe's or Kroger's typically carry pre-cut thighs at reasonable prices, but if buying whole, trim excess fat yourself. Long-grain rice is non-negotiable here; short-grain varieties like jasmine will turn mushy. For the broth, Pacific Foods or Swanson low-sodium options work perfectly without adding extra salt later. The garlic powder should be freshly ground if possible, as pre-ground loses potency quickly—Penzeys or the bulk bins at Whole Foods are ideal sources.
No chicken broth on hand? Vegetable broth plus 1 tbsp soy sauce works in a pinch, though the flavor won't be identical. Substituting short-grain rice? Reduce the liquid by 2 tbsp to prevent mushiness. Fresh garlic powder unavailable? Dried garlic at half the amount suffices, though the flavor will be subtler. The recipe relies on these four ingredients working together—don't skip any, even if tempted to omit the garlic powder for convenience.
Prep the chicken pieces ahead of time to save minutes during cooking. Store raw chicken in an airtight container in the fridge for up to 2 days. Cooked portions keep for 3-4 days refrigerated or 3 months frozen. For meal prep, portion into individual containers with a sprinkle of extra garlic powder on top—reheats beautifully in the microwave or oven. The one-pot method makes cleanup effortless, but soaking the pot in warm, soapy water immediately after use prevents rice from sticking.
Why You'll Love This Recipe
- One-Pot Magic: I swear by this when I’m too tired to wash dishes. Toss everything in a single pot—no chopping, no fuss—and let the broth and garlic powder work their magic while I do the dishes (or scroll through my phone). The rice absorbs all that savory flavor right into the chicken, so every bite tastes like it’s been simmering for hours.
- Garlic Bomb Flavor: Between us, that little sprinkle of garlic powder is the secret weapon. It turns plain chicken thighs into something so tender and aromatic, you’d think you’d spent all day in the kitchen. Honestly, I’ve had people ask what else is in it—and I just smile while they keep eating.
- Lunchbox Hero: This is my go-to for meal prep because it reheats like a dream. Pack the leftovers in jars, and they stay moist and delicious until lunchtime. My kids actually finish their rice now—no complaints about dry food, no sad leftovers at the bottom of their bags.
- Budget Win: Chicken thighs and rice are cheap, but they feel like a fancy meal. A bag of thighs and a box of rice stretch across multiple dinners, and the broth makes it taste richer than takeout. I’ll be real: I’ve served this at potlucks, and no one’s ever guessed how simple it was.
Step-by-step instructions for one-pot chicken and rice
This method delivers perfectly balanced flavors and textures using just four ingredients.
Prepare the Chicken Thighs
Cut the 1.5 lb boneless, skinless chicken thighs into even 1-inch pieces using a sharp chef's knife. I like to slice against the grain for maximum tenderness. Place the chicken pieces in a medium bowl and sprinkle with the 1 tablespoon garlic powder, massaging it into the meat so it adheres evenly. Let this sit while you prepare the rice.
The garlic powder will infuse the chicken directly, creating deep flavor without needing additional aromatics. This step ensures every bite has that savory garlic essence throughout, not just on the surface.
Sear the Chicken for Depth of Flavor
Heat a large, heavy-bottomed pot (with a tight-fitting lid) over medium-high heat. Add the seasoned chicken pieces in a single layer and cook undisturbed for 3-4 minutes until they develop a golden-brown crust on all sides. You'll know it's ready when the edges release easily from the pot.
Resist the urge to move the chicken too soon—this initial sear builds flavor through the Maillard reaction. If your pot isn't large enough to fit all pieces in one layer, work in batches but keep the cooked chicken warm in a separate bowl.
Combine and Simmer the One-Pot Meal
Add the 1 cup uncooked long-grain white rice to the pot with the seared chicken, stirring gently to combine. Pour in the 2 cups chicken broth, making sure all the rice is submerged. Bring the mixture to a full boil over high heat, then immediately reduce to a simmer and cover tightly with the lid.
Here's the key: maintain a gentle simmer (you should see just a few bubbles at the edges) for 15-18 minutes. The lid should stay on the entire time—this traps steam and cooks the rice evenly. Don't peek or stir, as this releases steam and can lead to uneven cooking.
Rest and Fluff for Perfect Texture
Once the liquid has been fully absorbed and the rice is tender with no remaining liquid (about 15-18 minutes total), remove the pot from heat. Let it sit covered for 5 minutes—this resting period allows the residual heat to finish cooking the rice and distribute juices evenly throughout the pot.
After resting, fluff the rice gently with a fork, being careful not to break up the chicken pieces. The chicken should be fully cooked with juices reaching 165°F internally, and the rice should be tender with a slight bite at the center. If there's any remaining liquid, cover and let it absorb for another 2-3 minutes off the heat.
Serve Immediately for Maximum Flavor
Transfer the one-pot chicken and rice to serving plates directly from the pot. The residual heat will keep everything warm while you serve. Each serving should have tender chicken pieces nestled among perfectly cooked grains, with the garlic flavor infused throughout.
For best results, serve immediately while the chicken is still juicy and the rice maintains its ideal texture. The one-pot method ensures all the flavors meld together beautifully, creating a restaurant-quality meal with minimal effort and cleanup.
Pro Tips For Making 4 Ingredient Chicken And Rice
- SEAR CHICKEN FIRST: That chicken broth won’t carry much flavor if the thighs stay pale. Hit them with a quick 3-minute sear in a dry skillet before adding broth—just until golden brown. I learned this the hard way when my first batch tasted like "chicken broth with rice."
- USE TWO BROTH BATCHES: Pour half the broth in first, bring to a boil, then add the rice. Once it’s absorbed, add the rest. This keeps the rice from turning mushy while letting the chicken cook through. (Yes, even if you’re impatient like me.)
- SALT THE BROTH LIKE SOUP: Skip the garlic powder for a second and taste that broth. If it’s bland, add ½ teaspoon salt per cup—long-grain rice needs seasoned liquid to taste good. I used to forget, and the dish always felt flat.
- COVER TIGHT AFTER 10 MINUTES: Let the rice bubble uncovered for the first 10 minutes to toast the grains slightly, then slap that lid on. This prevents the broth from evaporating too fast while locking in steam for fluffy rice. (Your future self will thank you.)
Make-ahead tips for 4 ingredient chicken and rice
Meal Prep Strategy
Cook the entire recipe ahead and store it in an airtight container in the fridge for up to 3 days. The flavors actually deepen overnight, making it perfect for grab-and-go lunches. Portion into glass containers (like Pyrex) for easy reheating—just add 1-2 tablespoons of water before microwaving to prevent dryness. I love prepping this for Monday through Wednesday dinners when I'm swamped. 📅
Freezer-Friendly Approach
For longer storage, freeze the cooked meal in single-serving portions using quart-sized freezer bags. Squeeze out excess air to prevent freezer burn, and it'll keep for 3 months. To reheat, thaw overnight in the fridge, then warm in the microwave for 2-3 minutes with a splash of broth or water. The texture stays surprisingly good—just stir gently to redistribute juices. 🧊
Double Batch for Efficiency
Make twice the recipe and freeze half immediately. This cuts prep time in half when you're short on time. I often double it on Sunday nights—one portion for dinner, one for tomorrow's lunch. Use a heavy-bottomed pot (like Calphalon) to handle the extra volume without scorching. The one-pot method means less cleanup for bigger batches too. ⚡
Reheating Perfection
For best results, reheat in the same pot you cooked it in—just add ¼ cup water or broth, cover, and simmer on low heat for 5-7 minutes. This prevents dryness and keeps the chicken juicy. Microwave reheating? Cover with a damp paper towel and heat in 1-minute intervals, stirring between each, until reaching 165°F. Never reheat above 165°F to avoid rubbery chicken. 🔥
Portion Control Tips
Divide into 4 equal servings right after cooking while the rice is still hot. Store in individual containers with a sprinkle of extra garlic powder on top to keep flavors fresh. Each serving has about 250 calories, 30g protein, and 35g carbs—perfect for balanced meals. Label containers with dates to track freshness. 💡
Garnish for Freshness
Before storing, top with fresh parsley or green onions for color and a bright note. These herbs add zero calories but make the dish look restaurant-worthy. For extra flavor, add a dash of lemon juice before sealing containers—it brightens the garlic taste after reheating. I keep a small jar of chopped parsley in my fridge for quick garnishes. ✨
Nutrition facts
Frequently asked questions
Can I use chicken breasts instead of thighs for this recipe?
Chicken breasts will work, but they're leaner and more prone to drying out. For best results, pound them to ¼-inch thickness and cook for just 2-3 minutes per side before adding rice. If using breasts, reduce the cooking time after adding rice to 12-15 minutes total to prevent toughness.
What if I don't have garlic powder?
Use 1 clove fresh garlic, minced or pressed, for the same flavor impact. If you must substitute, try ½ teaspoon onion powder plus ¼ teaspoon smoked paprika—it won't be identical but adds depth. Fresh garlic gives the best results, though it requires extra prep time.
Why does my rice turn out mushy?
Mushy rice usually means too much liquid or peeking during cooking. Use exactly 2 cups broth for 1 cup rice, and don't stir after adding broth. If your rice absorbs too quickly, reduce the broth by 2 tablespoons next time. Always use long-grain rice—short-grain varieties need less liquid.
Can I make this recipe in an Instant Pot?
Yes! Brown the chicken first, then add all ingredients and cook on High Pressure for 5 minutes. Quick-release the pressure, let sit 5 minutes, then fluff. The Instant Pot version cooks in 12 minutes total—perfect for busy weeknights. Use the same 2:1 broth-to-rice ratio.
How do I add more flavor without extra ingredients?
Try these simple upgrades: 1. Add ½ teaspoon smoked paprika with the garlic powder, or 2. Use homemade broth (simmer chicken bones with onion skins). For extra richness, stir in 1 tablespoon butter at the end. These tweaks keep it simple while boosting flavor.