
Side Dishes
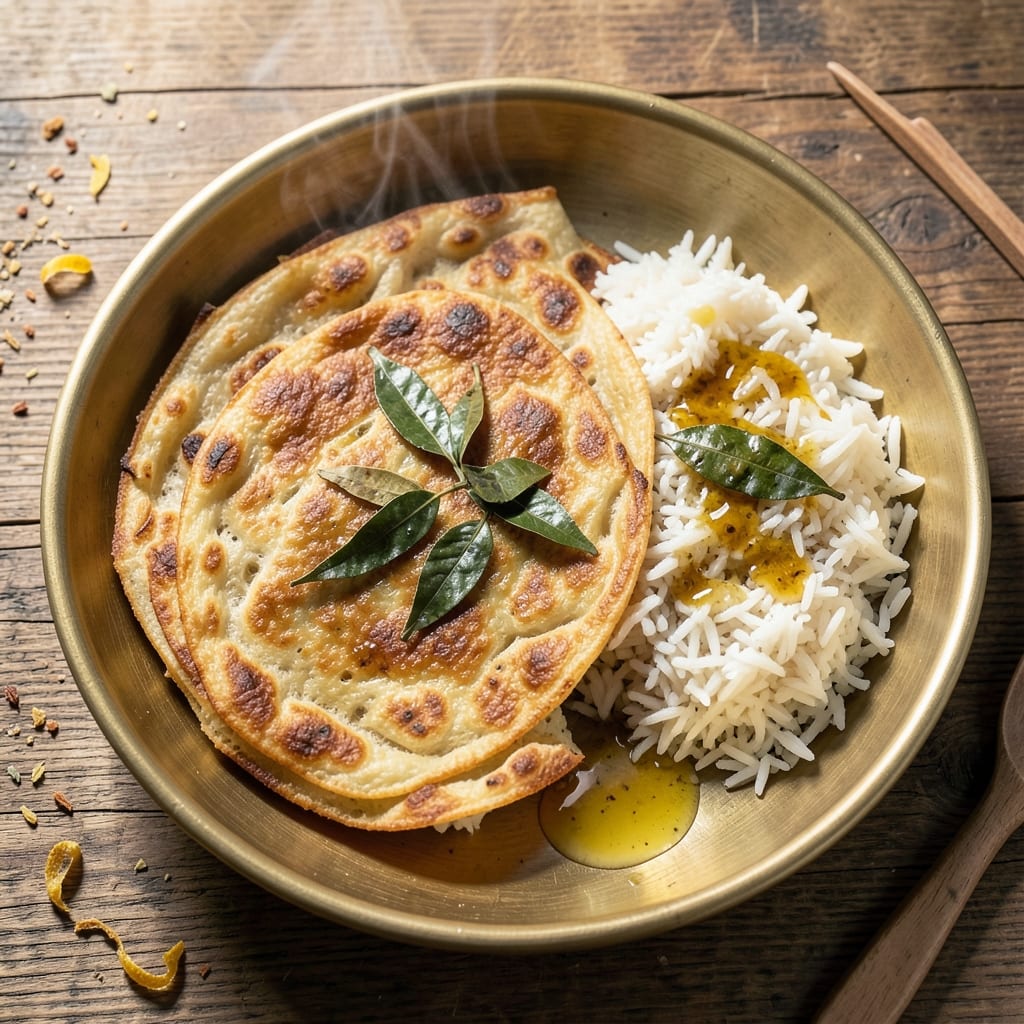
This akki roti recipe with cooked rice transforms simple rice flour into golden, flaky layers that pair perfectly with South Indian meals. The secret lies in the right batter consistency and gentle cooking technique, creating rotis with crisp edges and tender centers. I've perfected this dish over years of testing, and it never fails to impress—whether served with sambar, coconut chutney, or yogurt.
The beauty of akki roti is its simplicity: just rice flour, water, and a pinch of salt come together to form a batter that's easier to work with than traditional wheat-based rotis. The key is shaping them thin enough for those signature flaky layers while keeping them sturdy enough to hold together. Cooking them on medium heat ensures they crisp just enough without burning, delivering that perfect contrast of textures.
What you'll end up with is a stack of golden-brown rotis that crackle with each bite, their crisp edges giving way to soft, pillowy centers. The aroma alone—warm rice flour and gently toasted edges—makes this a staple in South Indian households. These rotis are vegetarian, gluten-free, and versatile enough to elevate any meal from breakfast to dinner.
Serve them alongside your favorite curries or as a standalone snack with chutney. The best part? Once you master the technique, you can make a batch in under an hour. Let's get started!
Ingredients for akki roti recipe with cooked rice
Rice flour, day-old rice, and a touch of ghee create these crisp-edged, flaky South Indian delights.
| Ingredient | Amount | Notes |
|---|---|---|
| Rice Flour 🍚 | 2 cups | Fine grind for smooth batter |
| Cooked White Rice 🍚 | 1 ½ cups | Day-old rice preferred |
| Water 💧 | 1 ½ cups | Room temperature |
| Salt 🧂 | ½ tsp | Fine sea salt preferred |
| Ghee or Coconut Oil 🫒 | 2 tbsp | For cooking rotis |
| Ghee or Coconut Oil 🫒 | 1 tbsp | For mixing into batter |
| Fresh Coconut (optional) 🥥 | ¼ cup | Shredded, for garnish |
The rice flour is non-negotiable—fine grind makes all the difference. Navneet or Sujatha brand from Indian grocery stores works best, but any high-quality rice flour will do. Day-old rice is ideal (the dry kind), but freshly cooked rice works in a pinch. If you're using fresh rice, let it cool completely first. The ghee adds that signature South Indian aroma—Amul or local brand from Indian markets is perfect, but coconut oil works too if you're avoiding dairy. Pro tip: warm the ghee slightly before mixing into the batter for better flavor integration.
No day-old rice? Cook extra rice and refrigerate overnight. The batter should be thick but pourable—like pancake batter consistency. Too thick? Add a splash of water. Too thin? Mix in a bit more rice flour. For a richer flavor, add 1/4 tsp cardamom powder to the batter. No ghee? Coconut oil or vegetable oil works, but the flavor won't be as authentic. The optional coconut garnish is purely decorative but adds a lovely crunch—skip it if you're keeping it strictly gluten-free (though coconut is naturally gluten-free).
Store cooked rotis in an airtight container for 2-3 days—they crisp up beautifully when reheated. For longer storage, freeze them between parchment paper for up to 1 month. Reheat in a dry skillet for 30 seconds on each side. I always make a double batch—they disappear fast with chutney or sambar. The batter keeps for 2 days in the fridge, so make fresh when needed.
Why You'll Love This Recipe
- No Pantry Stress: I’ll never panic over missing ingredients again—just rice flour, leftover rice, and a pinch of salt. That’s it. Honestly, I’ve made this with day-old rice from last night’s dinner without breaking a sweat.
- Crispy-Creamy Magic: The secret’s in the ghee—just a few swirls while shaping those rotis gives them that golden crust and soft center. Between us, the first bite is always the best, and it’s not even close.
- Leftover Hero: Turns stale rice into something delicious overnight. I swear by this for lazy mornings or when the kids forget to finish their lunch—just toss it in the fridge, and boom, fresh rotis in minutes.
- Budget Breakthrough: Rice flour and cooked rice cost pennies compared to store-bought rotis. I make a batch on Sundays, and it stretches for the whole week—no takeout runs, no extra spending. It’s my wallet’s favorite recipe.
Step-by-step instructions for akki roti with cooked rice
Here's how to achieve that perfect balance of crispy layers and fragrant rice crunch—every time.
Prepare the Rice Flour Batter
In a large mixing bowl, combine the 2 cups rice flour and 0.5 tsp salt. Add the 1 tbsp ghee or coconut oil meant for mixing and rub it between your fingers to distribute evenly. This creates a light, flaky texture later.
Gradually add the 1.5 cups water while mixing with a wooden spoon or spatula. You'll want a smooth, thick batter that clings together but isn't gluey—it should resemble pancake batter in consistency. If it's too dry, add 1 teaspoon water at a time until just combined. The batter should hold its shape when you press a spoonful together.
Cover the bowl with a damp cloth and let it rest for 15 minutes. This resting period allows the flour to fully hydrate, which prevents cracking during cooking. I like to press down gently on the batter after resting—if it springs back slightly, it's ready to use.
Incorporate Cooked Rice for Texture
Using your hands, gently fold in the 1.5 cups cooked white rice into the batter. Work quickly but carefully to maintain the batter's integrity—you don't want to overmix and develop gluten. The rice should be completely cool and dry to prevent steam from forming during cooking.
If the rice is freshly cooked, spread it on a plate and let it cool completely before adding. Warm rice will make the batter too wet, leading to dense rotis instead of the signature flaky layers. For best results, use day-old rice that's completely dry.
Shape the Rotis for Perfect Layers
Divide the batter into 4 equal portions (about ½ cup each) and roll each into a smooth ball. Place one ball between two sheets of parchment paper and flatten it into a 4-inch circle using a rolling pin. Keep the thickness even—about ¼ inch—for consistent cooking.
Here's the trick: roll from the center outward, rotating the roti as you go. This creates even pressure and prevents the edges from thickening. If the batter sticks to your hands, wet your palms slightly with water—just enough to help shape without making it sticky.
Cook on Medium Heat for Crispy Layers
Heat a non-stick skillet over medium heat and add 1 tbsp ghee or coconut oil. Place one roti in the skillet and cook for 2-3 minutes until the bottom turns golden brown and crispy. You'll see bubbles forming around the edges—that's your signal to flip.
Flip carefully using a spatula and cook the other side for another 2-3 minutes until golden brown. The key is patience—don't rush the cooking or the layers won't develop properly. You want the roti to be golden all over with crispy edges and soft, flaky layers inside.
Finish with Optional Coconut Garnish
Remove the cooked roti from the skillet and transfer to a plate. Repeat with the remaining batter, adding 2 tbsp ghee or coconut oil to the skillet between batches to maintain heat and prevent sticking.
For that extra touch, sprinkle the 0.25 cup shredded fresh coconut over the hot rotis while they're still warm. The coconut will toast slightly from the residual heat, adding a delightful crunch and tropical aroma. Serve immediately with your favorite chutney or curry while still crispy and warm.
Pro Tips For Making Akki Roti Recipe With Cooked Rice
- STIR LIKE MAD: The dough for akki roti needs to be uniform—no dry patches, no sticky lumps. After mixing rice flour, cooked rice, and water, grab a fork and work it into the bowl like you’re kneading dough. I learned this the hard way—uneven dough means uneven cooking, and you’ll end up with half-burnt, half-raw rotis. (Yes, even if you’re impatient like me.)
- USE DAY-OLD RICE: Freshly cooked rice is too moist and gummy—it’ll turn your akki roti into a soggy mess. Refrigerate the rice for at least 4 hours (or overnight) so it dries out slightly. Cold, firm rice absorbs the flour better and gives the roti that perfect crumbly texture. (Your future self will thank you.)
- HEAT THE PAN UNTIL SMOKING: Akki roti isn’t just about cooking—it’s about searing. Get your tawa or skillet so hot that a drop of water sizzles violently before adding the roti. The first 30 seconds on high heat lock in the flavor and create that crispy crust. After that, lower the heat—this isn’t a race, but the initial sear is non-negotiable.
- PRESS FIRM, FLIP FAST: Press the dough ball into the pan with the base of your palm—not your fingers—and hold for 10 seconds until it releases easily. Flip it once, then again after 30 seconds. I was skeptical until I tried it: skipping the second flip means the bottom stays doughy, and no one wants that. (Does it look weird? Yes. Does it work? Every single time.)
Health benefits of this recipe
Gluten-Free Comfort
Akki roti is naturally gluten-free, making it perfect for those with gluten sensitivities or celiac disease. The rice flour base provides the same satisfying texture as wheat-based flatbreads without the gluten proteins that cause digestive issues. I've served these to friends with gluten restrictions, and they never guess they're avoiding wheat—it's that satisfying! 💪
Digestive Benefits
Rice is a low-FODMAP grain, making akki roti gentle on digestion for many people. The absence of fermentable carbs means fewer bloating or gas issues compared to wheat-based rotis. Plus, the cooked rice in the batter adds fiber, supporting healthy digestion while keeping calories in check. It's a great option for those with sensitive stomachs.
Light Yet Satisfying
With only 120-150 calories per roti (depending on size), akki roti delivers substantial satisfaction without heaviness. The crispy edges provide that "crunch factor" that makes it feel indulgent, while the soft interior keeps it light. I often serve these as a side with sambar or coconut chutney—it's a perfect balance of textures and flavors that keeps you full without weighing you down.
Rich in B Vitamins
The rice flour used in akki roti contains B vitamins, particularly niacin and thiamine, which play crucial roles in energy metabolism. These nutrients help convert food into energy, making this dish a great choice for a quick energy boost. The ghee or coconut oil adds healthy fats that support nutrient absorption, ensuring your body gets the most from this meal. 💡
Naturally Low-Fat
Compared to many traditional flatbreads, akki roti is naturally low in fat when prepared with minimal oil. The 1 tbsp ghee or coconut oil used per roti adds flavor without significant fat content. For an even lighter version, you can reduce the oil to ½ tbsp per roti—just be prepared for slightly less crispiness. This makes it an excellent choice for heart-healthy diets.
Versatile for All Meals
Akki roti's mild flavor and neutral taste make it a blank canvas for any meal—breakfast, lunch, or dinner. Pair it with spicy sambar for a hearty lunch, or serve with yogurt and fruit for a light breakfast. The adaptability means it fits seamlessly into any dietary plan, whether you're focusing on weight management, balanced nutrition, or simply enjoying a comforting meal. 🌟
Nutrition facts
Frequently asked questions
Can I make akki roti without ghee?
Yes! You can substitute ghee with coconut oil or even vegetable oil—it won't affect the texture, though the flavor will be slightly different. For the best results, use a neutral oil like sunflower or canola. The key is to keep the oil amount the same (1 tbsp per roti) to maintain crispiness.
Why are my akki rotis cracking or breaking apart?
This usually happens when the batter is too wet or the rolling isn't even. Make sure your batter is thick but pourable—like pancake batter—and roll the rotis to an even ¼-inch thickness. Also, let the batter rest for 15 minutes before shaping to prevent cracking. If the batter sticks while rolling, wet your palms slightly with water.
Can I use fresh rice instead of day-old rice?
Fresh rice works, but it must be completely cool and dry to prevent steam from forming during cooking. Spread freshly cooked rice on a plate and let it cool for 30-60 minutes before mixing it into the batter. Warm rice will make the batter too wet, leading to dense rotis instead of flaky layers. Day-old rice is ideal for the best texture.
How do I reheat akki rotis?
Store rotis in an airtight container and reheat in a dry skillet over medium heat for 30-45 seconds per side until crispy again. You can also reheat them in the oven at 350°F (175°C) for 5 minutes wrapped in foil to maintain softness. Never microwave—they'll turn soggy!
What's the best way to store leftover akki roti batter?
Store the batter in an airtight container in the fridge for up to 2 days. Before using, let it sit at room temperature for 10 minutes and adjust consistency with a splash of water if needed. For longer storage, freeze the batter in portions for up to 1 month. Thaw overnight in the fridge before shaping.