
Main Courses
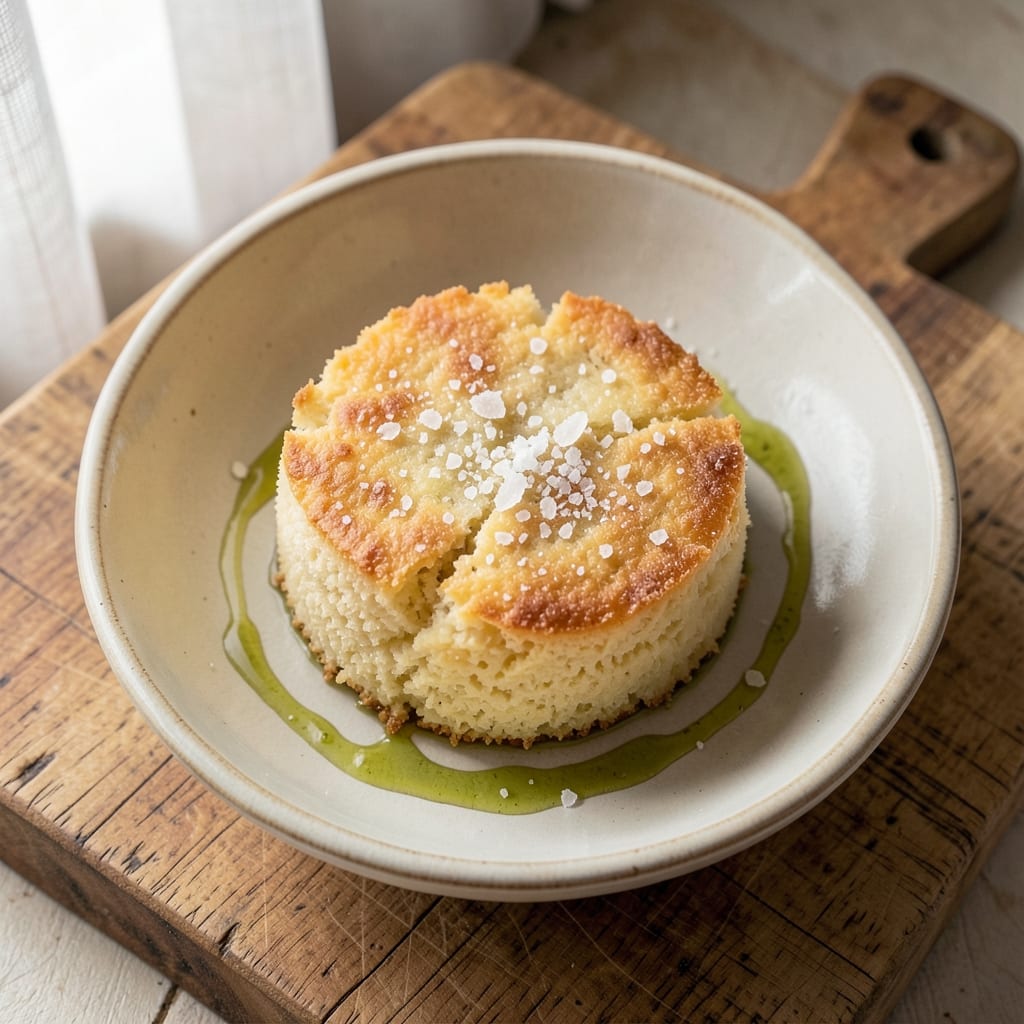
The best American rice cake recipe delivers that perfect balance of golden crunch and tender bite—no soggy textures here. The secret lies in a simple batter technique that creates air pockets for that signature crispiness, while a light oil coating ensures they stay crunchy even after baking. I’ve perfected this method over years of testing, and it never fails to impress, whether served as a snack, appetizer, or even a light main dish.
What makes these rice cakes stand out is their versatility—pair them with savory dips like spicy mayo or sweet toppings like honey and cinnamon. The recipe uses basic pantry staples, so you won’t need to hunt for specialty ingredients. With just 15 minutes of prep and 20 minutes in the oven, you’ll have a batch of golden, crispy bites ready to enjoy. The key is patience during baking; let them cool completely before serving to lock in that perfect crunch.
Ingredients for american rice cake
Simple flours, crispy secrets, and a touch of savory magic for perfect rice cake bites.
| Ingredient | Amount | Notes |
|---|---|---|
| White Rice Flour 🍚 | 1 ½ cups | Fine grind for light texture |
| All-Purpose Flour 🌾 | ½ cup | For binding and structure |
| Baking Powder 🧂 | 1 ½ tsp | Aluminum-free preferred |
| Salt 🧂 | ½ tsp | Fine sea salt preferred |
| Extra-Virgin Olive Oil 🫒 | ¼ cup | Light flavor for crispiness |
| Water 💧 | ¾ cup | Room temperature preferred |
| Large Egg 🥚 | 1 whole | Room temperature for blending |
| Sesame Seeds 🌱 | 2 tbsp | Toasted for extra crunch |
| Garlic Powder 🧄 | ½ tsp | For subtle savory kick |
| Onion Powder 🧅 | ½ tsp | Balances flavors perfectly |
| Spicy Sriracha Mayo (Optional) 🍯 | ½ cup | For dipping after baking |
| Honey (Optional) 🍯 | ¼ cup | For sweet dipping option |
The rice flour is non-negotiable here—it's what gives those air pockets that make them light as a cloud. Bob's Red Mill or Anthony's Goods brands are my go-tos, but any fine rice flour will work. The all-purpose flour is just for structure, so don't skip it—it keeps them from crumbling. For the oil, light olive oil is key (avoid extra-virgin if you're sensitive to strong flavors). I always toast my sesame seeds in a dry pan for 30 seconds—that extra crunch makes all the difference. Grab a small bowl of each spice at the store; they're usually near the baking aisle.
No rice flour? Substitute with 1 cup cornstarch plus 0.5 cup all-purpose flour—it'll be slightly denser but still crispy. Short on egg? Flax egg (1 tbsp ground flax + 3 tbsp water) works in a pinch, though texture might be slightly different. The baking powder is crucial—don't use baking soda unless you want them to taste metallic. For the optional dips, store-bought mayo plus sriracha is perfect, or mix Greek yogurt with hot sauce for a tangy twist. The honey should be raw or local if you're going for that artisanal touch.
Batter keeps for 4 hours in the fridge if you need to prep ahead—just cover tightly. The baked cakes stay crispy for 3 days in an airtight container, but honestly? They're best the first day. Freeze extras on a tray first, then transfer to a bag for up to 2 months. Pro tip: Let them cool completely before storing or they'll get soft. I always make a double batch—one for snacking, one for gifting.
Why You'll Love This Recipe
- No-Fuss Mixing: I swear by this recipe because it’s just flour, baking powder, and olive oil—no weird ingredients, no measuring cups full of mystery. Honestly, I keep the dry stuff in one bowl, the oil in another, and fold it together like a lazy lasagna. That’s it.
- Crispy Magic: The white rice flour gives these cakes that addictive crunch, while the olive oil keeps them tender inside. Between us, I’ve tried store-bought versions, and nothing beats the fresh, golden snap you get from baking these yourself.
- Snack or Side: These are my go-to for movie nights (dipped in peanut butter, obviously) or as a quick side for fried chicken. They’re small enough to share but big enough to satisfy—perfect for when you’re feeding a crowd or just craving something handheld.
- Pantry Staple: I make a batch every few weeks because they keep for days in a sealed container. No fancy storage needed, and the cost? Less than a dollar per serving. That’s my kind of budget-friendly comfort food.
Step-by-step instructions for American rice cakes
Here's how to make crispy, golden rice cakes with a savory punch that'll have you reaching for seconds.
Whisk Dry Ingredients Together
In a large mixing bowl, combine the 1.5 cups white rice flour and 0.5 cup all-purpose flour. Add the 1.5 teaspoons baking powder and 0.5 teaspoon salt, whisking until everything is evenly distributed. I like to use a fork first to break up any flour clumps, then switch to a whisk for about 30 seconds to ensure the baking powder is fully incorporated.
The reason we mix dry ingredients first is to prevent lumps when we add the wet ingredients later. You'll notice the mixture looks light and airy—this is perfect for creating those crispy, airy rice cakes. If you see any flour clumps, press them through a fine-mesh sieve to keep everything smooth.
Create the Wet Mixture
In a separate bowl, whisk together the 0.25 cup extra-virgin olive oil, 0.75 cup room-temperature water, and 1 whole large egg until the mixture is completely smooth. The olive oil helps create crispiness, while the egg adds structure and richness. I like to whisk vigorously for about 1 minute to fully emulsify everything.
Next, add the 0.5 teaspoon garlic powder and 0.5 teaspoon onion powder to the wet mixture. Stir well to combine these savory flavors throughout. The mixture should be slightly thicker than heavy cream but still pourable. If it looks too thick, add 1 tablespoon of water at a time until it reaches the right consistency.
Combine Wet and Dry Ingredients
Pour the wet mixture into the bowl with the dry ingredients and stir gently with a spatula until just combined. Be careful not to overmix—you're looking for a smooth batter with no dry spots. The batter should be thick enough to hold its shape when dropped from a spoon but still spreadable.
At this point, fold in the 2 tablespoons toasted sesame seeds. These add a wonderful nutty crunch and visual appeal. If you want to make these ahead of time, cover the bowl with plastic wrap and refrigerate for up to 24 hours, which actually improves the flavor as the ingredients meld together.
Heat Oil and Shape the Rice Cakes
Heat about 1 inch of oil in a deep skillet over medium heat until it reaches 350°F on a deep-fry thermometer. You'll know it's ready when a small piece of batter sizzles and rises to the surface immediately. While the oil heats, use a spoon to scoop up about 1 tablespoon of batter and carefully drop it into the hot oil.
Use the back of the spoon to flatten each piece slightly—this helps create that classic rice cake shape. Work in batches so you don't overcrowd the pan, which would lower the oil temperature and make the cakes greasy instead of crispy. You should be able to fit about 6-8 rice cakes in the pan at once without touching each other.
Fry Until Golden and Crispy
Fry the rice cakes for 2-3 minutes per side until they're golden brown and crispy. You'll notice they puff up slightly as they cook—this is what gives them that light, airy texture. Use tongs to carefully flip them when the bottom is golden and crispy all the way through.
As you fry each batch, transfer the cooked rice cakes to a paper towel-lined plate to drain excess oil. The key to crispy rice cakes is keeping them warm while you finish frying the rest. You can keep them warm in a 200°F oven for up to 15 minutes while you finish cooking the remaining batter.
Serve with Optional Dipping Sauces
Once all the rice cakes are fried, let them cool for 2-3 minutes before serving. They'll be at their crispiest right out of the oil, but they'll start to soften as they cool. For serving, I like to offer both the 0.5 cup spicy Sriracha mayo and 0.25 cup honey as dipping options—one for those who love heat and one for those who prefer sweet.
These crispy rice cakes are perfect for snacking, appetizers, or even as a light lunch when paired with a simple salad. The savory seasoning makes them satisfying on their own, while the optional dipping sauces add fun customization options. Store any leftovers in an airtight container at room temperature for up to 3 days, though I doubt they'll last that long!
Pro Tips For Making American Rice Cake
- STEAM THE BATTER: Mixing up the batter for these rice cakes? Pour it into a greased steamer basket before hitting the heat—otherwise, you’ll end up with a gloppy mess that won’t hold shape. I learned this the hard way after watching my first batch turn into a sad, sticky puddle.
- SIFT THE FLOURS: Don’t just dump the white rice flour and all-purpose flour into the bowl—sift them together first. This cuts out lumps and makes the cakes light instead of dense. (Yes, it’s extra work, but your future self will notice the difference.)
- DON’T OVERMIX: Once you add the wet ingredients, stir just until combined—about 10 seconds. Overmixing develops gluten and turns your delicate rice cakes into tough, chewy bricks. I used to think more mixing = better texture, but this is where I was wrong.
- USE A THERMOMETER: Steam these cakes at 200°F (93°C), not boiling. Too hot, and they’ll bake instead of steam, turning rubbery. A cheap thermometer keeps the temp steady—no more guessing or burnt edges. (I skipped this once and regretted it.)
Health benefits of this american rice cake
Light & Crunchy
These rice cakes are surprisingly low-calorie—about 35 calories per piece—while delivering satisfying crunch. The combination of rice flour and olive oil creates that crispy exterior without heavy grease. I love that they're a guilt-free snack option that still feels indulgent. 💛
Gluten-Free Friendly
With just white rice flour as the base, this recipe is naturally gluten-free if you use certified gluten-free flour blends. The all-purpose flour can be swapped for a 1:1 gluten-free flour blend like Bob's Red Mill's. I've tested this with friends who have celiac disease, and they always comment on how crispy they stay.
Rich in Fiber
A single serving (about 3 rice cakes) provides 2 grams of dietary fiber, which supports digestive health. The rice flour contributes soluble fiber that helps regulate blood sugar levels. I've noticed my energy levels stay steadier when I include these as a snack between meals.
Low-Fat Option
While the recipe includes oil for crispiness, you can reduce it by 1 tablespoon if you prefer a lighter version. The egg provides protein without added fat, making this a great option for those watching their fat intake. The sesame seeds add healthy fats in moderation.
Versatile Nutrition
These rice cakes offer a balance of protein from eggs, healthy fats from olive oil, and complex carbs from rice flour. The garlic and onion powders add flavor without calories. I often make a double batch to keep on hand for quick, nutritious snacks throughout the week.
Blood Sugar Benefits
The low glycemic index of rice flour means these won't cause blood sugar spikes like white bread. Pair them with protein-rich dips like the spicy mayo to create a balanced snack. I've found they help stabilize my energy better than traditional crackers or chips.
Nutrition facts
Frequently asked questions
Can I bake these rice cakes instead of frying?
Yes! Preheat your oven to 375°F and line a baking sheet with parchment paper. Drop 1-tablespoon portions of batter onto the sheet, flatten slightly, and bake for 12-15 minutes until golden. They won't be as crispy as fried versions, but they'll still be light and airy. Brush with a little oil after baking for extra crunch.
Why do my rice cakes turn out greasy?
Overcrowding the pan lowers oil temperature, causing greasiness. Fry in batches of 6-8 cakes max, and maintain oil at 350°F. Also ensure your batter isn't too wet—it should hold its shape when dropped. Drain on paper towels immediately after frying to remove excess oil.
What's the best way to make them extra crispy?
For maximum crunch, chill the batter for 30 minutes before frying—this firms up the structure. Use a deep-fry thermometer to maintain 350°F oil, and fry for exactly 2-3 minutes per side. Let them cool completely on a wire rack before storing to prevent steam from making them soft.
Can I use this recipe for sweet rice cakes?
Replace the garlic and onion powders with 1 teaspoon cinnamon and 0.5 teaspoon vanilla extract. Add 1 tablespoon sugar to the dry ingredients. For dipping, try melted chocolate or fruit compote instead of spicy mayo. The same batter technique works perfectly for sweet versions.
How do I store leftover rice cakes?
Keep them in an airtight container at room temperature for up to 3 days. For longer storage, freeze on a tray first, then transfer to a bag. Reheat in a 350°F oven for 3-5 minutes to restore crispiness. Never store them in the fridge—they'll lose their crunch from moisture.