
Main Courses
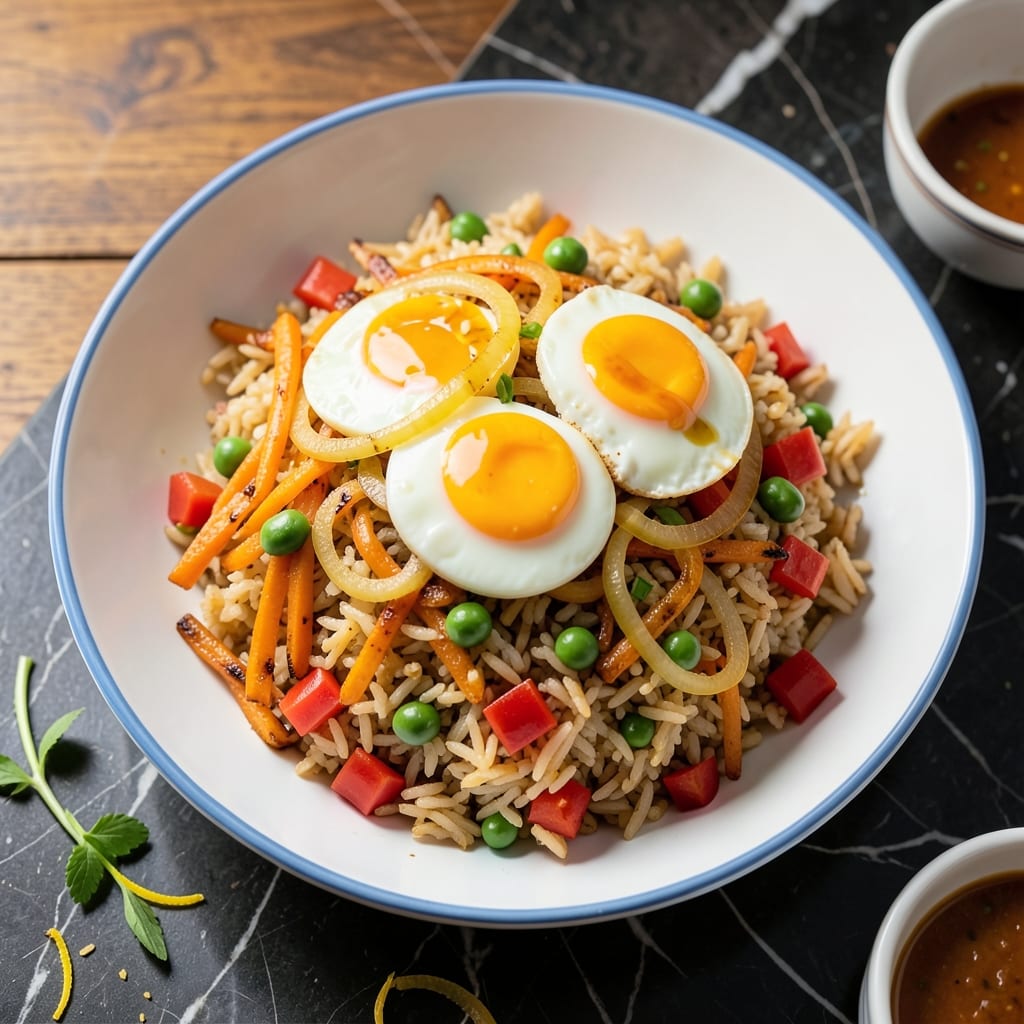
This American-style fried rice recipe delivers all the comfort of a classic takeout dish with crispy edges, tender veggies, and perfectly scrambled eggs—all in one pan. The secret lies in using day-old rice (never fresh!) and high heat to achieve that signature wok-like texture. I’ve perfected this version over years of testing, ensuring every bite has just the right balance of savory, slightly sweet, and umami-rich flavors.
What sets this recipe apart is the simplicity: no fancy equipment needed, just a sturdy skillet and a few pantry staples. Soy sauce, garlic, and a touch of sesame oil form the flavor base, while peas, carrots, and optional protein (chicken, shrimp, or beef) add heartiness. The eggs scramble into soft, fluffy strands that cling to every grain, creating that irresistible pull-apart texture.
By the time you’re done, you’ll have a fragrant, golden-brown fried rice with crispy edges and tender centers—ready to serve as a main dish or side. The best part? It’s customizable: swap in cheese for a cheesy twist, add chili flakes for heat, or keep it classic. This recipe proves homemade fried rice can be just as satisfying as takeout, without the wait.
Perfect for weeknight dinners, meal prep, or feeding a crowd, this one-pan meal comes together in under 20 minutes. Let’s get cooking!
Ingredients for american style fried rice
Pantry staples plus fresh veggies and eggs—this one-pan meal delivers crispy edges and tender bites.
| Ingredient | Amount | Notes |
|---|---|---|
| Day-Old Cooked White Rice 🍚 | 4 cups | Cold or room temperature preferred |
| Large Eggs 🥚 | 3 whole | Room temperature for even cooking |
| Yellow Onion 🧅 | 1 whole | Diced into small pieces |
| Carrots 🥕 | 1 cup | Diced into small cubes |
| Frozen Peas 🌱 | ½ cup | Thawed before using |
| Light Soy Sauce 🥢 | ½ cup | Low sodium preferred |
| Sesame Oil 🫒 | 1 tbsp | Toasted sesame oil for flavor |
| Vegetable Oil 🫒 | 2 tbsp | High smoke point preferred |
| Garlic Cloves 🧄 | 3 cloves | Minced finely |
| Green Onions 🧅 | 2 whole | Sliced thinly |
| Salt 🧂 | ½ tsp | Adjust to taste |
| Black Pepper 🌶️ | ¼ tsp | Freshly ground |
| Optional Protein 🍗 | 1 cup | Diced chicken, shrimp, or beef |
The rice is non-negotiable here: day-old is a must—fresh rice gets mushy. I usually cook a big batch of rice on Sunday so I’ve got it ready for fried rice all week. Day-Ro or jasmine rice works best for texture. For the eggs, room temperature makes all the difference—they scramble into those perfect fluffy strands instead of rubbery clumps. If you're using protein, cook it separately and add it back in at the end to keep it tender. The soy sauce should be light, not dark—Kikkoman or La Choy are reliable brands.
No sesame oil? Toasted sesame seeds at half the amount will work in a pinch, but you’ll miss that nutty aroma. Swap frozen peas for fresh if you’ve got them—just don’t overcook them. The optional protein can be anything: diced rotisserie chicken, shrimp, or beef strips. For extra crispiness, use a nonstick skillet with high heat—that’s how you get those golden edges. If you’re short on time, microwave the rice for 30 seconds to dry it out before frying. The green onions add freshness at the end—don’t skip them!
This keeps beautifully in the fridge for 4-5 days, though it’s honestly best fresh. Reheat in a skillet with a splash of water to restore crispiness. For meal prep, portion into containers and store with a paper towel on top to absorb moisture. Freezes for 3 months but texture suffers slightly. I double the batch and freeze half—perfect for lazy days when takeout sounds too good to pass up.
Why You'll Love This Recipe
- No Chopping Chaos: I swear by this recipe when I’m too tired to dice anything—just dice the onion once, and those frozen peas? Already prepped. The carrots stay in big chunks, so they’re ready in seconds.
- Eggy Magic: That scrambled egg in the middle? It’s the star. Soft in the center, slightly crispy edges—it turns this into something way more satisfying than takeout. Honestly, I’ll eat it plain just for that.
- Leftover Hero: Between us, this dish begs for seconds. The rice stays light, the veggies hold their texture, and it reheats like a dream. I make a double batch on Sundays just to avoid cooking later.
- Budget Win: Onions, carrots, eggs, and rice? Check. Frozen peas? Even cheaper. It’s the kind of meal that stretches my grocery money without sacrificing flavor—my wallet and taste buds both win.
Step-by-step instructions for American style fried rice
Here's how to transform simple ingredients into a perfectly crispy, flavorful one-pan dish.
Prepare the Egg Mixture and Prep Vegetables
Crack the 3 whole Large Eggs into a bowl and whisk vigorously until the yolks and whites are completely combined and the mixture is uniform in color. This ensures even cooking and prevents rubbery eggs in your fried rice. In a separate bowl, combine the 1 cup Carrots (diced into small cubes) and 0.5 cup Frozen Peas (thawed). Set both mixtures aside while you prep the rest.
Finely dice the 1 whole Yellow Onion into small pieces—about ¼-inch cubes. Mince the 3 cloves Garlic Cloves and slice the 2 whole Green Onions thinly. These aromatics will form the flavor base of your dish. If using 1 cup Optional Protein, dice it into bite-sized pieces now and set aside. The key here is even distribution of ingredients for balanced flavor in every bite.
Cook the Eggs and Set Aside
Heat 1 tablespoon of the Vegetable Oil in a large skillet or wok over medium-high heat until shimmering. Pour in the whisked eggs and let them sit undisturbed for 5-7 seconds—this allows the bottom to set slightly before gently pushing the cooked edges toward the center with a spatula. Continue folding the eggs until they're just set but still slightly runny in the center. Remove the eggs and set them aside on a plate.
This technique creates soft, custardy eggs that won't overcook when mixed with the rice later. If the eggs look fully cooked, they'll turn rubbery when combined with the hot rice. The residual heat from the pan will finish cooking them perfectly when you add everything back together.
Stir-Fry Aromatics and Vegetables
Increase the heat to high and add the remaining 1 tablespoon Vegetable Oil to the same skillet. Add the diced yellow onion and stir-fry for 1-2 minutes until softened but not browned. Add the minced garlic cloves and cook for 30 seconds until fragrant—this prevents bitter flavors from developing.
Toss in the carrots and frozen peas, stirring constantly for 2-3 minutes until the carrots begin to soften slightly. Season immediately with 0.5 teaspoon Salt and 0.25 teaspoon Black Pepper. If using optional protein, add it now and cook for 2-3 minutes until heated through. The vegetables should retain some texture—overcooking will make the fried rice mushy.
Combine Rice and Season
Add the 4 cups Day-Old Cooked White Rice to the skillet, breaking up any clumps with your spatula. Stir-fry for 2-3 minutes, letting the rice absorb the flavors from the vegetables and aromatics. Pour in the 0.5 cup Light Soy Sauce and 1 tablespoon Sesame Oil, tossing everything together until the rice is evenly coated and glistening.
The soy sauce will help deglaze the pan, picking up all those delicious browned bits that contain concentrated flavor. This is where the magic happens—don't skip this step. The rice should look moist but not soggy, with the oil evenly distributed throughout. If it looks dry, add 1-2 tablespoons of water and stir well.
Finish and Serve
Return the eggs to the skillet and gently fold them into the rice mixture, stirring for 1-2 minutes until everything is evenly combined and heated through. The residual heat will finish cooking the eggs while keeping them tender. Taste and adjust seasoning if needed—you might want to add a bit more soy sauce for saltiness or a pinch of pepper for heat.
Transfer the fried rice to serving plates and garnish with the sliced green onions. Serve immediately while still hot and crispy. The texture should be a perfect balance—crispy edges on the rice, tender eggs, and slightly crisp vegetables. If you wait too long, the rice will lose its texture and become sticky.
Pro Tips For Making American Style Fried Rice
- CRANK THE HEAT HIGH: American fried rice starts with a screaming-hot wok or skillet—no half-measures. I used to baby this step, and my rice turned soggy before the eggs even set. Once it’s smoking, add your oil, then toss in the onions and carrots. If your pan isn’t hot enough, you’ll regret it when the rice clumps like glue.
- BREAK EGGS FIRST, THEN WAIT: Scramble your eggs in a separate bowl before adding them to the rice—this keeps them tender and prevents them from turning rubbery. After they’re just set but still slightly runny, let them sit for 30 seconds. That extra time lets them firm up properly when they hit the rice, so they don’t turn to gritty bits.
- USE COLD, DRY RICE: Day-old rice is non-negotiable, but cold rice straight from the fridge is a game-changer. Spread it on a tray to dry out for 10 minutes first—this prevents mush. I learned this the hard way when my rice turned into a sticky mess after adding peas. Cold, dry rice fries up crisp and separates perfectly.
- SAVE TIME WITH FROZEN PEAS: Skip thawing frozen peas—they’ll release moisture as they cook, and that’s exactly what you want for juicy rice. Toss them in the last 30 seconds of cooking, and resist the urge to stir them constantly. They’ll soften just enough to blend in without turning the rice mushy. (Yes, even if you’re impatient like me.)
Pro cooking tips for this dish
High Heat Mastery
American-style fried rice demands high heat—think highest setting on your stovetop—to achieve those signature crispy edges. I use a 12-inch carbon steel wok (like Mauviel) because it conducts heat like crazy, but a heavy-duty nonstick skillet works too. Preheat your pan for 2-3 minutes before adding oil—this ensures even cooking and prevents soggy rice. 🔥
Egg Scramble Secrets
The eggs are the star, so treat them right! Whisk them vigorously until the yolks and whites are fully emulsified—this prevents rubbery strands. Cook them in small batches if needed, and remove them from the pan just before they’re fully set (they’ll finish cooking when mixed with the rice). Pro tip: Use room-temperature eggs for even cooking, and add a pinch of salt to the egg mixture before scrambling. 🥚
Rice Texture Control
Day-old rice is non-negotiable—it’s drier and holds up better to stir-frying. If you’re short on time, spread freshly cooked rice on a baking sheet and microwave it for 30 seconds to dry it out. Break up any clumps with your spatula while cooking to ensure even distribution of oil and seasoning. The goal is crispy edges with tender centers—overcrowding the pan will steam the rice instead of crisping it. 🍚
Soy Sauce Timing
Add the soy sauce only after the rice and vegetables are combined—this prevents the rice from absorbing too much liquid too early. A splash of water or broth (just 1-2 tablespoons) helps distribute the sauce evenly and creates that glossy finish. Taste as you go: American-style fried rice should be savory but not salty—adjust with extra soy sauce or a pinch of sugar if needed. 🥢
Protein Prep Tips
If using protein, cook it separately and add it back at the end to keep it tender. Chicken should be fully cooked and cooled, shrimp should be pre-cooked and chilled, and beef should be seared first for extra flavor. For extra crispiness, toss the protein in 1 teaspoon cornstarch before adding it to the pan—this creates a light coating that crisps beautifully. 🍗
Sesame Oil Finish
Add the sesame oil at the very end—just before serving—to preserve its delicate aroma. A single tablespoon is enough to infuse the entire dish with nutty depth. Swirl it around the pan for 10-15 seconds before combining with the rice, then fold everything together quickly. Garnish with green onions and a sprinkle of toasted sesame seeds for that restaurant-quality touch. 🌟
Nutrition facts
Frequently asked questions
Why does this recipe use day-old rice instead of fresh?
Fresh rice is too moist and will turn mushy when stir-fried. Day-old rice has dried out slightly, giving it that perfect crispy texture on the edges while staying tender inside. For fresh rice, spread it on a baking sheet and microwave for 30 seconds to dry it out before cooking.
Can I make this with brown rice or other varieties?
This recipe works best with white rice (like Day-Ro or jasmine) because it cooks faster and absorbs flavors better. Brown rice stays too firm and absorbs too much liquid. If you prefer it, use half white rice and half brown for a healthier twist, but expect a slightly different texture.
What's the best way to add protein without drying it out?
Cook protein separately and add it back at the end to keep it tender. For chicken or shrimp, pre-cook and chill before adding. For beef, sear it first, then toss in 1 teaspoon cornstarch before stir-frying for extra crispiness. Never overcook protein in the pan—it should be heated through in 2-3 minutes max.
How do I prevent my fried rice from getting soggy?
Use high heat and avoid overcrowding the pan. Break up rice clumps while cooking, and stir frequently to promote crispy edges. If the rice looks dry, add 1-2 tablespoons water at the end, not during cooking. Serve immediately—fried rice loses texture when left sitting.
Can I make this ahead of time?
This dish is best served fresh, but you can prep components ahead: cook rice, chop veggies, and scramble eggs in advance. Store separately in the fridge for 24 hours, then combine and reheat in a skillet with 1 tablespoon oil and a splash of water to restore crispiness. Freezing isn't recommended—texture suffers after thawing.