
Desserts
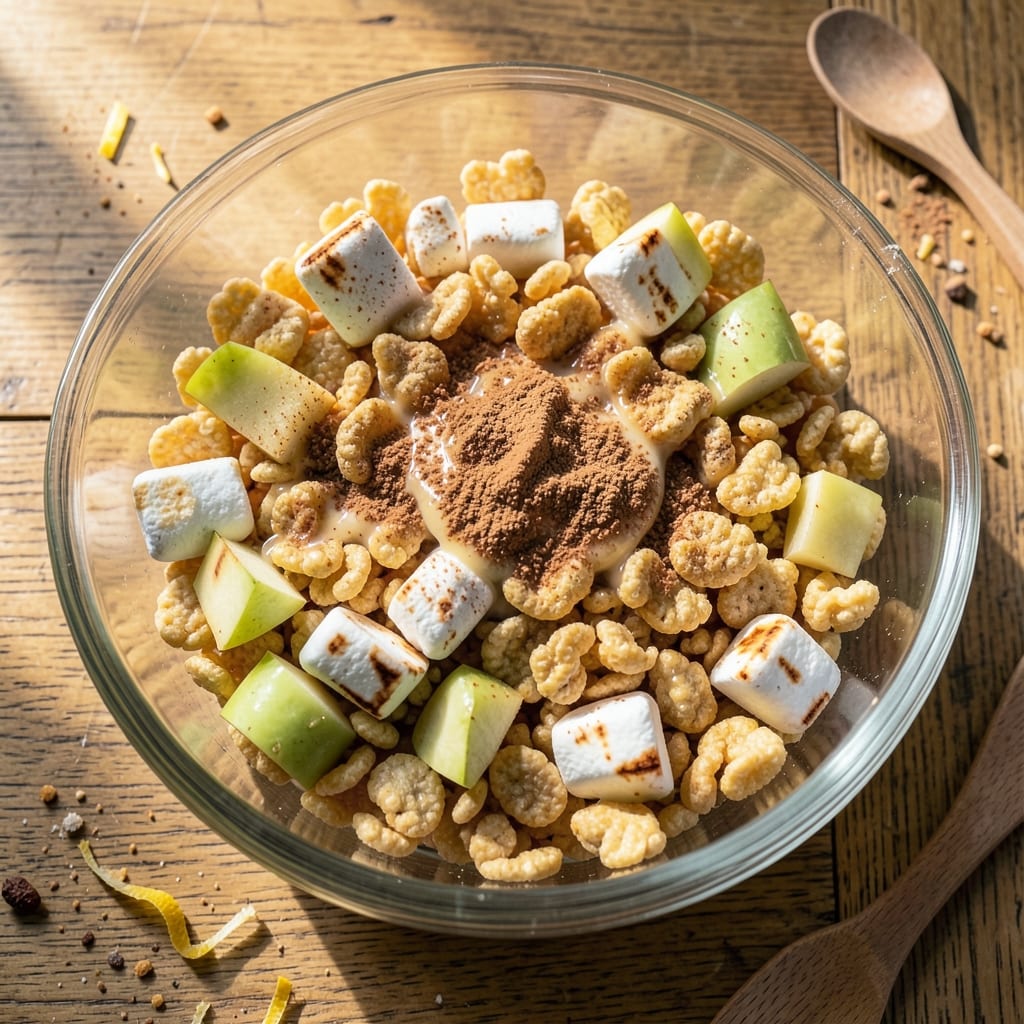
This apple rice krispies recipe transforms a childhood classic into a sophisticated dessert with warm cinnamon-spiced apples and buttery marshmallow layers. The secret lies in finely diced apples that caramelize just enough to add natural sweetness without overpowering the crispy Rice Krispies texture. I developed this version after years of experimenting with fruit-infused treats, and it consistently delivers that perfect balance of chewy marshmallow, crunchy cereal, and fresh apple flavor.
The beauty of this recipe is its simplicity—just a few ingredients come together in a single pot, then pressed into a pan for that signature bar shape. The apples soften slightly from the heat, releasing their juices to create a subtle moisture that keeps the treats from drying out. What makes it special is how the apple flavor shines through without competing with the marshmallow's sweetness, creating a dessert that's both nostalgic and unexpectedly sophisticated.
By the time these treats cool, you'll have golden-brown bars with crispy edges and a tender center, where every bite delivers layers of buttery Rice Krispies, melty marshmallow, and bursts of apple flavor. The texture is what makes them irresistible—crunchy on the outside, chewy in the middle, with just the right amount of apple sweetness throughout. They're perfect for potlucks, holiday gatherings, or a cozy weekend treat that feels like a hug in dessert form.
For extra flair, you can drizzle melted chocolate or caramel on top, or sprinkle with chopped nuts for added crunch. The recipe also works beautifully with other fruits like pear or peach if you want to experiment. Here's everything you need to create this crowd-pleasing dessert that's sure to become a new favorite.
Ingredients for apple rice krispies
Six cups of cereal, twelve ounces of marshmallows, and apples that caramelize just enough to elevate this nostalgic treat.
| Ingredient | Amount | Notes |
|---|---|---|
| Rice Krispies Cereal 🍞 | 6 cups | Original, not honey-nut variety |
| Large Marshmallows 🧸 | 12 oz | Mini marshmallows work too |
| Unsalted Butter 🧈 | ½ cup | Full-fat for best flavor |
| Granny Smith Apples 🍎 | 1 ½ lb | Peeled, finely diced (about 3 cups) |
| Light Brown Sugar 🍚 | ½ cup | Packed, not scooped |
| Ground Cinnamon 🌿 | 1 ½ tsp | Freshly ground preferred |
| Vanilla Extract 🍯 | 1 tsp | Pure extract, not imitation |
| Lemon Juice 🍋 | 1 tbsp | Freshly squeezed |
| Salt 🧂 | ¼ tsp | Fine sea salt preferred |
| Dark Chocolate Chips 🍫 | ¼ cup | For optional drizzle (optional) |
| Pecans 🥜 | ¼ cup | Chopped, for optional garnish (optional) |
The apples are the secret weapon here—Granny Smiths stay firm enough to dice finely but soften beautifully. Organic apples from the store's produce section work fine, but if you're feeling fancy, grab a couple from a local orchard in season. The key is dicing them into tiny, even pieces (about 1/4-inch)—this ensures they caramelize without turning mushy. I always peel mine first (the skin can get tough), but if you're using very ripe apples, you can leave it on for extra fiber. For the butter, Land O'Lakes or Plugrá are my go-tos—they melt smoothly and add that rich, buttery flavor that makes these treats irresistible.
No Granny Smiths? Fuji or Honeycrisp work just as well—they're sweeter but still hold their shape. Running short on marshmallows? Mini marshmallows at half the weight (so 6 oz instead of 12) will give you the same volume. The brown sugar can be swapped for white, but the molasses in light brown sugar adds depth. For extra apple flavor, add 1 tsp apple pie spice along with the cinnamon. And if you're feeling adventurous, swap half the apples for pear or peach—it changes the flavor profile completely but still works beautifully.
These treats keep for about 5 days in an airtight container at room temperature, though they're best enjoyed within 2 days for maximum crispiness. For longer storage, wrap them tightly in plastic and refrigerate for up to 1 week. I like to portion them into individual squares before serving—they're perfect for potlucks or holiday gatherings. If you're making these ahead for a party, add the chocolate drizzle and nuts right before serving so they stay fresh and crunchy. The apples soften slightly over time, so the texture is best when fresh.
Why You'll Love This Recipe
- Five-Ingredient Magic: I swear by this recipe when I’m staring into my pantry at 6:30 PM wondering what to feed the kids. You’ve got cereal, marshmallows, butter, apples, and sugar—no fancy gadgets, no stress. Just melt, mix, and let the Rice Krispies snap into place like a warm hug in cereal form.
- Tart-Sweet Crunch: That Granny Smith apple? It’s the MVP here. The sharp bite cuts through the gooey marshmallow and buttery Rice Krispies, then the brown sugar ties it all together like a perfect fall day. Honestly, it’s the kind of flavor combo that makes you want to eat it straight from the pan—no shame.
- Breakfast or Dessert: Between us, this is my secret weapon for lazy mornings or after-school snacks. Serve it warm in bowls for a nostalgic treat, or pack leftovers in jars for lunch the next day. (Yes, even on a Tuesday night.) The apples keep it fresh longer than I expected—no sad, soggy cereal here.
- Budget-Friendly Leftovers: I make a double batch every time because it’s cheap and the leftovers are ridiculously good cold. Store them in the fridge for up to a week, and they’re perfect for quick breakfasts or a 2-minute dessert. Not the prettiest, but the taste makes up for it—plus, my wallet thanks me.
Step-by-step instructions for apple Rice Krispies treats
Here's how to transform crispy cereal and melty marshmallows into a fall-inspired dessert with apple spice magic.
Cook the Apple Filling to Perfection
In a large saucepan, melt the 0.5 cup unsalted butter over medium heat. Add the 1.5 lb peeled, finely diced Granny Smith apples and cook for 8-10 minutes until they begin to soften and release their juices. This step develops the apple flavor without turning mushy.
Stir in the 0.5 cup light brown sugar, 1.5 tsp ground cinnamon, 1 tsp vanilla extract, 1 tbsp lemon juice, and 0.25 tsp salt. Bring the mixture to a gentle simmer, then reduce heat to low and cook for another 10-12 minutes until the apples are completely tender and the filling thickens slightly. You'll know it's ready when the mixture coats the back of a spoon and smells like a spiced apple orchard.
Melt Marshmallows and Butter Together
In a separate large bowl, combine the 12 oz large marshmallows and 0.5 cup unsalted butter. Microwave in 30-second intervals, stirring between each interval, until the marshmallows are completely melted and the mixture is smooth. Be careful not to overheat—you want a creamy, glossy consistency, not a grainy texture.
Stir in the cooked apple filling until fully incorporated. The mixture should be thick but still pourable. If it's too stiff, add 1-2 tablespoons of hot water to loosen it. This step is where all the flavors come together, so give it a taste test—adjust sweetness or spice if needed before proceeding.
Combine with Rice Krispies Cereal
Working quickly (the mixture sets fast), fold in the 6 cups Rice Krispies Cereal using a large spoon or spatula. Mix until every cereal piece is fully coated and glistens with the marshmallow-apple mixture. The texture should be slightly sticky but manageable—if it's too wet, add a few more cereal pieces to absorb the moisture.
For extra flavor, fold in the 0.25 cup dark chocolate chips and 0.25 cup chopped pecans if using. These optional additions add delightful pockets of flavor and texture throughout each treat. The chocolate will melt slightly from the warm mixture, creating little surprise bites in every mouthful.
Press into Pan and Cut into Squares
Transfer the mixture to a 9x13-inch baking dish lined with parchment paper or lightly greased with butter. Press firmly and evenly using a spatula or the back of a spoon. For best results, spray your hands with cooking spray to prevent sticking. Press until the mixture is compact and smooth—this ensures clean cuts later.
Let the treats cool completely at room temperature for at least 1 hour before cutting. This waiting period is crucial—it allows the marshmallow to set properly so the treats hold their shape when sliced. Once set, use a sharp knife to cut into 1-inch squares. For cleaner cuts, dip the knife in hot water and wipe dry between cuts.
Optional Chocolate Drizzle and Garnish
For an elegant finish, melt the remaining 0.25 cup dark chocolate chips with 1 teaspoon of vegetable oil in a microwave-safe bowl in 20-second intervals, stirring between each interval until smooth. Drizzle the melted chocolate over the cooled treats in decorative patterns.
Sprinkle with additional chopped pecans if desired, pressing them gently into the chocolate before it sets. These final touches add visual appeal and extra crunch. Store in an airtight container at room temperature for up to 5 days, or refrigerate for up to 10 days if you prefer them extra firm.
Pro Tips For Making Apple Rice Krispies
- TOSS APPLES COLD: Thinly sliced Granny Smiths oxidize fast—toss them in cold water with a splash of lemon juice while you prep the rest. Drain right before adding to the pan; wet slices won’t steam and ruin your crispy texture.
- MELT MARSHMALLOWS LOW: Start marshmallows on medium-low heat, stirring constantly. High heat turns them rubbery—I learned this the hard way after one batch that looked like chewy shoe leather. If they brown too fast, pull the pan off heat and stir.
- BUTTER FIRST, NOT LAST: Melt the unsalted butter first, then add brown sugar and apples. This lets the butter coat everything evenly, preventing dry cereal clusters later. Skip this, and you’ll end up with sticky, uneven pockets of flavor.
- CRUSH HALF THE KRISPIES: Reserve 1/3 of the Rice Krispies to add at the very end, crushed lightly with a rolling pin. This adds texture contrast—no one wants a mouthful of perfect squares when you could have crunchy shards too.
Troubleshooting this dish
Sticky Mixture Fix
If your apple-Rice Krispies mixture feels too wet and sticky after combining, don't panic! Simply fold in an extra ½ cup Rice Krispies Cereal (or up to 1 cup total) to absorb excess moisture. The cereal will soak up the liquid while maintaining the signature crispy texture. I've found this works best when the mixture is still warm—just a few extra cereal pieces can make all the difference. 💡
Preventing Dry Treats
Dry treats happen when the marshmallow mixture sets too quickly or the apples release too much juice. To avoid this, make sure your apples are finely diced (about ¼-inch pieces) and cook them until just tender—not mushy. Also, let the treats cool completely before cutting, as warm treats will be softer and more prone to crumbling. If they do dry out slightly, a quick fix is to reheat them in the microwave for 10-15 seconds to restore some chewiness.
Uneven Pressing Issues
If your treats aren't pressing evenly into the pan, try spraying your hands with cooking spray before pressing—this prevents sticking and makes it easier to create a smooth, even surface. For extra firmness, press the mixture into the pan in layers: spread half, press down firmly, then add the remaining mixture and press again. This two-step method ensures even distribution and cleaner cuts later. 🍎
Marshmallow Separation
Grainy or separated marshmallows usually mean overheating. To avoid this, melt marshmallows in 30-second intervals in the microwave, stirring thoroughly between each interval. If your mixture looks grainy, stir in 1 tablespoon of hot water to help dissolve the marshmallows completely. For a smoother texture, I also recommend using large marshmallows (not mini) as they melt more evenly.
Apple Filling Too Watery
If your apple filling releases too much liquid, simmer it uncovered for an extra 5 minutes to evaporate excess moisture. You can also add 1 teaspoon cornstarch mixed with 1 tablespoon water to thicken the filling before combining with marshmallows. This simple trick helps balance the texture without altering the flavor. 💧
Cutting Problems
For clean cuts, use a sharp chef's knife and dip it in hot water between slices—this prevents the treats from sticking. If your treats crumble when cutting, they likely didn't cool completely. Let them rest another 10-15 minutes before trying again. For extra firmness, chill the pan in the refrigerator for 10 minutes before cutting into squares.
Nutrition facts
Frequently asked questions
Can I use different types of apples in this recipe?
While Granny Smith apples work best for their tartness and firm texture, you can experiment with Honeycrisp, Fuji, or even pear for a sweeter twist. Just dice them finely (about ¼-inch pieces) to ensure even cooking. The key is balancing sweetness—if using sweeter apples, reduce the brown sugar to ¼ cup instead.
How do I make these treats vegan?
Swap the butter for vegan butter or coconut oil, use vegan marshmallows, and replace the dark chocolate chips with vegan chocolate chips. For extra binding, add 1 tbsp flaxseed meal mixed with 3 tbsp water to the apple mixture. The texture will be slightly denser but still delicious!
Why did my treats turn out too dry?
Dry treats usually mean the marshmallow mixture set too quickly or the apples released too much juice. To fix this, ensure your apples are finely diced and cook them until just tender (not mushy). Also, let the treats cool completely before cutting—warm treats crumble more easily. If they dry out, reheat them for 10-15 seconds in the microwave to restore chewiness.
Can I add other fruits to this recipe?
Yes! Try peaches, pears, or even cranberries for a festive twist. For best results, use about 1.5 cups of diced fruit (similar to the apples) and adjust the cooking time—softer fruits like peaches only need 5-7 minutes of simmering. The texture will vary, but the flavor combinations are delicious!
How long do these treats stay fresh?
Store them in an airtight container at room temperature for up to 5 days, or refrigerate for up to 10 days if you prefer them extra firm. For longer storage, wrap individual squares in plastic wrap and freeze for up to 3 months. Thaw at room temperature before serving.