
Side Dishes
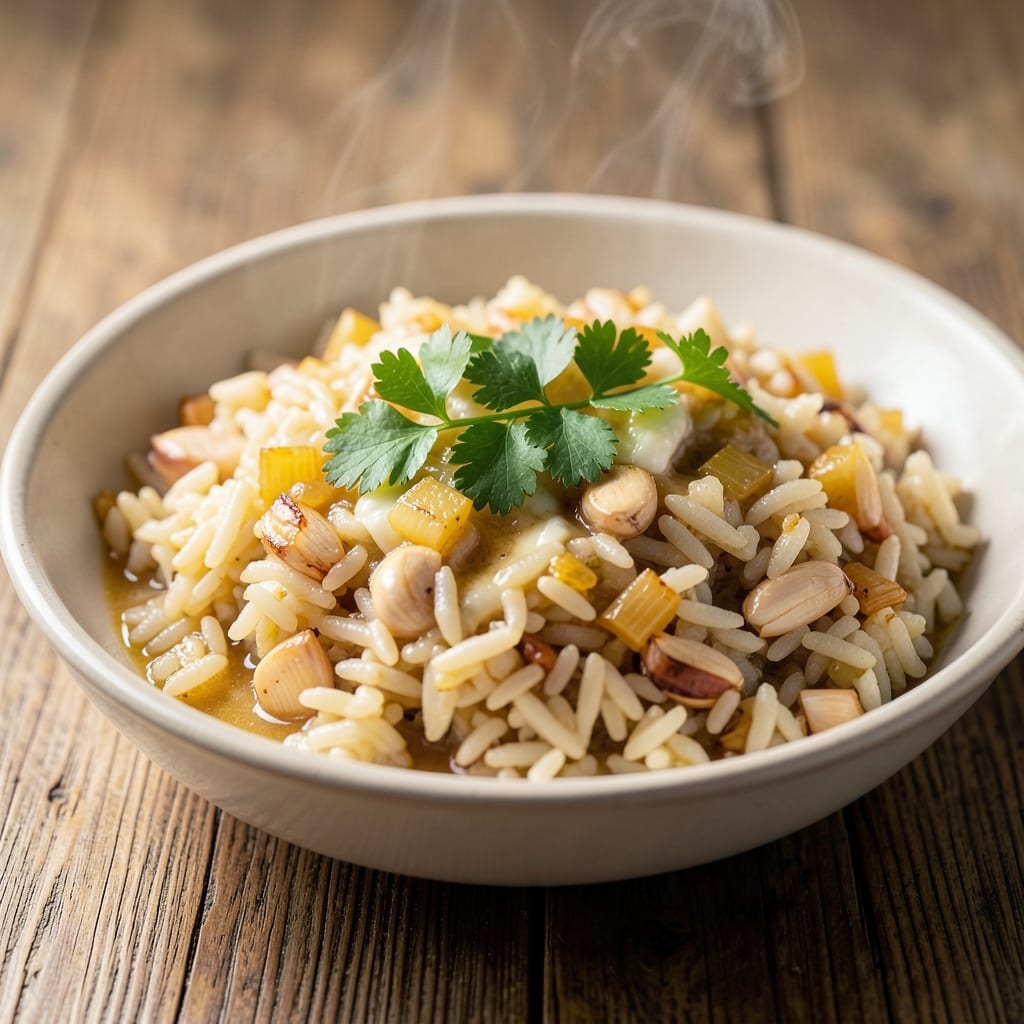
This Applebee's rice pilaf recipe delivers that signature golden-brown crisp top and creamy texture you crave. The secret lies in a perfect balance of long-grain rice, rich chicken broth, and aromatic herbs that transform ordinary rice into a restaurant-worthy side dish. I've recreated the technique that makes this pilaf stand out on any menu, with just the right amount of butter for that signature richness.
What sets this recipe apart is the two-stage cooking process that creates that coveted crispy top while keeping the interior perfectly tender. You'll start with a flavorful base of sautéed onions and garlic, then build layers of savory broth and herbs. The final step—broiling for that signature crust—is where the magic happens, giving you that perfect balance of textures in every bite.
By the time you serve this pilaf, you'll have a dish that's creamy, aromatic, and topped with that irresistible golden crust. The combination of tender rice, savory broth, and herby notes creates a side that's substantial enough to serve as a main course or perfect for complementing grilled meats. The aroma alone will have everyone at the table asking for seconds.
This recipe serves 6-8 and comes together in about 45 minutes, making it ideal for family dinners or special occasions. The ingredients are simple—just rice, broth, butter, and herbs—but the technique elevates them to restaurant-quality perfection. Let's get started on recreating this classic side dish at home.
Ingredients for applebee's rice pilaf
Simple ingredients, restaurant-quality technique—just rice, butter, and herbs for that signature crispy top.
| Ingredient | Amount | Notes |
|---|---|---|
| Long-Grain White Rice 🍚 | 2 cups | Uncooked, like jasmine or basmati |
| Chicken Broth 🍲 | 3 cups | Low-sodium preferred, homemade or store-bought |
| Unsalted Butter 🧈 | 4 tbsp | Cold, cut into small cubes |
| Yellow Onion 🧅 | 1 whole | Medium size, finely diced |
| Garlic Cloves 🧄 | 3 cloves | Fresh, minced finely |
| Fresh Parsley 🌿 | ¼ cup | Chopped, stems removed |
| Dried Thyme 🌿 | 1 tsp | Or 1 tbsp fresh thyme |
| Salt 🧂 | 1 ½ tsp | Adjust to taste, kosher preferred |
| Black Pepper 🌶️ | ½ tsp | Freshly ground for best flavor |
| Heavy Cream 🥛 | ¼ cup | Optional for extra creaminess |
| Lemon Juice 🍋 | 1 tbsp | Freshly squeezed, brightens flavors |
The rice is the star, so grab jasmine or basmati—they hold up best to the two-stage cooking. Trader Joe's has great bulk bins for both, or check the Asian aisle at Walmart. For the butter, don't use salted—it'll make the pilaf too salty. Cold butter cubes melt beautifully during cooking, creating that signature richness. The onion and garlic should be finely diced (almost paste-like)—this builds flavor fast. I always double-check my broth is low-sodium, because we're adding extra salt later. Pro tip: Swanson or Pacific Foods are my go-to brands for good-quality, low-sodium broth.
No fresh parsley? Dried works at half the amount, but fresh gives that pop of color. Short on thyme? Italian seasoning at the same quantity works in a pinch. The heavy cream is optional but makes the pilaf extra luscious—skip it if you're watching calories. For the lemon juice, Meyer lemons from the grocery store have that perfect balance of sweet and tart. The secret to the crispy top? Cold butter on top before broiling—don't skip this step! And if you're making this ahead, the pilaf actually tastes better the next day as flavors meld together.
This pilaf reheats beautifully—just add a splash of water or broth and cover to steam. Keeps in the fridge for 4-5 days sealed tightly. For freezing, portion into single-serving containers—they reheat perfectly for quick lunches. The crispy top gets softer when reheated, so if you want to revive it, broil for 2-3 minutes after adding a pat of butter. Double the recipe if you're feeding a crowd—it's that good.
Why You'll Love This Recipe
- One-Pot Magic: I swear by this trick—just toss everything in one pot, stir once, and walk away. The rice cooks up fluffy and separate, not that mushy, sad pile I used to get when I overthought it.
- Garlic-Butter Bliss: That moment when the butter melts into the toasted onions and garlic? Pure satisfaction. It’s rich but not heavy, with just enough savory depth to make you want to eat it straight from the pan.
- Weeknight Workhorse: I make this when I’m feeding the whole family on a Tuesday. It pairs with grilled chicken, steak, or even just a salad—no one ever complains, and it’s always the first thing gone.
- Budget-Friendly Staple: Long-grain rice and chicken broth are cheap, but this tastes like a restaurant dish. I double the batch and freeze half; thaw it for busy nights when I don’t want to cook. Smart, simple, and always a win.
Step-by-step instructions for Applebee's-inspired rice pilaf
Here's how to recreate that signature crisp-topped, golden-brown pilaf—every bite perfect.
Sauté Onions and Garlic Until Translucent
Melt the 4 tablespoons unsalted butter in a large skillet over medium heat. Add the finely diced whole yellow onion and cook for 5-6 minutes, stirring occasionally, until soft and translucent. You'll know it's ready when the onion edges start to turn just slightly golden.
Push the onions to one side of the pan and add the 3 minced garlic cloves. Cook for 30 seconds until fragrant—don't let it brown, or it'll turn bitter. Stir everything together and remove from heat temporarily. This aromatic base is the flavor foundation for your pilaf.
Toast the Rice Until Golden
Return the skillet to medium heat and add the 2 cups long-grain white rice. Stir constantly for 3-4 minutes until the rice grains become translucent at the edges and develop a slight golden color. This toasting step prevents mushy rice and builds depth of flavor.
I like to press down gently on the rice with a wooden spoon during the last minute—this ensures even contact with the pan and prevents any uncooked spots. You're looking for rice that's dry but just starting to turn golden, not brown.
Deglaze and Simmer with Broth
Pour in the 3 cups chicken broth all at once and bring to a gentle boil. Immediately reduce heat to low and cover the skillet with a tight-fitting lid. Let it simmer undisturbed for 15 minutes—this is where the rice absorbs the broth evenly without turning mushy.
Here's the thing—don't peek or stir during this time. Every time you lift the lid, you release steam and potentially dry out the rice. After 15 minutes, check the liquid level—it should be mostly absorbed but with a little remaining. If it's completely gone, add 2-3 tablespoons water to prevent burning.
Create the Signature Crispy Top
Remove the lid and increase heat to medium-high. Let the top layer dry out for 3-4 minutes until it develops a golden-brown crust. This is the signature Applebee's touch—don't rush it, or the top won't be crisp enough. You'll see the edges start to darken and pull away slightly from the pan.
While the top crisps, stir in the 1 teaspoon dried thyme, 1.5 teaspoons salt, and 0.5 teaspoon black pepper. The thyme should be evenly distributed throughout the rice. This is also when you want to add the 0.25 cup heavy cream (if using) and 1 tablespoon lemon juice for that bright, restaurant-quality finish.
Fluff and Garnish Perfectly
Remove from heat and let sit covered for 5 minutes. Then, using a fork, gently fluff the rice from the bottom up to separate the grains. This prevents a dense, compact texture. The crispy top will still hold its structure while the interior stays tender.
Transfer to a serving dish and sprinkle with the 0.25 cup chopped fresh parsley. The parsley adds freshness and makes the dish look restaurant-worthy. Serve immediately while the crispy top is still perfect—this pilaf doesn't reheat well once that golden crust forms.
Pro Tips For Making Applebee'S Rice Pilaf
- TOAST THE GARLIC RIGHT: Skip the soft, mushy garlic—sauté those minced cloves in butter until they’re golden and smell like a restaurant kitchen. I learned this the hard way: undercooked garlic just tastes like a missed opportunity. Let them brown for 30 seconds after the onions soften, or the whole dish will lack depth.
- USE COLD BROTH: Applebee’s pilaf stays fluffy because the broth starts cold. Hot broth cooks the rice unevenly and turns it gummy. Measure your chicken broth, let it sit out for 10 minutes, or even chill it briefly—your rice will thank you with perfect texture.
- STIR ONCE, THEN LEAVE IT: The second you stir that rice after adding broth, you risk breaking the grains. After mixing in the butter-onion-garlic base, give it one gentle stir, then walk away. Cover and let it steam undisturbed for 15 minutes—no peeking, no stirring. Trust the process.
- BUTTER IS YOUR FLAVOR INSURANCE: Don’t skimp on the butter—this isn’t a diet dish. Use at least 2 tablespoons for every cup of rice, and let it melt fully into the onions before adding broth. The fat coats the rice, making every bite richer. (Yes, even if you’re watching calories.)
Best sauces and condiments for applebee's rice pilaf
Creamy Garlic Sauce
For an extra-rich version, stir in ¼ cup heavy cream during the final 3 minutes of cooking. I like to add 1 tbsp lemon juice too—it brightens the flavors and balances the richness. The cream should be warmed gently to prevent curdling. This sauce works perfectly as a topping or mixed into the pilaf itself for that signature Applebee's texture. 🥛
Herb Butter Drizzle
Melt 2 tbsp unsalted butter with 1 tsp dried thyme and ½ tsp garlic powder in a small saucepan over low heat. Once melted, drizzle this fragrant butter over the finished pilaf right before serving. The butter adds another layer of richness while the herbs tie everything together beautifully. I keep this mixture ready in my fridge for quick use. 🧈
Lemon-Herb Vinaigrette
Whisk together 2 tbsp olive oil, 1 tbsp lemon juice, 1 tsp Dijon mustard, and 1 tbsp chopped parsley for a bright, tangy drizzle. This works wonderfully as a finishing touch for the pilaf, especially if you're serving it alongside grilled meats. The acidity cuts through the richness while adding freshness. I often make this ahead and store it in a small jar. 🍋
Garlic Aioli
Blend ½ cup mayonnaise, 1 minced garlic clove, 1 tsp lemon juice, and a pinch of salt until smooth. Spread a thin layer of this aioli on top of the pilaf after broiling for that signature crispy texture. The garlic complements the thyme beautifully while adding a creamy contrast. I use Hellmann's for consistent results. 🧄
Cheesy Broth Topping
Mix ¼ cup shredded cheddar cheese with 2 tbsp chicken broth until smooth. Spread this mixture over the pilaf during the final 2 minutes of broiling. The cheese melts into a creamy sauce while creating a golden crust. This variation is perfect for those who love extra cheesy flavors. 🧀
Spicy Yogurt Drizzle
Combine 2 tbsp Greek yogurt, ½ tsp lemon juice, and a pinch of cayenne pepper for a tangy, spicy topping. Drizzle this over the pilaf just before serving to add a cool contrast to the warm rice. The yogurt also helps balance any richness in the dish. I keep this mixture in a small container in my fridge for quick access. 🌶️
Nutrition facts
Frequently asked questions
Can I use instant rice for this Applebee's-style pilaf?
Not ideal! Instant rice cooks too quickly and won't develop that signature crispy top or creamy texture. For best results, stick with long-grain white rice (jasmine or basmati) that needs about 15 minutes of cooking time. If you're short on time, use pre-rinsed rice to save 5 minutes on preparation.
What's the secret to getting that perfect crispy top?
The magic happens in two steps: first, cook the rice uncovered on medium-high heat for 3-4 minutes after removing the lid, and second, spread 1 tablespoon cold butter on top before broiling for 2-3 minutes until golden. The cold butter creates steam that crisps the surface beautifully.
Can I make this pilaf ahead of time?
Cook it completely (including the crispy top), then let it cool. Store in an airtight container for up to 4 days in the fridge. To revive the crispy top, broil for 2 minutes after adding a pat of butter. The flavors actually improve overnight as they meld together.
What's the best way to reheat leftovers?
Add 2 tablespoons water or broth to the pan, cover tightly, and heat on low for 5 minutes. Then fluff with a fork. For extra crispiness, broil for 1-2 minutes after adding a bit of butter. Never microwave—it makes the rice gummy. The crispy top won't be as perfect but the flavor stays excellent.
Can I substitute chicken broth with vegetable broth?
Yes, but reduce the salt by half a teaspoon since vegetable broth is usually less salty. The flavor will still be delicious, though slightly more herb-forward. For a meaty taste, add 1 teaspoon soy sauce to the broth before cooking. This works perfectly for vegetarian versions.