
Main Courses
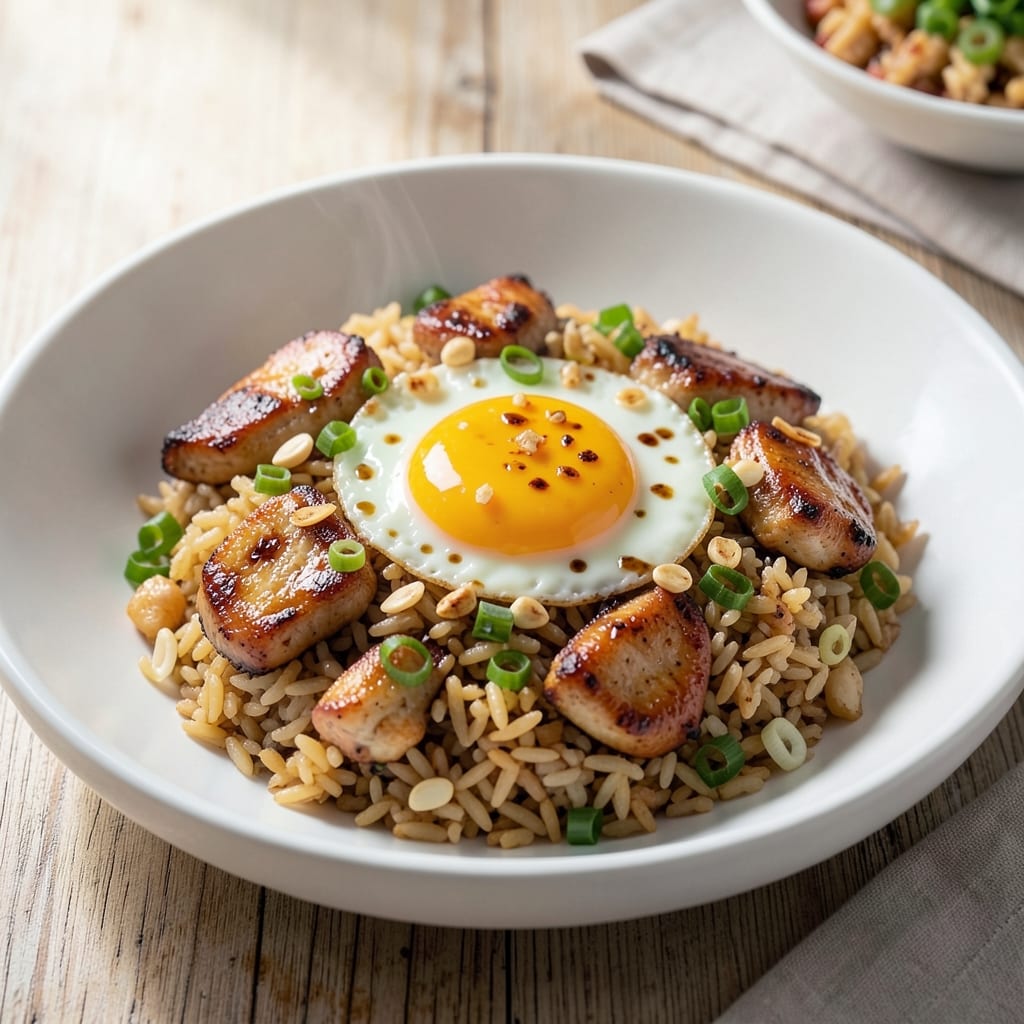
This Arashi fried rice recipe brings the smoky, buttery richness of Japanese home cooking to your kitchen with perfect balance—crispy edges, tender egg, and aromatic garlic butter that transforms simple rice into a restaurant-worthy dish. The secret lies in high-heat stir-frying and a technique that keeps every grain distinct while building layers of flavor through quick cooking and precise seasoning.
What sets this recipe apart is the smoky garlic butter crunch—a signature element that elevates ordinary fried rice into something special. We start with day-old rice (never fresh!) for ideal texture, then build flavor through a crispy egg base, savory protein (chicken, shrimp, or tofu), and a fragrant blend of garlic, soy sauce, and sesame oil. The result is a dish that’s both comforting and sophisticated, with each bite offering a mix of textures and umami depth.
By the time you’re done, you’ll have perfectly crispy fried rice with golden-brown egg ribbons, tender protein, and a sauce that clings to every grain without making it soggy. The aroma alone—smoky, garlicky, and slightly sweet—will have everyone at the table asking for seconds. This recipe delivers restaurant-quality results with minimal effort, making it perfect for weeknight dinners or impressing guests.
The beauty of Arashi fried rice is its versatility—swap proteins, adjust seasonings, or add veggies like peas or carrots to suit your taste. Garnish with green onions or sesame seeds for freshness and crunch. Let’s get cooking!
Ingredients for arashi fried rice
Eight essential ingredients plus optional veggies for that signature smoky, buttery crunch.
| Ingredient | Amount | Notes |
|---|---|---|
| Day-Old Cooked White Rice 🍚 | 4 cups | Cold or room temperature preferred |
| Large Eggs 🥚 | 4 whole | Room temperature for even cooking |
| Boneless Chicken Breast 🍗 | 1 lb | Diced into 0.5-inch pieces |
| Unsalted Butter 🧈 | 4 tbsp | European-style preferred for flavor |
| Garlic Cloves 🧄 | 6 cloves | Minced finely for aroma |
| Light Soy Sauce 🥄 | 3 tbsp | Or tamari for gluten-free |
| Sesame Oil 🫒 | 1 tbsp | Toasted sesame oil for aroma |
| Vegetable Oil 🫒 | 2 tbsp | High smoke point for stir-frying |
| Green Onions 🧅 | 3 whole | Sliced thin for garnish |
| Toasted Sesame Seeds 🌾 | 1 tbsp | For crunchy garnish |
| White Pepper 🌶️ | ½ tsp | Freshly ground preferred |
| Salt 🧂 | ½ tsp | Adjust to taste |
| Peas (optional) 🌽 | ½ cup | Frozen works perfectly |
| Carrots (optional) 🥕 | ½ cup | Diced small for texture |
The butter and garlic are the stars here—don't skimp. European-style butter has more flavor, and fresh garlic makes all the difference. For the rice, day-old is non-negotiable—fresh rice turns mushy. I grab mine from Trader Joe's because their pre-cooked rice stays perfect. Chicken breast is lean, so cut it small for even cooking. If you're using shrimp or tofu, adjust the cooking time—they cook faster than chicken.
No soy sauce? Coconut aminos work, though the flavor will be slightly different. Short on sesame oil? Toast sesame seeds in a dry pan first—they'll add crunch and aroma. The eggs need to be room temperature—cold eggs curdle in hot oil. For extra flavor, mix a pinch of white pepper into the soy sauce before adding it to the rice. The optional veggies? Frozen peas are perfect—they're pre-cooked and add sweetness without sogginess.
This reheats beautifully—just add a splash of water and stir-fry for 2 minutes. Keeps for 3 days in the fridge, freezes for 1 month. I always make a double batch because it's that good. Store extras in airtight containers with parchment paper between layers to keep it crispy. Garnish with green onions and sesame seeds right before serving—that's when it's at its best.
Why You'll Love This Recipe
- One-Pan Magic: I swear by this—no chopping boards, no extra dishes. Just toss the cold rice, scrambled eggs, and chicken into one pan with butter and garlic, and let the heat do the work. Even my "I can't cook" friend nailed it.
- Garlic Butter Bliss: That moment when the butter melts into the rice, coating every grain with garlic richness? Pure satisfaction. The eggs get crispy edges, the chicken stays juicy, and the whole thing smells like a hug from a food truck.
- Lunchbox Hero: Pack it cold or reheat it—this fried rice holds up like a champ. I make a big batch on Sundays, and by Wednesday, it’s still the star of my lunch. Honestly, my kids would eat it plain if I let them.
- Budget Win: Chicken breast and day-old rice stretch into a meal that feeds four for under $10. No fancy ingredients, no waste—just reliable, filling comfort food that doesn’t break the bank. (Yes, even on a Tuesday night.)
Step-by-step instructions for Arashi fried rice
Here's how to make this smoky, garlicky fried rice with perfect eggy richness and buttery crunch.
Prep and Cook the Chicken
Cut the 1 lb boneless chicken breast into ½-inch pieces and set aside. Heat 1 tablespoon of the vegetable oil in a large skillet over medium-high heat. Add the chicken and cook for 4-5 minutes until it turns opaque and loses its pink color. The chicken should be fully cooked through but still juicy—don't overcook or it'll dry out. Transfer the chicken to a plate and set aside.
Here's the thing—this step sets the foundation for flavor. The chicken needs to be fully cooked but still tender, so medium-high heat is key. If you see any juices running clear when you cut into it, you're golden. Keep the cooked chicken warm while you move to the next steps.
Scramble the Eggs Perfectly
In the same skillet (no need to clean it—the flavor's in there), reduce heat to medium and add 2 tablespoons of the unsalted butter. Let it melt completely, then add the 4 whole large eggs. Scramble them gently with a spatula, stirring constantly until they're just set but still slightly runny in the center—about 2-3 minutes. This creates that signature eggy richness without making them rubbery.
I press down gently on the eggs during the first minute to help them cook evenly. You'll know they're ready when they form soft curds but still have a slight sheen—this is what makes fried rice so satisfying. Remove the eggs from the skillet and set them aside with the chicken.
Stir-Fry the Garlic Butter Base
Increase heat to medium-high and add the remaining 1 tablespoon vegetable oil and 2 tablespoons of the unsalted butter to the skillet. Once the butter foams, add the 6 cloves minced garlic and cook for 30 seconds until fragrant but not browned—you want aroma, not bitterness. Then add the 4 cups day-old cooked white rice, breaking up any clumps with your spatula.
This is where the magic happens. The garlic should sizzle just enough to release its aroma but not burn. You'll see the rice start to take on color as it heats through. If you're using the optional ½ cup peas and ½ cup carrots, add them now and stir for 1 minute to warm them through.
Combine Everything and Season
Return the chicken and eggs to the skillet with the rice. Add the 3 tablespoons light soy sauce, 1 tablespoon sesame oil, ½ teaspoon white pepper, and ½ teaspoon salt. Stir everything together vigorously for 2-3 minutes until the rice is heated through and the flavors meld together. The rice should be hot all the way through with no cold spots.
Taste and adjust seasoning if needed—you might want to add a bit more soy sauce or salt depending on your preference. The rice should be flavorful but not overly salty. This is the moment that matters: all those individual components coming together into one cohesive, delicious dish.
Finish and Garnish
Remove the skillet from heat and let it sit for 1 minute. Then transfer the fried rice to serving plates. Garnish with the 3 whole green onions (sliced thin) and 1 tablespoon toasted sesame seeds. The green onions add freshness while the sesame seeds bring that nutty crunch we all love.
Serve immediately while it's hot and the aromas are at their peak. Each bite should deliver that perfect combination of smoky garlic, buttery richness, eggy goodness, and savory soy sauce. This dish is all about balance—crispy edges, tender chicken, and that signature eggy texture that makes fried rice so special.
Pro Tips For Making Arashi Fried Rice
- CRACK THE EGGS FIRST: I used to scramble the eggs last, but they’d turn rubbery by the time everything else was done. Crack those eggs into a bowl, scramble them before you start cooking the chicken—just until they’re soft and slightly runny, then set aside. When you’re ready to fold them in, they’ll melt into the rice like silk.
- SLICE CHICKEN THIN: Boneless chicken breast is forgiving, but not when you cut it like a steak. Thin slices—about ¼-inch thick—cook faster and stay juicy. Cut against the grain, and don’t overcrowd the pan. If you’re impatient like me, you’ll end up with dry chunks.
- USE DAY-OLD RICE: Fresh rice is a disaster in fried rice—it turns mushy and gummy. Break up clumps in the dry rice before heating it, then spread it on a tray to cool overnight. Cold, dry rice fries up crisp and separate, so every grain gets that perfect toasty bite.
- SALT THE BUTTER HARD: Unsalted butter is your friend, but don’t skimp on the salt. Toss in a pinch before melting it—more than you think, especially if your chicken or eggs weren’t salted earlier. The butter carries flavor, and you want every bite to taste rich, not bland. Trust me, your taste buds will notice.
Pro cooking tips for this dish
High-Heat Stir-Fry Mastery
Arashi fried rice thrives on high heat—your wok or skillet should be screaming hot before adding any oil. I crank my burner to medium-high and let it sit for 1-2 minutes until a drop of water sizzles violently. This prevents steaming and ensures crispy edges on every grain. Use a 12-inch cast-iron skillet or carbon steel wok for even heat distribution—I swear by my Mauviel M'Cook for this. 🔥
Never overcrowd the pan—cook in batches if needed. I aim for ½-inch depth of rice per stir-fry session. The rice should sizzle and develop a golden crust within 30 seconds of contact. If it sticks, your heat isn't high enough or your oil isn't hot enough. Add more oil in ½ tablespoon increments until it releases cleanly.
Egg Texture Secrets
The eggs are the heart of this dish, and low-and-slow scrambling is key. Start with medium heat (not high!) and use a heatproof spatula to gently fold the eggs. The moment they begin to set, press down with the spatula to create thin, even ribbons—this is what gives fried rice its signature eggy richness. I like mine just set but still slightly glossy—about 75% cooked when removed.
Pro tip: Add a pinch of white pepper to the eggs before scrambling. It enhances their flavor without overpowering. Also, room-temperature eggs scramble perfectly—cold eggs from the fridge will curdle and turn rubbery. I pull mine from the fridge 30 minutes before cooking to ensure even texture. 🥚
Garlic Butter Timing
The garlic butter base is where the smoky magic happens, and timing is everything. Add the minced garlic to the hot oil just before the rice goes in—cook it for exactly 30 seconds until fragrant but not browned. Overcooking garlic turns it bitter, which ruins the delicate balance of flavors in fried rice. I use European-style butter (like Plugrá) because it has a higher fat content that creates better foam and flavor.
For extra depth, I toast the garlic in the butter off-heat for 10 seconds after removing from the stove. This caramelizes just enough to add a nutty undertone without burning. The butter should foam but not brown—if it does, reduce your heat next time. This step is non-negotiable for that restaurant-quality crunch.
Rice Texture Control
Day-old rice is non-negotiable—fresh rice releases too much moisture and turns mushy. Break up any clumps with your spatula as you add it to the pan, and stir vigorously for the first 30 seconds to separate the grains. The rice should sizzle and pop—this indicates it's heating through properly. If it looks dry, add 1 teaspoon water and stir immediately.
For extra crispiness, I finish the rice by spreading it in a single layer on a cool plate for 30 seconds before returning it to the pan. This creates a crispy exterior while keeping the interior tender. The goal is distinct grains with crunchy edges—not a mushy, glued-together mess. 🍚
Seasoning Balance
The soy sauce is your flavor anchor, but don't overdo it. Start with 3 tablespoons and taste as you go—you can always add more, but you can't take it out. I also mix ½ teaspoon white pepper directly into the soy sauce before adding it to the rice. This adds subtle heat without overpowering the dish. The sesame oil should be added last—just 1 tablespoon—to enhance aroma without dominating.
For a deeper umami boost, I add ½ teaspoon fish sauce (like Red Boat) to the soy sauce mixture. It's a secret weapon that elevates the dish without changing its Japanese identity. Taste as you stir—fried rice should be savory, slightly sweet, and aromatic, not salty or bland. The seasoning should cloak the rice but not drown it. ✨
Nutrition facts
Frequently asked questions
Why does the recipe specify day-old rice instead of fresh?
Fresh rice releases too much moisture when stir-fried, making it mushy and gluey. Day-old rice has firmer grains that absorb flavors better and develop crispy edges when cooked properly. If you only have fresh rice, spread it on a tray and refrigerate for 1-2 hours before using.
Can I make this with shrimp instead of chicken?
Shrimp cooks much faster than chicken, so add it to the pan just before combining everything with the rice. Use ½ lb shrimp (peeled and deveined) and cook for only 1-2 minutes until pink. The texture will be slightly different but equally delicious.
How do I prevent the rice from turning out soggy?
High heat is your best friend—your pan should be screaming hot before adding oil. Use medium-high heat and stir constantly for the first 30 seconds to separate grains. If it looks dry, add just 1 teaspoon water and stir immediately. Never cover the pan while cooking.
What's the best way to reheat leftover Arashi fried rice?
Reheat in a dry skillet over medium heat for 2-3 minutes, stirring frequently. For extra crispiness, add ½ teaspoon sesame oil while reheating. Microwaving works but makes it rubbery—always use a pan for best results.
Is this recipe gluten-free?
Not traditionally, but you can easily adapt it! Replace regular soy sauce with tamari or coconut aminos. Check all other ingredients (like sesame oil) to ensure they're certified gluten-free. The flavor will be slightly different but still delicious.