
Main Courses
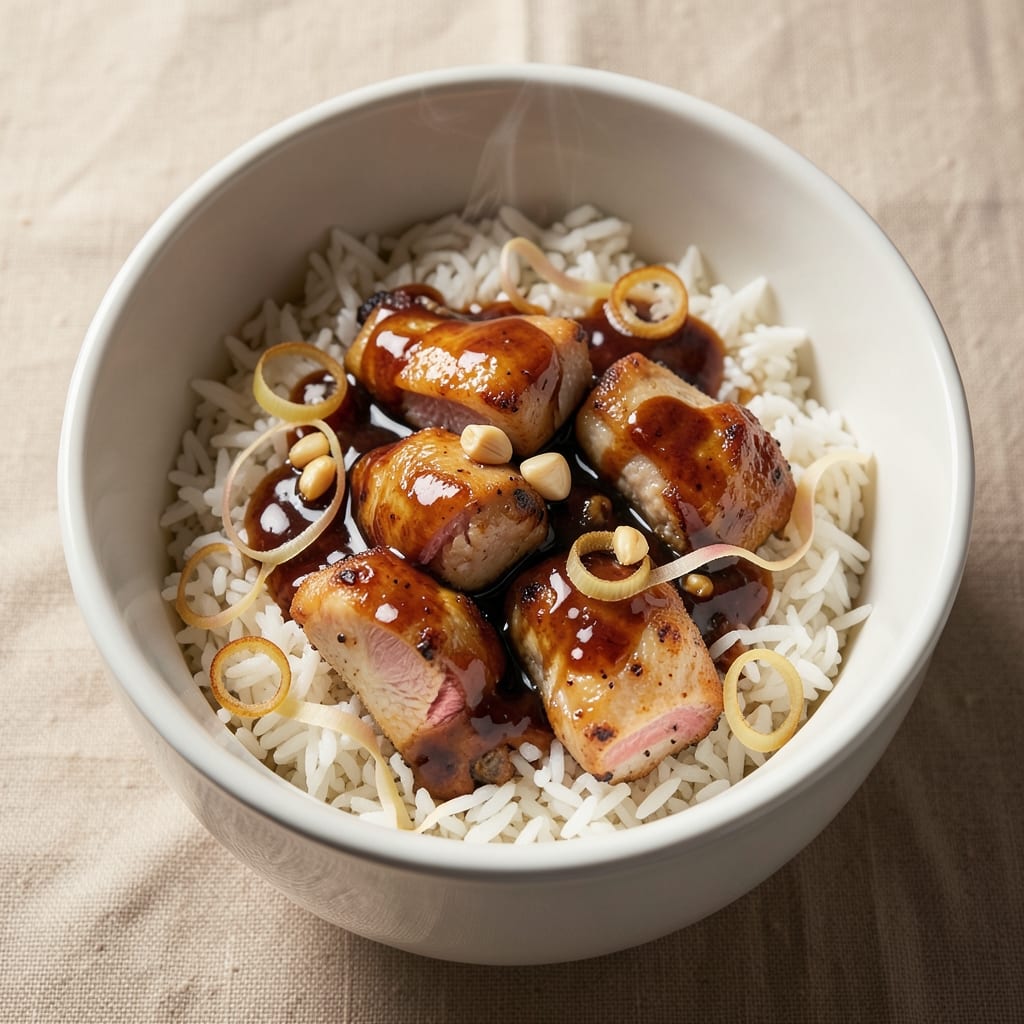
This one-pot aroma rice cooker chicken and rice transforms weeknight dinners into restaurant-quality meals with minimal effort. The secret lies in perfectly seasoned chicken thighs that cook alongside fragrant jasmine rice, creating golden, crispy grains that cling to every bite. No stovetop monitoring or complex techniques—just set it, forget it, and enjoy a complete meal ready in under an hour.
The beauty of this method is its simplicity: tender chicken infused with garlic, ginger, and soy sauce pairs seamlessly with rice that develops a subtle crust from the rice cooker's steam. The result is a cohesive dish where every component harmonizes—juicy protein, aromatic rice, and a savory broth that reduces naturally. Ideal for busy schedules, this recipe delivers professional results without the fuss of multiple pots or precise timing.
Ingredients for aroma rice cooker chicken and rice
Fourteen ingredients, one pot, restaurant-quality golden crisp rice with tender chicken.
| Ingredient | Amount | Notes |
|---|---|---|
| Boneless, Skinless Chicken Thighs 🍗 | 1 ½ lb | Cut into bite-sized pieces |
| Jasmine Rice 🍚 | 1 ½ cups | Uncooked, long-grain preferred |
| Garlic Cloves 🧄 | 4 cloves | Minced for aromatic base |
| Fresh Ginger 🌿 | 1 ½ tbsp | Grated, finely chopped |
| Low-Sodium Soy Sauce 🥄 | ¼ cup | For umami depth |
| Honey 🍯 | 1 tbsp | For subtle sweetness |
| Vegetable Oil 🫒 | 1 tbsp | High smoke point |
| Water 💧 | 2 cups | For rice cooking |
| Chicken Broth 🍲 | ½ cup | Low-sodium preferred |
| Sesame Oil 🫒 | ½ tbsp | For finishing aroma |
| Diamond Crystal Kosher Salt 🧂 | ½ tsp | Adjust to taste |
| Ground Black Pepper 🌶️ | ¼ tsp | Freshly ground |
| White Pepper 🌶️ | ¼ tsp | For elegant finish |
| Fresh Green Onions 🧅 | ¼ cup | Sliced for garnish |
The chicken thighs are the foundation—bone-in, skin-on if you can find them, as they render fat for extra flavor. Costco or local butchers often carry them at better prices than grocery stores. Jasmine rice is non-negotiable here; its delicate aroma pairs perfectly with the savory chicken. For the ginger, fresh is essential—dried lacks the bright punch. If you're using pre-minced garlic, squeeze out excess moisture to prevent watery rice. The soy sauce should be low-sodium to avoid over-salting the dish.
No jasmine rice? Basmati or long-grain white works in a pinch, though texture will differ slightly. Short on chicken thighs? Breasts work too, but they dry out faster—cut them smaller for even cooking. The sesame oil might be hard to find in regular grocery stores; Asian markets or Trader Joe's carry it reliably. For extra depth, add a 1 tsp fish sauce (if not avoiding fish products) or an additional 0.5 tbsp soy sauce for umami. The green onions can be swapped for cilantro or scallions if preferred.
This dish reheats beautifully—microwave 2 minutes covered or 10 minutes in a 350°F oven for best results. Store leftovers in an airtight container for up to 4 days; the rice texture holds up better than most rice dishes. For meal prep, double the recipe and freeze portions—thaw overnight in the fridge before reheating. The golden crust forms during the final 5 minutes of cooking, so don't peek at the rice cooker! If making ahead, add the sesame oil and green onions just before serving.
Why You'll Love This Recipe
- One-Pot Magic: The rice cooker does all the work—no stovetop babysitting, no burning rice. Just toss in the chicken thighs, whole garlic cloves, and ginger slices with the rice, add a splash of soy sauce, and let it steam into golden perfection. Honestly, I’ve made this while scrolling through my phone.
- Garlic-Ginger Bomb: That first bite? Crispy chicken with a punch of fresh ginger and garlic so deep it lingers. The low-sodium soy sauce ties it all together without overpowering—just enough umami to make your taste buds do a happy dance.
- Lunchbox Hero: Pack the leftovers cold or reheat them—both work. The rice stays fluffy, the chicken stays juicy, and it’s the kind of meal that makes you the office favorite. (Yes, even on a Tuesday night.)
- Budget Win: Chicken thighs are forgiving and cheap, and a single batch stretches for four meals. Between us, this recipe saved me $50 last month by cutting takeout in half. Plus, the aroma alone makes the house feel like a restaurant.
Step-by-step instructions for aroma rice cooker chicken and rice
This one-pot method delivers perfectly balanced flavor and texture every time.
Prepare the Chicken and Aromatics
Cut the 1.5 lb boneless, skinless chicken thighs into bite-sized pieces, about 1-inch cubes. This size ensures even cooking and quick absorption of flavors. In a small bowl, combine the 4 cloves minced garlic, 1.5 tbsp finely grated fresh ginger, 0.25 cup low-sodium soy sauce, 1 tbsp honey, 0.5 tsp Diamond Crystal kosher salt, 0.25 tsp ground black pepper, and 0.25 tsp white pepper. Mix well to create a cohesive marinade.
Transfer the chicken pieces to the marinade and toss gently to coat evenly. Let them sit for 10 minutes at room temperature while you prepare the rice cooker. This brief marinating time infuses the chicken with flavor without overpowering its natural taste. The honey in the marinade will also help create a subtle caramelized crust during cooking.
Sear the Chicken in the Rice Cooker
Add 1 tbsp vegetable oil to the bottom of your Aroma rice cooker and spread it evenly using a silicone spatula. Heat the cooker on high for 2 minutes until the oil shimmers. Add the marinated chicken pieces in a single layer and cook for 3-4 minutes until they develop a light golden-brown crust on the bottom.
This searing step is crucial—it locks in juices and builds flavor through the Maillard reaction. Don't overcrowd the cooker or the chicken will steam instead of brown. If the chicken releases easily from the bottom, it's ready for the next step. If it sticks, wait another minute before proceeding.
Layer the Rice and Liquid
Add the 1.5 cups uncooked jasmine rice to the cooker, spreading it evenly over the chicken pieces. This layering ensures each grain gets exposed to the chicken's flavorful juices. Pour in the 2 cups water and 0.5 cup chicken broth until the liquid reaches about ½ inch above the rice level. The broth adds depth without making the rice mushy.
Stir gently once or twice to distribute the rice evenly, but avoid stirring vigorously after this point. The rice cooker's natural heat distribution will handle the rest. The liquid level is important—too little and the rice will dry out; too much and it will become gummy.
Cook and Finish with Sesame Oil
Close the rice cooker lid and select the white rice setting. Cook for 20 minutes until the rice cooker automatically switches to keep-warm mode. The chicken should be fully cooked with an internal temperature of 165°F when checked with a meat thermometer. If the rice isn't fully cooked after 20 minutes, check the liquid level and add 1-2 tablespoons water if needed.
Once cooking is complete, open the lid and drizzle 0.5 tbsp sesame oil evenly over the surface. Gently fold the rice and chicken together using a silicone spatula, being careful not to break the chicken pieces. The sesame oil adds a nutty aroma that complements the savory chicken and rice. Let the dish sit covered for 5 minutes to allow the flavors to meld.
Garnish and Serve
Transfer the chicken and rice to serving plates, garnishing each portion with 0.25 cup sliced fresh green onions. The green onions add a fresh contrast to the rich, savory dish. Serve immediately while the rice is still warm and the chicken is juicy. Each bite should deliver a perfect balance of tender chicken, fluffy rice, and aromatic seasoning.
This one-pot method ensures minimal cleanup while delivering restaurant-quality results. The rice cooker's even heat distribution prevents burning or sticking, and the layered cooking process creates a dish where every component shines.
Pro Tips For Making Aroma Rice Cooker Chicken And Rice
- CRUSH THE GINGER: Use a microplane or knife to finely grate the ginger—no peeling needed—until it’s nearly paste-like. I learned this the hard way: chunky ginger just sits there while the chicken and garlic take over the flavor. A tablespoon of this fine ginger will make your rice cooker smell like a Thai street cart within minutes.
- SALT THE CHICKEN FIRST: Pat the thighs dry, then sprinkle them with ½ teaspoon of salt per pound and let them sit for 10 minutes before cooking. This isn’t just about seasoning—it kickstarts the browning and keeps the meat juicy. I used to skip this, and my chicken always ended up bland and slightly rubbery.
- LAY THE GARLIC LOW: Don’t dump all the minced garlic into the rice cooker at once—reserve half to sprinkle on top of the chicken after it’s browned. The direct heat chars it fast, turning it bitter. Scatter it lightly so it crisps just enough to add depth without overpowering.
- DON’T OVERLOAD THE RICE: Stick to the 1:1.5 ratio of rice to water (or broth) for jasmine rice—no more, no less. Too much liquid means soggy rice; too little means dry rice. I’ve burned rice cookers trying to salvage undercooked rice, and trust me, you don’t want to deal with that.
Pro cooking tips for aroma rice cooker chicken and rice
Searing Secrets
The 2-minute oil shimmer before adding chicken is non-negotiable—this creates the perfect foundation for flavor. I use avocado oil (high smoke point) and a silicone spatula to spread it evenly. If your rice cooker doesn’t have a preheat function, just wait until you see tiny bubbles forming at the oil’s surface. 🔥 This step builds the Maillard reaction that gives your chicken that irresistible crust.
Pro tip: Don’t overcrowd the chicken! Arrange pieces in a single layer with slight gaps. If they touch, they’ll steam instead of sear. For extra crispiness, press them gently into the hot oil for 10 seconds before releasing. This creates deeper caramelization without burning.
Rice Liquid Precision
The ½-inch liquid buffer above the rice is critical—too much makes mushy rice, too little risks burning. I measure my 2 cups water + 0.5 cup broth in a liquid measuring cup for accuracy. For extra insurance, add 1 extra tablespoon if your rice cooker has a tendency to dry out rice.
Never stir the rice after the initial layering! The rice cooker’s heat distribution works best when left undisturbed. If you must check on it, use a chopstick to gently probe the rice—this won’t disrupt the cooking process like stirring would.
Chicken Doneness Check
Always use a meat thermometer to verify doneness—165°F internal temperature is the gold standard. I insert the probe into the thickest piece of chicken, avoiding bone if using bone-in cuts. If your chicken cooker lacks a thermometer, cut into a piece: juices should run clear, and the meat should pull away from the bone easily.
For extra tenderness, I add 1 teaspoon of honey to the marinade (beyond the recipe’s amount). This helps break down collagen during cooking, resulting in juicier chicken. The honey also creates a subtle caramelized crust that’s irresistible.
Sesame Oil Timing
Drizzle the sesame oil only after cooking completes—adding it earlier can make the rice greasy. I use a small squeeze bottle for even distribution. The oil should sizzle slightly when it hits the hot rice, releasing its nutty aroma instantly. Let it sit for 5 minutes before serving to allow the flavors to meld completely.
For a restaurant-style finish, sprinkle toasted sesame seeds on top right before serving. Toast them in a dry pan over medium heat for 30 seconds until fragrant—this amplifies their flavor dramatically.
Nutrition facts
Frequently asked questions
Can I use chicken breasts instead of thighs in this recipe?
Yes, but with adjustments! Chicken breasts cook faster and dry out more easily, so cut them into ½-inch thick pieces and reduce cooking time by 2-3 minutes. Marinate them for 15 minutes instead of 10 to prevent dryness. The honey in the marinade helps keep them juicy. For extra tenderness, add 1 tbsp cornstarch to the marinade.
Why does my rice come out gummy or mushy?
This usually happens from too much liquid or stirring too soon. The recipe calls for ½ inch of liquid above the rice—measure carefully! Never stir after the initial layering. If your rice cooker tends to overcook, check the rice 2 minutes early and switch to keep-warm mode manually. For extra insurance, use 1.4 cups rice instead of 1.5 cups.
Can I make this recipe in a regular rice cooker?
The method works in any rice cooker with a searing function. If yours lacks one, use a separate pan to sear the chicken first, then transfer everything to the rice cooker. The key is maintaining the 1:1.25 rice-to-liquid ratio (1.5 cups rice + 2 cups liquid). The aroma rice cooker just makes the crispy rice texture easier to achieve.
How do I store leftovers without drying out the rice?
Store in an airtight container with a damp paper towel on top to retain moisture. Reheat covered in the microwave for 2 minutes or in a 350°F oven for 10 minutes. For best texture, add 1-2 tbsp water before reheating. Leftovers keep well for 4 days in the fridge or 3 months in the freezer.
What can I substitute if I don't have sesame oil?
Use ½ tbsp neutral oil (like vegetable or canola) plus ¼ tsp toasted sesame seeds for aroma. For a different flavor profile, try 1 tsp fish sauce (if not avoiding fish) or ½ tsp toasted cumin. The dish will still be delicious—just with a slightly different aromatic twist.