
Main Courses
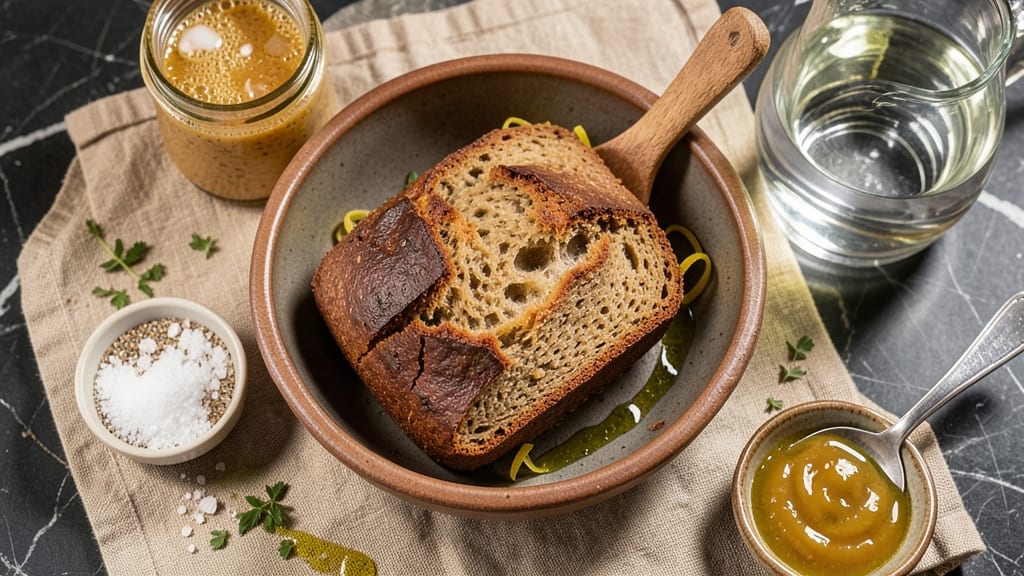
This brown rice flour sourdough bread transforms whole-grain baking into a crispy, nutty masterpiece with a light crumb—no wheat required. The secret lies in balancing fermentation time and hydration, creating a loaf that's both hearty and airy, with a crust that crackles like a traditional sourdough.
I've refined this recipe over years to ensure it rises properly and develops that signature tang without turning dense.
What sets this apart is the brown rice flour, which adds earthy depth while maintaining a lighter texture than you'd expect.
The dough requires patience—24 hours of bulk fermentation—but the result is worth it: a loaf with a satisfying crunch, a tender interior, and just enough sourness to satisfy sourdough purists. Perfect for sandwiches, toast, or gifting to fellow gluten-free bakers who crave real bread.
Ingredients for brown rice flour sourdough bread
Four cups of nutty brown rice flour kickstart this gluten-free sourdough masterpiece, paired with precise hydration for perfect rise.
| Ingredient | Amount | Notes |
|---|---|---|
| Brown Rice Flour 🌾 | 4 cups | Unbleached, finely milled preferred |
| Active Sourdough Starter 🍞 | 1 cup | 100% hydration, bubbly and active |
| Filtered Water 💧 | 1 ½ cups | Room temperature, 75°F |
| White Vinegar 🍶 | ½ tsp | For starter acidity adjustment |
| Granulated Sugar 🍚 | 1 tbsp | Feeds starter fermentation |
| Extra-Virgin Olive Oil 🫒 | ½ cup | Cold-pressed, fruity variety |
| Psyllium Husk Powder 🌿 | 1 ½ tbsp | Essential for gluten-free structure |
| Salt 🧂 | 1 ½ tsp | Fine sea salt preferred |
| Instant Yeast 🍞 | ¼ tsp | Optional for faster rise |
| Ground Flaxseed 🌰 | 1 tbsp | Mixed with water for egg wash |
| Water 💧 | ¼ cup | For flaxseed egg wash |
The brown rice flour is non-negotiable—Bob's Red Mill or Anthony's Goods brands yield the finest grind for optimal texture. Look for 'unbleached' labels to avoid grayish hues. Psyllium husk powder, sourced from NOW Foods or bulk bins at natural markets, is your structural secret weapon. Fermented for 24 hours, this dough demands patience; room-temperature fermentation (75°F) is critical for proper gluten development substitutes. The active sourdough starter should have visible bubbles and a slightly tangy aroma—discard any with hooch buildup or foul odors.
No psyllium husk? Xanthan gum at half the amount works in a pinch, though texture will differ. Substituting white rice flour reduces nutty depth—stick with brown for authenticity. The optional instant yeast (Saf-Instant brand recommended) can cut fermentation time by 2 hours, but traditional sourdough purists will insist on the full 24-hour window. For the flaxseed egg wash, Bob's Red Mill ground flaxseed works best; store-bought mixes often contain fillers that dilute effectiveness. The olive oil should be extra-virgin with 100% cold-pressed labeling—anything less lacks the fruity notes that complement the crust.
Fermented dough keeps 3 days in an airtight container at room temperature, though flavor peaks at day 2. For longer storage, freeze shaped loaves (3 months) wrapped in parchment and plastic. Thaw overnight at room temperature—microwaving destroys the delicate crust structure. The psyllium husk powder should be stored in a cool, dark place to prevent clumping. Freshly baked loaves develop maximum crust crispness after 2 hours of cooling; resist slicing until then.
Why You'll Love This Recipe
- I’ll be real: this dough comes together in one bowl—no kneading, no fuss. Just toss the brown rice flour, sourdough starter, and water, then let the vinegar and sugar do their magic while you sip your coffee.
- No-Fuss Mixing: I’ll be real: this dough comes together in one bowl—no kneading, no fuss. Just toss the brown rice flour, sourdough starter, and water, then let the vinegar and sugar do their magic while you sip your coffee.
- Nutty, Tangy Magic: That brown rice flour? It adds a subtle earthiness that pairs perfectly with the tangy sourdough kick. Honestly, the first bite feels like a hug for your taste buds—especially when toasted with a little extra sugar.
- Meal Prep MVP: Between us, this bread holds up amazingly for days. Slice it, freeze it, or pack it for lunches—it’s my go-to when I need something hearty but low-maintenance. (Yes, even on a Tuesday night.)
Step-by-step instructions for brown rice flour sourdough bread
This method delivers a gluten-free loaf with perfect structure and nutty depth—no compromises.
Prepare the Flaxseed Egg Wash
In a small bowl, combine the 1 tablespoon ground flaxseed with the ¼ cup water. Stir vigorously for 2 minutes until fully thickened into a gelatinous consistency resembling raw egg whites. This acts as our binder for the gluten-free dough.
The mixture should hold its shape when lifted with a spoon—if it's too thin, add another teaspoon of flaxseed. Cover and set aside while you prepare the dough. This step is critical for achieving that signature crusty exterior without traditional gluten development.
Mix the Dough Components
In a large mixing bowl, whisk together the 4 cups brown rice flour, 1.5 tablespoons psyllium husk powder, 1.5 teaspoons salt, and ¼ teaspoon instant yeast. The psyllium husk powder is our secret weapon for structure—it mimics gluten's elasticity when hydrated.
Create a well in the center and add the 1 cup active sourdough starter, 1 tablespoon granulated sugar, ½ teaspoon white vinegar, and ½ cup extra-virgin olive oil. The starter should be bubbly and active—if it's sluggish, feed it 1 tablespoon sugar and let it sit for 30 minutes before proceeding.
Hydrate and Develop the Dough
Gradually pour in the 1½ cups filtered water while mixing with a wooden spoon. The dough will be thick and shaggy initially—this is normal. Mix for 5 minutes by hand until all dry ingredients are fully incorporated and the mixture clings together.
For the final 2 minutes of mixing, incorporate the flaxseed egg wash. The dough should form a cohesive, slightly sticky mass that can be shaped. If it's too dry, add 1 tablespoon water at a time until it reaches the proper consistency. Cover the bowl with a damp towel and let rest for 20 minutes at room temperature.
Shape and Proof the Loaf
Line a 9x5-inch loaf pan with parchment paper, leaving an overhang on both sides for easy removal. Transfer the dough to the prepared pan and shape it by pressing down firmly with wet hands. The goal is to create an even surface with straight sides—this prevents irregular expansion during baking.
Cover the pan with a damp towel and let proof at 75°F for 4-6 hours, or until the dough has risen 1-2 inches above the pan's rim. A toothpick inserted into the center should come out clean. The longer proofing time allows the sourdough starter to develop maximum flavor complexity in this gluten-free formulation.
Bake for Maximum Crust and Crumb
Preheat your oven to 375°F with a Dutch oven inside for 30 minutes. The Dutch oven creates steam that's essential for developing that signature crust. Remove the hot Dutch oven and carefully transfer the loaf pan inside, covering tightly with the lid.
Bake for 45 minutes, then remove the lid and continue baking for an additional 15-20 minutes until the crust is deep golden brown and the internal temperature reaches 205°F. The bread should sound hollow when tapped on the bottom. Immediately transfer to a wire rack to cool completely before slicing—this prevents a gummy texture.
Pro Tips For Making Brown Rice Flour Sourdough Bread
- Weigh Your Flour: Brown rice flour compacts differently than wheat—use a kitchen scale for accuracy. I learned this the hard way when my first loaf turned out dense because I scooped instead of weighed, and the ratio was off by nearly 20 grams.
- Hydrate the Starter First: Mix your active sourdough starter with filtered water before adding it to the flour—this prevents clumping. I used to dump the starter dry, and the batter always turned gummy; pre-hydrating keeps everything smooth.
- Skip the Vinegar Rush: Let the white vinegar sit with the water for 5 minutes before mixing—it helps dissolve any flour grittiness. I was skeptical until I tried it, and the batter became noticeably more uniform without extra effort.
- Proof in a Warm Spot: Place your shaped loaf in a bowl with a damp towel over it, then set it near the oven (with the light on) for proofing—consistent 80°F (27°C) speeds things up. I used to rely on room temp, and the rise was always uneven.
Pro cooking tips for this dish
Psyllium Husk Magic
The 1.5 tablespoons psyllium husk powder is non-negotiable for structure—it mimics gluten's elasticity when hydrated. I recommend NOW Foods brand for consistent quality. Mix it thoroughly with the brown rice flour before adding liquids to prevent clumping.
If you're short on time, you can reduce fermentation by 2 hours but expect slightly denser crumb. 💫
Temperature Control
Fermenting at 75°F is ideal—use a proofing box or warm oven with light on if your kitchen runs cooler. The dough should rise 1-2 inches above the pan during 4-6 hours of proofing.
For colder climates, extend proofing to 8 hours to compensate. A toothpick should come out clean when inserted at the center.
Dutch Oven Mastery
Preheat the Dutch oven for 30 minutes before baking to create maximum steam for that signature crust. I use a Le Creuset 5.5-quart model—it retains heat better than other brands.
After 45 minutes covered, remove the lid and bake 15-20 minutes more until deep golden brown. The internal temp should reach 205°F for perfect doneness.
Flaxseed Egg Wash
The flaxseed egg wash must be fully thickened—about 2 minutes of vigorous stirring. If it's too thin, add another ½ teaspoon flaxseed until it holds its shape when lifted. Brush this generously on the loaf before baking for that golden crust.
Store any unused wash in the fridge for up to 3 days—it works great for other gluten-free baked goods too.
Crust Development
For extra crispiness, sprinkle 1 tablespoon cornmeal or semolina on the loaf before the final 15 minutes of baking. This creates a beautiful texture contrast. Let the bread cool completely on a wire rack—at least 2 hours—before slicing to prevent gumminess.
The crust continues developing crispness as it cools, so patience pays off. ✨
Fermentation Troubleshooting
If your dough doesn't rise enough, check your starter—it should be bubbly and active. For sluggish fermentation, extend bulk fermentation to 36 hours at room temperature. Overproofed dough will collapse when baked—look for 1-2 inches rise as your target.
The psyllium husk absorbs moisture quickly, so add water 1 tablespoon at a time if the dough feels too dry during mixing.
Nutrition facts
Frequently asked questions
Why does this recipe use psyllium husk powder?
Psyllium husk mimics gluten's elasticity in gluten-free baking, creating structure that brown rice flour alone can't provide. The 1.5 tablespoons in this recipe binds the dough and prevents crumbling during baking. Without it, your loaf would likely collapse or have a dense crumb.
Can I make this without a Dutch oven?
Yes, but your crust won't be as crispy. Use a baking sheet with a metal bowl inverted over the loaf during the first 30 minutes of baking to trap steam. For extra browning, place a tray of boiling water on the oven rack below. The texture will be slightly less crackly but still delicious.
How do I know when my sourdough starter is ready?
Your starter should have visible bubbles, float in water, and smell tangy (not rotten). For this recipe, it needs 100% hydration and active fermentation—double its size within 4-6 hours after feeding. If it's sluggish, feed it 1:1:1 ratio (flour:water:sugar) and wait another 2 hours before using.
Will this bread be crumbly or dense?
With proper technique, this should have a tender crumb with slight chewiness—not crumbly. The key is the 24-hour fermentation and psyllium husk integration. If it turns out dense, your starter may have been underactive or the dough overproofed. For troubleshooting, extend bulk fermentation to 36 hours in future batches.
Can I substitute white rice flour?
You can try, but your bread will lose nutty depth and may taste bland. White rice flour lacks the earthy flavor of brown, and the texture will be slightly less hearty. If substituting, reduce water by 1 tablespoon to account for its lower moisture absorption. For best results, stick with brown rice flour for authentic flavor.