
Main Courses
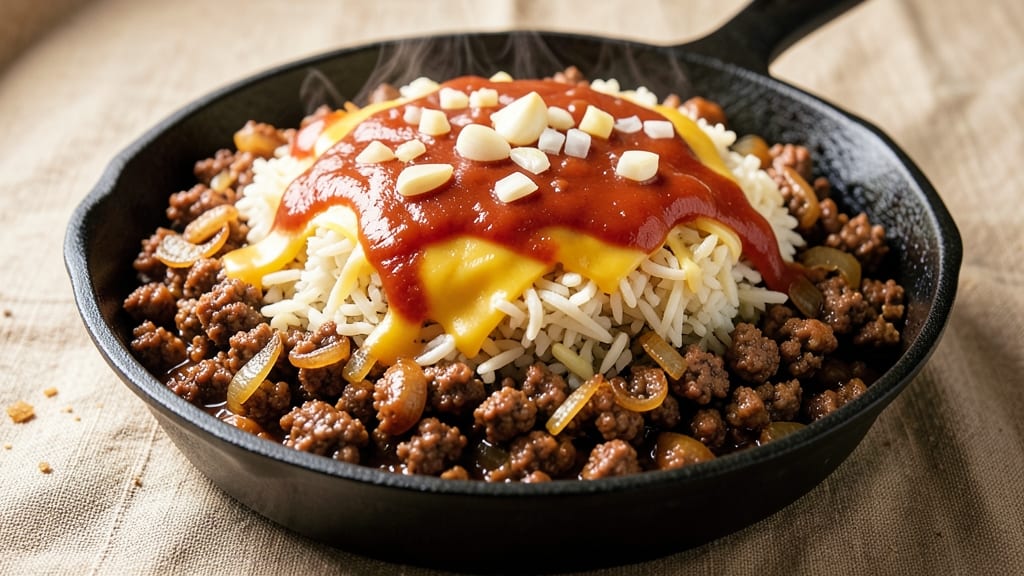
This cheeseburger rice casserole recipe delivers all the flavors of your favorite burger—juicy beef, melty cheese, and tangy condiments—in one comforting, crisp-topped dish. The secret lies in the layered approach: savory ground beef mixed into creamy rice, topped with a golden cheese crust that crackles with every bite. After years of perfecting this one-pan wonder, I've finally cracked the code for that signature crispy finish without sacrificing the creamy, cheesy center.
What makes this casserole special is how it balances textures and flavors—tender ground beef, fluffy rice, and a crispy cheese topping that holds up even when you're serving a crowd. The best part? It comes together in just 30 minutes of prep, then bakes hands-off while you handle the sides.
Whether you're feeding a hungry family or hosting game day, this recipe delivers restaurant-quality comfort with minimal effort. The crispy topping alone makes it worth the wait.
Ingredients for cheeseburger rice casserole
Pantry staples meet restaurant flavors—juicy beef, tangy condiments, and that perfect crispy cheese topping.
| Ingredient | Amount | Notes |
|---|---|---|
| Ground Beef 🥩 | 1 ½ lb | 80% lean, finely chopped |
| Long-Grain White Rice 🍚 | 3 cups | Uncooked, medium grain |
| Beef Broth 💧 | 2 cups | Low-sodium preferred |
| Yellow Onion 🧅 | 1 whole | Diced, medium size |
| Garlic Cloves 🧄 | 4 cloves | Minced, fresh preferred |
| Ketchup 🍅 | ½ cup | Heinz preferred |
| Worcestershire Sauce 🍯 | 1 tbsp | Classic or Lea & Perrins |
| Mustard 🌶️ | 1 tbsp | Dijon or yellow |
| Shredded Cheddar Cheese 🧀 | 2 cups | Sharp or medium |
| Panko Breadcrumbs 🍞 | ½ cup | For crispy topping |
| Butter 🧈 | 2 tbsp | Melted, unsalted |
| Salt 🧂 | 1 tsp | Kosher or sea salt |
| Black Pepper 🌶️ | ½ tsp | Freshly ground |
| Pickle Relish 🥒 | ¼ cup | Sweet or dill preferred |
| Green Onion 🧅 | 2 whole | Sliced, for garnish |
The ground beef is where the magic starts. 80% lean gives you that perfect balance of flavor and fat—90% lean will dry out. I always grab the pre-chopped stuff from the meat counter to save time, but if you're feeling fancy, chop it yourself for better texture. The onion and garlic? Fresh is non-negotiable—dried powder just doesn't cut it here. For the cheese, sharp cheddar gives the best flavor, but medium works in a pinch. Just make sure it's freshly shredded—the pre-shredded kind has anti-caking agents that make the topping gummy.
No ketchup? Tomato paste plus a splash of vinegar works in a bind. Worcestershire hard to find? Soy sauce plus a pinch of sugar mimics that umami kick. The relish adds that classic burger tang—if you've got pickle juice instead, thin it with water and use half the amount. Panko makes the crispy topping, but regular breadcrumbs toasted in the oven work too. Pro tip: Toast your panko first for extra crunch. And if you're out of Dijon mustard, yellow plus a pinch of sugar does the trick.
This casserole tastes even better the next day—honestly, the flavors meld overnight. Store leftovers in the fridge for up to 4 days, covered tightly. For the crispy topping, make it fresh before baking—it loses crunch if prepped ahead. Freezes beautifully too, just reheat covered to keep the top crispy. The green onions add freshness, but they're optional—I usually sprinkle them on right before serving so they stay bright.
Why You'll Love This Recipe
- One-Pot Magic: I swear by this recipe when I’m in a hurry—just brown the beef, dump everything in one dish, and let it simmer. No chopping, no fuss, just hands-off cooking while you handle the rest of dinner.
- Umami Bomb: That beef broth and caramelized onion base? It’s the secret weapon here. The rice soaks up all the rich, savory flavors, and the garlic cloves roasted right in the pan? Absolute flavor gold.
- Leftovers for Days: Between us, this casserole tastes better the next day—if that’s even possible. I make a double batch on Sundays because it reheats perfectly for lunches, and my kids actually ask for it.
- Budget Feast: Ground beef, rice, and broth? This is the kind of meal that stretches every dollar without sacrificing taste. It’s my go-to when I need to feed a crowd without breaking the bank—plus, it’s way more satisfying than takeout.
Step-by-step instructions for cheeseburger rice casserole
Here's how to make this hearty, one-pan dish with that perfect crispy topping everyone will love.
Brown the Ground Beef
Heat a large oven-safe skillet over medium-high heat. Add the 1.5 lb ground beef and cook, breaking it apart with a wooden spoon, until it loses its raw color and begins to brown. This should take about 5-6 minutes. You're looking for beef that's fully cooked through but still juicy—don't overcrowd the pan or it'll steam instead of brown.
Once the beef is browned, drain most of the fat (leave about 1 tablespoon) and add the diced yellow onion. Cook for another 3-4 minutes until the onions soften and become translucent. Stir in the minced garlic cloves and cook for just 30 seconds until fragrant—garlic burns quickly, so keep an eye on it. The beef should now have that classic cheeseburger flavor we're building upon.
Build the Casserole Base
To the skillet with the beef mixture, add the 3 cups uncooked long-grain white rice, stirring to coat each grain with the beef and onion mixture. Pour in the 2 cups beef broth, the 0.5 cup ketchup, 1 tablespoon Worcestershire sauce, and 1 tablespoon mustard. Stir everything together until the rice is evenly distributed and the liquid is well incorporated.
Bring the mixture to a gentle simmer over medium heat. Let it cook uncovered for 5 minutes to help reduce the liquid slightly and allow the flavors to meld. You'll see the rice begin to absorb some of the liquid and soften slightly. This step is crucial for developing that deep, savory flavor that makes this casserole so comforting.
Prepare the Crispy Topping
In a small bowl, combine the 2 cups shredded cheddar cheese, 0.5 cup panko breadcrumbs, 0.25 cup pickle relish, 1 teaspoon salt, and 0.5 teaspoon black pepper. Mix well with your hands or a fork until the relish is evenly distributed throughout the mixture. This topping is what creates that magical crispy texture we're all after.
Spread this cheese mixture evenly over the top of the rice casserole in the skillet. The goal is to create an even layer that will crisp up beautifully in the oven. Don't worry if it looks like too much—this is the secret to that perfect crunchy topping that makes this dish special.
Bake to Golden Perfection
Transfer the skillet to a preheated 375°F oven and bake uncovered for 30 minutes. After 30 minutes, the rice should be tender and the cheese topping should be starting to bubble and turn golden brown. This is where the magic happens—patience is key here.
For the final 5 minutes, increase the oven temperature to 400°F. This higher heat will help crisp up the cheese topping to that perfect golden brown color we're after. Watch it closely during these last minutes—you want that beautiful, bubbly, crispy finish that makes this casserole look and taste restaurant-quality.
Rest and Serve
Remove the casserole from the oven and let it rest for 5 minutes. This resting period allows the rice to finish absorbing any remaining liquid and the cheese topping to set slightly. The casserole will be hot, so use oven mitts to handle the skillet.
Garnish with the sliced green onions just before serving. The contrast of the fresh green onions against the rich, cheesy topping adds a nice pop of color and freshness. Serve immediately while the topping is still crispy and the rice is hot and comforting. This one-pan wonder is perfect for feeding a crowd or meal prepping for the week ahead.
Pro Tips For Making Cheeseburger Rice Casserole
- Brown the Beef Thoroughly: I learned this the hard way—skipping the full brown on ground beef leaves your casserole tasting more like a stew than a rich, meaty dish. Cook the beef in batches if needed, breaking it up with a spoon until it’s deeply browned, not just pink. That crust packs serious flavor.
- Soak the Rice First: I was skeptical until I tried it: rinse the long-grain white rice under cold water, then let it sit in warm beef broth for 10 minutes before assembling. This guarantees even cooking and prevents that dry, gritty texture at the bottom—no one wants a sad, undercooked center.
- Layer Cheese Sparingly: Does it look weird? Yes. Does it work? Every single time. Instead of dumping all the cheese on top before baking, sprinkle half in the middle layer (right after the beef and rice) and the rest on top. This keeps the casserole creamy throughout, not just a cheesy crust with a dry base.
- Use a Mix of Broths: Plain beef broth can feel flat in this dish. Swap ¼ of it for a splash of Worcestershire sauce or a splash of ketchup—just enough to balance the salt and add depth. It’s the little tweak that makes the whole casserole taste more restaurant-worthy than weeknight-meal worthy.
Serving suggestions for this cheeseburger rice casserole
Classic Burger Sides
Serve this casserole with classic burger sides to complete the experience. A crisp dill pickle spear on the side adds that tangy contrast that cuts through the richness—trust me, it's a game-changer. For extra fun, include crispy potato chips or fries on the side, especially if you're feeding a crowd.
I like to keep it simple with a cool glass of milk or iced tea to balance the hearty flavors. 🥒
Fresh Salad Pairing
For a lighter option, pair your casserole with a simple arugula salad tossed with lemon vinaigrette. The peppery bite of arugula and bright citrus cut through the richness beautifully.
I use about 4 cups arugula, 2 tablespoons olive oil, and 1 tablespoon lemon juice, plus a pinch of salt. Add some cherry tomatoes or cucumber slices for extra crunch. This keeps the meal balanced and refreshing.
Crunchy Toppings
Add extra texture with crispy bacon bits or crumbled potato chips on top right before serving. The salty crunch contrasts perfectly with the creamy cheese topping. For a smoky twist, sprinkle with smoked paprika or crushed red pepper flakes—about ½ teaspoon of each.
These toppings elevate the dish to next-level flavor without overpowering the main event. 🌶️
Game Day Essentials
This casserole is perfect for game day! Set up a DIY topping bar with extra cheese, pickles, and even sliced jalapeños for those who want heat. Serve with cool ranch or blue cheese dressing for dipping.
I also recommend keeping cold beer or soda on hand—something fizzy helps cleanse the palate between bites. The crowd will love the interactive element!
Meal Prep Serving
If you're prepping ahead, store leftovers in an airtight container and reheat covered to keep the crispy topping intact. Serve with warm dinner rolls or cornbread for soaking up any extra sauce. For a quick lunch, pair with a side of coleslaw—the creamy dressing complements the casserole perfectly.
Just avoid reheating in the microwave if you want that crispy texture to stay intact. ⏰
Nutrition facts
Frequently asked questions
Can I make this casserole ahead of time?
Prep everything up to the crispy topping, then refrigerate the unbaked casserole for up to 24 hours. When ready to bake, add the topping and cook as directed. For best results, bake straight from the fridge—just add 10-15 extra minutes at 375°F to account for the cold start. The flavors actually improve overnight!
What if I don't have panko for the crispy topping?
No problem! Use regular breadcrumbs that you've toasted in a dry skillet for 2-3 minutes until golden. For extra crunch, mix in 1 tablespoon cornstarch per ½ cup breadcrumbs. The key is getting those crumbs hot before they hit the oven—this creates that signature crackly texture.
Can I use ground turkey or chicken instead of beef?
Yes, but the flavor will be lighter. For turkey, use 93% lean and add 1 extra tablespoon Worcestershire sauce plus ½ teaspoon smoked paprika to boost umami. For chicken, increase to 1.75 lb and add 1 teaspoon garlic powder. Both work well, but beef gives that classic cheeseburger depth. The texture stays the same though!
Why did my cheese topping get soggy?
Soggy topping usually means one of two things: either the oven wasn't hot enough or the topping was too wet. Make sure your oven reaches 375°F before baking, and increase to 400°F for the final 5 minutes. Also, press excess moisture out of your cheese before adding it to the topping mix. For extra insurance, sprinkle 1 tablespoon cornstarch into the topping mixture.
How can I make this dish kid-friendly?
Skip the Worcestershire sauce and mustard—replace with 1 teaspoon onion powder and ½ teaspoon garlic powder for milder flavor. Use mild cheddar instead of sharp, and reduce the relish to 2 tablespoons. Cut into fun shapes with a cookie cutter after baking, or serve with ketchup or ranch for dipping. Kids love the crispy topping too!