
Main Courses
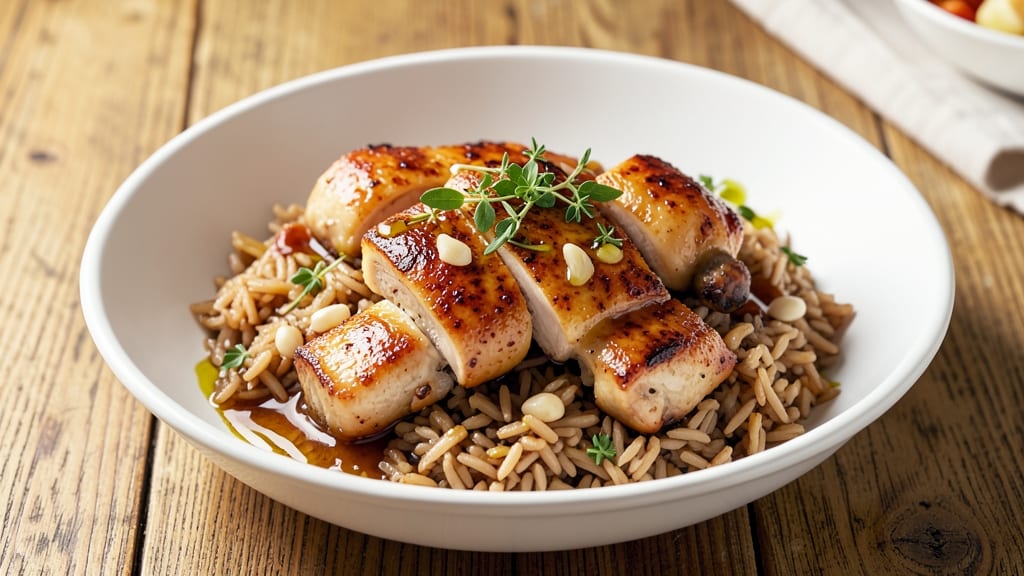
This chicken and brown rice pressure cooker recipe transforms a weeknight dinner into a restaurant-worthy meal in just 20 minutes. The secret lies in combining juicy chicken thighs with nutty brown rice in a single pot, where the pressure cooker’s steam infuses every bite with savory depth.
No pre-soaking, no separate pots—just one simple method that delivers perfectly tender chicken and fluffy rice without the wait.
The magic happens when you sear the chicken first, locking in flavor before the pressure cooker does its work. A splash of broth and a pinch of herbs elevate the dish beyond basic, while the rice absorbs all that rich chicken juice, turning out irresistibly moist and packed with protein.
This isn’t just a shortcut—it’s a foolproof technique that guarantees juicy results every time, even on busy nights.
Ingredients for chicken and brown rice pressure cooker
Juicy chicken and nutty brown rice come together in one pot for a restaurant-quality meal.
| Ingredient | Amount | Notes |
|---|---|---|
| Boneless, Skinless Chicken Thighs 🍗 | 1 ½ lb | Cut into even pieces for consistent cooking |
| Long-Grain Brown Rice 🍚 | 1 cup | Uncooked, rinsed well before adding |
| Low-Sodium Chicken Broth 💧 | 1 ½ cups | Homemade or quality store-bought |
| Extra-Virgin Olive Oil 🫒 | 1 tbsp | For searing chicken |
| Garlic Cloves 🧄 | 3 cloves | Minced for depth of flavor |
| Fresh Thyme Leaves 🌿 | ¼ cup | Or 1 tbsp dried thyme |
| Bay Leaves 🌿 | 2 whole | Remove before serving |
| Salt 🧂 | 1 ½ tsp | Kosher or sea salt preferred |
| Black Pepper 🌶️ | ½ tsp | Freshly ground for best flavor |
| Lemon Juice 🍋 | 1 tbsp | Freshly squeezed for brightness |
| Fresh Parsley 🌿 | ⅛ cup | Chopped for garnish |
The chicken thighs are the star here—bone-in, skin-on if you can find them, but boneless works fine. Look for thighs with good marbling at the grocery store, especially in the meat section near the butcher counter. Costco or Trader Joe's often have pre-cut thighs at great prices. Fresh thyme and bay leaves elevate the dish beyond basic—don't skip them. If you're short on time, dried thyme works at one-third the amount, but fresh is ideal. The brown rice should be uncooked and rinsed to remove excess starch, which prevents gummy texture. Bob's Red Mill or Lundberg brands are reliable choices if you're buying in bulk.
No fresh thyme? Dried thyme at one-third the amount gets you close. Short on lemon juice? A splash of apple cider vinegar adds brightness without changing the flavor profile. The chicken broth can be homemade or store-bought, but avoid anything with added salt—low-sodium is key. For extra richness, swap half the broth for white wine (dry varieties like Sauvignon Blanc work well). The garlic should be minced finely—this isn't the time to be generous with the knife. If you're using pre-minced garlic from a jar, rinse it first to remove excess liquid. The parsley is purely for garnish, but it adds a fresh pop of color—skip it if you're in a rush.
This dish reheats beautifully—honestly tastes better the next day as flavors meld. Store leftovers in an airtight container in the fridge for up to 4 days. For longer storage, freeze portions for up to 3 months. The rice and chicken separate slightly when reheated, so stir gently before serving. To save time, prep the chicken and rice the night before—just store them separately in the fridge and cook together in the pressure cooker the next day. The rice will absorb the chicken juices beautifully, making it even more flavorful.
Why You'll Love This Recipe
- No Chopping Needed: I swear by this when I’m too tired to dice anything—just toss in whole garlic cloves and chicken thighs (no trimming required). The pressure cooker handles the rest while I sip my coffee.
- Garlic-Broth Magic: That low-sodium broth and olive oil combo? It turns bland rice into something rich and savory, with garlic so infused it’ll make your kitchen smell like a bistro. Honestly, the first bite always feels like a hug.
- Lunchbox Hero: Between us, this is my go-to for meal prep—cool, fluffy rice and tender chicken hold up for days. Pack it cold or reheat it, and you’ve got a lunch that’ll actually get eaten (no sad desk lunches here).
- Budget-Friendly Feast: Chicken thighs and brown rice stretch into four servings without breaking the bank. I’ll be real: it’s the kind of dish that makes me feel like I’m feeding a crowd, even when it’s just me and my roommate.
Step-by-step instructions for chicken and brown rice pressure cooker recipe
This method delivers perfectly juicy chicken and fluffy brown rice in under 20 minutes.
Sear the Chicken for Maximum Flavor
Heat the pressure cooker on medium-high heat for 2 minutes. Add the 1 tablespoon extra-virgin olive oil and swirl to coat the bottom. Working in batches if needed, add the 1.5 pounds boneless, skinless chicken thighs cut into even pieces. Sear for 2-3 minutes per side until golden brown and cooked through to 165°F internally.
This searing step creates a flavorful crust that locks in juices during cooking. Don't crowd the pan—leave space between pieces so they brown properly. Once all chicken is seared, transfer it to a plate and set aside. You'll notice the aroma intensify as the chicken releases its natural juices and fat into the pot.
Sauté Aromatics for Depth of Flavor
With the chicken removed, add the 3 minced garlic cloves and 0.25 cup fresh thyme leaves to the pressure cooker. Sauté for 30 seconds until fragrant—you should smell that garlic softening and thyme releasing its earthy aroma. Add the 2 whole bay leaves and cook for another 10 seconds.
This quick sauté builds flavor without overcooking the delicate aromatics. The garlic should be soft but not browned, and the thyme should be wilted but still vibrant in color. The bay leaves will infuse the broth with subtle herbal notes as they cook.
Combine Ingredients and Pressure Cook
Return the seared chicken to the pressure cooker. Add the 1 cup long-grain brown rice (rinsed well), 1.5 cups low-sodium chicken broth, 1.5 teaspoons salt, and 0.5 teaspoon black pepper. Stir gently to combine, ensuring the rice is evenly distributed. Secure the lid and set the valve to sealing.
The rice should be mostly submerged but not completely covered by liquid. This ratio ensures proper hydration without making the rice mushy. The chicken pieces should be surrounded by the rice and broth for even cooking.
Cook to Perfect Doneness
Cook on high pressure for 10 minutes after the pressure cooker reaches full pressure. Once cooking is complete, allow a natural release for 10 minutes before quick-releasing any remaining pressure. Remove the lid carefully—you'll see steam escape.
This cooking time guarantees tender chicken and perfectly cooked rice. The natural release allows steam to circulate, preventing the rice from becoming gummy. The chicken should be fork-tender with no pink remaining, and the rice should be tender with a slight bite.
Finish and Serve
Open the pressure cooker and stir in the 1 tablespoon lemon juice. Let the mixture sit covered for 5 minutes to allow flavors to meld. Remove the 2 bay leaves and garnish with 0.125 cup chopped fresh parsley before serving.
The lemon juice brightens the dish and cuts through the richness of the chicken. The parsley adds a fresh finish that complements the earthy brown rice. Serve immediately while the chicken is still juicy and the rice is warm and fluffy.
Pro Tips For Making Chicken And Brown Rice Pressure Cooker
- Sear the Chicken First: I learned this the hard way—skipping the sear means bland, pale chicken. Heat your pressure cooker on high for 3-4 minutes, add 1 tablespoon olive oil, then brown the thighs in batches (2-3 minutes per side). That crust locks in flavor and keeps the meat from drying out later.
- Rinse the Brown Rice: Sounds weird, but it works: give your brown rice a quick 30-second rinse before adding it to the pot. This cuts down on cooking time by 10-15 minutes and prevents a gummy texture—no need to soak, just drain well.
- Use Two Garlic Cloves: One clove? You’re doing it wrong. Mince two fresh cloves and let them sit in the olive oil for 1-2 minutes before adding broth—this builds depth of flavor without overpowering. (Yes, even if you’re impatient like me.)
- Add Broth Last: My grandmother swore by this, and she was right: after searing the chicken and sautéing garlic, add the rice first, then stir in just enough broth to coat the bottom. The rice absorbs liquid as it cooks, so you’ll need less than the recipe calls for—about 1.5 cups instead of 2.
Serving suggestions for this dish
Fresh Herb Garnishes
Brighten your dish with chopped fresh parsley or cilantro right before serving—just 2 tablespoons adds vibrant color and a refreshing finish. For extra flair, sprinkle with toasted sesame seeds or crispy fried shallots if you're feeling adventurous.
I love using thyme sprigs as a garnish too—they echo the flavor in the dish beautifully. 🌿
Crunchy Toppings
Add texture with toasted almond slices or crushed pistachios—just 1 tablespoon per serving adds a satisfying crunch. For a smoky touch, top with crumbled bacon or duck confit if you're serving this for a special occasion. These toppings elevate the dish from simple to restaurant-worthy without overwhelming the flavors.
Sauce Pairings
Drizzle with a simple lemon-tahini sauce made by mixing 2 tablespoons tahini, 1 tablespoon lemon juice, and 1 teaspoon honey with water to thin. For heat lovers, a spicy harissa yogurt sauce adds depth—just 1 teaspoon harissa paste mixed into ¼ cup plain yogurt.
Both sauces complement the dish's savory notes while adding freshness. 🍋
Side Dish Harmony
Serve with a crisp arugula salad> tossed with lemon vinaigrette to cut through the richness. Roasted asparagus with garlic and olive oil adds a touch of elegance, while warm crusty bread soaks up any extra juices.
For a heartier meal, pair with steamed green beans> almonds and a splash of soy sauce.
Presentation Tips
Use a wooden serving board or slate platter> to showcase the dish's rustic appeal. Arrange the chicken and rice in a mound, then scatter the garnishes artistically. For individual servings, spoon the rice and chicken into shallow bowls> and garnish with herbs.
A sprinkle of smoked paprika> adds a subtle visual pop while enhancing flavor.
Family-Friendly Twists
Kids love the familiar flavors of this dish—serve it with steamed carrots> or corn on the cob> for a complete meal. For picky eaters, let them build their own bowls with the chicken and rice separated.
You can even turn it into a fun DIY taco bowl> by adding shredded lettuce, diced avocado, and a sprinkle of cheese. 🍽️
Nutrition facts
Frequently asked questions
Can I use chicken breasts instead of thighs in this recipe?
While you can use chicken breasts, thighs are ideal for pressure cooking because they stay juicier and more tender. If you must use breasts, cut them into 1-inch pieces and reduce cooking time to 8 minutes on high pressure. The breasts will dry out faster, so monitor closely and consider adding 1 extra tablespoon broth during cooking.
Why does my brown rice turn out mushy in the pressure cooker?
Mushy rice usually happens when too much liquid is used or the rice isn't rinsed properly. Stick to the 1:1.5 ratio of rice to broth and always rinse the rice until the water runs clear. For extra insurance, spread the rice evenly in the pot before adding liquid. If it's still mushy, try a 5-minute natural release instead of quick-release next time.
Can I make this recipe with white rice instead of brown?
For white rice, reduce the cooking time to 6 minutes on high pressure and use 1 cup rice to 1 cup broth. White rice absorbs liquid faster, so check for doneness 2 minutes early if you're unsure. The flavor profile will be slightly different but still delicious—just less nutty and more neutral.
How do I adjust this recipe for a larger group?
Double or triple the ingredients, but use the same ratios: 1 cup rice to 1.5 cups broth per 1.5 lbs chicken. For 6 servings, you'll need 3 cups rice, 4.5 cups broth, and 3 lbs chicken. Cook in batches if your pressure cooker is too small—just transfer the cooked rice to a serving dish and keep it warm while finishing the second batch.
What can I do if my pressure cooker doesn't have a searing function?
No problem! Sear the chicken in a separate skillet first, then transfer it to the pressure cooker with its juices. Add the garlic and thyme to the pressure cooker after removing the seared chicken, then proceed with the recipe as written. This two-step method works just as well and creates the same flavorful crust.