
Desserts
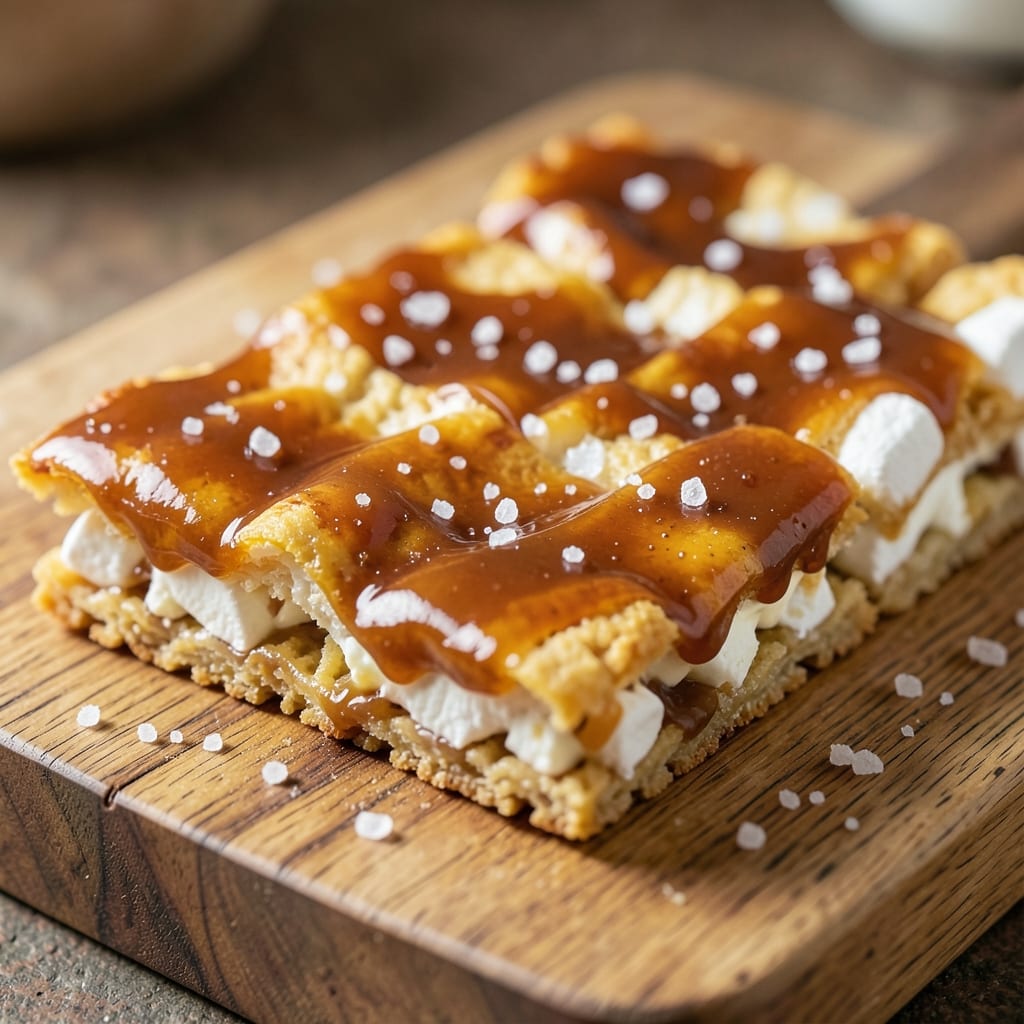
Aldi's Rice Krispie treats recipe delivers that nostalgic marshmallow-cereal magic with a budget-friendly twist. 🔥 The secret lies in using Aldi's affordable marshmallows and crispy cereal—both of which create a texture that's perfectly chewy yet crisp at the edges. This recipe simplifies the classic process, ensuring no sticky messes or burnt edges.
What sets this version apart is the foolproof method for melting marshmallows evenly without scorching, paired with a few extra minutes of cooling to achieve that signature firm-yet-tender consistency. The result? A pan of golden, square treats that cut cleanly and taste just like childhood memories—only better, because you control the quality.
By the time you're done, you'll have a batch of treats that's perfect for parties, potlucks, or satisfying that sweet craving. The recipe uses simple pantry staples and delivers restaurant-quality results with minimal effort. No special equipment is needed—just a microwave or stovetop and a little patience.
These treats also freeze beautifully, making them ideal for meal prep or holiday gifting. The Aldi brand ensures you get the best value without sacrificing taste or texture. Ready to make your own? Let's get started with this stress-free, no-fuss recipe.
Ingredients for aldi rice krispie treats
Aldi's budget-friendly marshmallows and cereal create nostalgic treats with restaurant-quality texture.
| Ingredient | Amount | Notes |
|---|---|---|
| Aldi Large Marshmallows 🍫 | 10 oz | Standard size, not mini |
| Aldi Rice Krispies Cereal 🍚 | 6 cups | Original flavor preferred |
| Unsalted Butter 🧈 | ½ cup | Cold, cubed for even melting |
| Vanilla Extract 🌿 | 1 tsp | Pure, not imitation |
| Diamond Crystal Kosher Salt 🧂 | ¼ tsp | Fine grain preferred |
| Granulated Sugar 🍚 | ½ tsp | For sprinkling on top |
| Non-Stick Cooking Spray 🫒 | 1 tbsp | For greasing pan |
| Butter Flavored Cooking Spray 🧈 | 1 tbsp | For final coating |
| Aluminum Foil 📄 | 1 sheet | For lining pan |
| Water 💧 | 1 tbsp | For microwave melting |
The Aldi marshmallows and cereal are the stars here—grab the large marshmallows (not mini) and the original flavor cereal from the cereal aisle. Aldi's marshmallows melt more evenly than name brands, and the cereal stays crispier. Check the expiration date—freshness matters for that signature snap. For the butter, cold cubes melt more evenly than softened sticks, preventing scorching. If you're using a microwave, the extra tablespoon of water helps create steam for even melting. Pro tip: Warm your mixing bowl first—just rinse it with hot water and dry it before adding melted marshmallows to prevent premature cooling.
No Aldi marshmallows? Great Value or store-brand marshmallows work just as well—they're all essentially the same product. Short on cereal? Any crispy rice cereal (like Kix or Corn Flakes) will work, though the texture might vary slightly. Want extra flavor? Add 1/4 tsp cinnamon or 1/2 tsp peanut butter powder to the marshmallow mixture. For the butter, if you're lactose intolerant, Earth Balance vegan butter works perfectly—just use the same amount. The sugar sprinkle on top isn't just for looks—it adds a subtle crunch that balances the chewiness. If you're making these for a party, double the recipe—they disappear fast!
These treats stay fresh for 3-4 days in an airtight container at room temperature, but they're even better the next day once everything sets. For longer storage, wrap individually in parchment paper and freeze for up to 3 months. The foil lining in your pan makes cleanup a breeze—just let it cool 5 minutes, then lift the whole sheet out. For gifting, package in clear cellophane with a ribbon—they look gorgeous and cut cleanly. If you're making a big batch, use two 9x13 pans. Just remember: patience is key—let them cool completely before cutting, or they'll crumble. Trust me, it's worth the wait for that perfect texture.
Why You'll Love This Recipe
- Pantry Magic: I swear by this recipe because it uses stuff I already have—no special shopping needed. Those Aldi large marshmallows melt into gooey perfection without sticking to the pan, and the Rice Krispies add that satisfying crunch every time.
- Butter-Vanilla Boost: Honestly, the vanilla extract and butter make all the difference. It’s not just sweet—it’s warm and rich, like a hug in treat form. The kosher salt on top? That’s the secret that turns good into ridiculously good.
- Party in a Box: Between us, these are my go-to for last-minute gatherings. Cut into squares, they’re easy to serve, and kids (or adults) can grab them without making a mess. (Yes, even on a Tuesday night.)
- Budget Buster: I make a double batch and freeze half—no waste, no stress. The ingredients cost next to nothing, but the flavor? That’s priceless. Plus, they reheat faster than takeout.
Step-by-step instructions for Aldi Rice Krispie treats
Master these techniques and you'll achieve perfectly crispy edges with a gooey center every time.
🔥 Step 1: Melt Marshmallows and Butter Precisely
Line a 9x13-inch baking dish with the aluminum foil, leaving a slight overhang on the sides. This prevents sticky messes later. In a large microwave-safe bowl, combine the 10 oz Aldi Large Marshmallows, 0.5 cup Unsalted Butter, and 1 tbsp Water. Microwave on high for 90 seconds, then stir vigorously with a silicone spatula to ensure even melting.
Return the mixture to the microwave for another 30-45 seconds until completely smooth and glossy. The marshmallow-butter blend should reach 160°F—this temperature ensures proper binding with the cereal. If it's not fully melted, stir and microwave in 10-second increments until smooth. The mixture should coat the back of a spoon without resistance.
👨🍳 Step 2: Add Vanilla and Salt for Flavor Balance
Remove the bowl from the microwave and let it cool for 2 minutes—this prevents the vanilla from cooking off. Stir in the 1 tsp Vanilla Extract and 0.25 tsp Diamond Crystal Kosher Salt until fully incorporated. The vanilla enhances sweetness while the salt cuts through richness, creating a well-rounded flavor profile.
Work quickly now—the mixture begins setting as it cools. If it starts thickening prematurely, microwave for 10 seconds to restore smoothness. The ideal consistency is like warm honey, thick enough to coat the cereal but still pourable.
🥘 Step 3: Combine with Cereal for Perfect Texture
Add the 6 cups Aldi Rice Krispies Cereal to the marshmallow mixture and stir gently with a wooden spoon. Avoid pressing down on the cereal—this creates dense, cake-like treats instead of light, airy ones. The cereal should be fully coated but still retain its individual pieces. If the mixture thickens too much, microwave for 5 seconds to loosen it.
Transfer the mixture to the prepared foil-lined baking dish and press down firmly and evenly using a greased 8x8-inch square of parchment paper or a damp spatula. The goal is a smooth, even surface with no gaps—this ensures uniform baking. For extra crispy edges, I like to press the mixture against the sides of the pan as well.
🔥 Step 4: Chill and Cut for Clean Slices
Lightly spray the top of the treats with the 1 tbsp Butter Flavored Cooking Spray and refrigerate for at least 2 hours (or up to 24 hours) until completely firm. Chilling is critical—it allows the marshmallow to fully set and the cereal to crisp. If you're impatient, freeze for 1 hour instead, but refrigeration yields better texture.
Once firm, remove the foil and use a sharp knife to cut into 1-inch squares. For perfectly clean cuts, dip the knife in hot water between slices and wipe dry. The treats should hold their shape without crumbling. If they stick to the knife, return them to the fridge for 10 minutes to firm up further.
🍽️ Step 5: Serve with Optional Sugar Crust
For an elegant finish, sprinkle the top with the 0.5 tsp Granulated Sugar and return to the fridge for 5 minutes to let the sugar adhere. The sugar creates a delicate crystalline crust that adds subtle texture. Serve immediately for maximum gooeyness, or store in an airtight container at room temperature for up to 5 days.
Each treat should have crispy edges that give way to a soft, marshmallow center with just the right amount of cereal crunch. The vanilla and salt balance the sweetness perfectly, while the butter adds rich depth. Perfect for parties, gifts, or just satisfying that sweet tooth craving.
Pro Tips For Making Aldi Rice Krispie Treats
- STOP MICROWAVING THE MARSHMALLOWS: The Aldi large marshmallows need real heat—microwaving them first makes them greasy and uneven. Instead, melt them in a heavy pot over medium-low with the butter, stirring constantly until smooth (about 8-10 minutes). If you rush it, you’ll end up with a sticky, uneven mess that won’t set properly.
- USE A THERMOMETER FOR BUTTER: Unsalted butter burns faster than you think. Pull the pot off heat when it reaches 160°F (71°C)—just before it starts browning—and let the residual heat finish melting the marshmallows. I learned this the hard way after one batch smelled like toasted regret.
- SALT THE MIX AFTER COOLING: Sprinkle that Diamond Crystal kosher salt after the treats cool slightly (about 5 minutes). If you add it too early, the salt dissolves into the butter and makes the whole batch taste flat. A pinch (½ tsp) on top is enough—trust me, you don’t need more.
- PRESS FAST, RELEASE SLOW: Dump the mix into a greased pan immediately and press firmly with a spatula—no half-hearted patting. Then, let it sit for 10 full minutes before cutting. The longer you wait, the cleaner the edges and the less crumbly the texture. (Yes, even if you’re impatient like me.)
Essential equipment for perfect results
Microwave Essentials
Your microwave is the workhorse for this recipe—no stovetop required! I recommend using a large microwave-safe bowl (like a Pyrex 3.5-quart or Glasslock container) that can handle the marshmallow mixture without overflowing. The 1 tbsp water helps create steam for even melting, so avoid skipping it. If your microwave has a turntable, use it for more consistent heating. 🔥
For precise temperature control, invest in a microwave thermometer (like the Thermoworks Thermapen One) to monitor the marshmallow-butter blend. Aim for 160°F—this ensures perfect binding with the cereal. If you don’t have one, test doneness by coating the back of a spoon: it should glide smoothly without resistance. A silicone spatula is ideal for stirring without scratching your bowl.
Mixing Tools
A wooden spoon is your best friend for combining the cereal—it won’t melt like a metal spoon would. For pressing the mixture into the pan, use a greased 8x8-inch square of parchment paper (or a damp spatula) to create an even surface. The parchment prevents sticking and makes cleanup effortless. I also keep a small bowl of hot water nearby to dip the knife between cuts for clean slices. ✨
Pan and Lining
Skip the fancy equipment—just grab a 9x13-inch baking dish (any material works) and line it with aluminum foil, leaving a slight overhang. This prevents the treats from sticking and makes removal a breeze. For extra insurance, lightly spray the foil with non-stick cooking spray before adding the mixture. A sharp chef’s knife (like a Victorinox Fibrox) is essential for clean cuts—dull knives crush the treats instead of slicing them.
Optional Extras
Want to elevate your treats? A small spray bottle (for the butter-flavored cooking spray) ensures even coverage on top. For gifting, clear cellophane wrap and a ribbon make presentation effortless. If you’re batch-making, a second 9x13-inch pan cuts prep time in half. And for flavor variations, keep mini marshmallows or chocolate chips on hand for mix-ins. 💫
Nutrition facts
Frequently asked questions
Can I make these treats without a microwave?
For stovetop melting, combine 10 oz marshmallows, 0.5 cup butter, and 1 tbsp water in a heavy-bottomed saucepan. Heat over low-medium heat, stirring constantly until smooth (about 5-7 minutes). Keep the temperature below 160°F to prevent scorching. A candy thermometer helps monitor this precisely.
Why did my treats turn out too sticky?
Overmelted marshmallows or insufficient chilling cause stickiness. Always melt in 10-second increments and aim for 160°F. For extra firmness, chill for 3-4 hours instead of 2 hours. If they're still soft, sprinkle with 1 tbsp powdered sugar and press gently to absorb moisture.
Can I use mini marshmallows instead?
Yes, but adjust the quantity! Use 12 oz mini marshmallows (about 3 cups) instead of 10 oz large marshmallows. They melt faster, so watch closely in the microwave. The texture will be slightly different—minis create a denser, cake-like treat rather than classic crispy edges.
How do I make these treats dairy-free?
Replace butter with 0.5 cup vegan butter (like Earth Balance) and use dairy-free marshmallows. The recipe works identically! For extra richness, add 1 tbsp coconut oil to the melted marshmallow mixture. The texture remains chewy and crispy when chilled properly.
Can I shape these into balls instead of squares?
Yes! After pressing into the pan, cut into 1.5-inch rounds instead of squares. For classic Rice Krispie balls, press the mixture into a greased ball (about 1.5 inches wide) and roll in crushed cereal or powdered sugar. Chill for 1 hour before serving. The center stays gooey while the exterior gets crispy.