
Main Courses
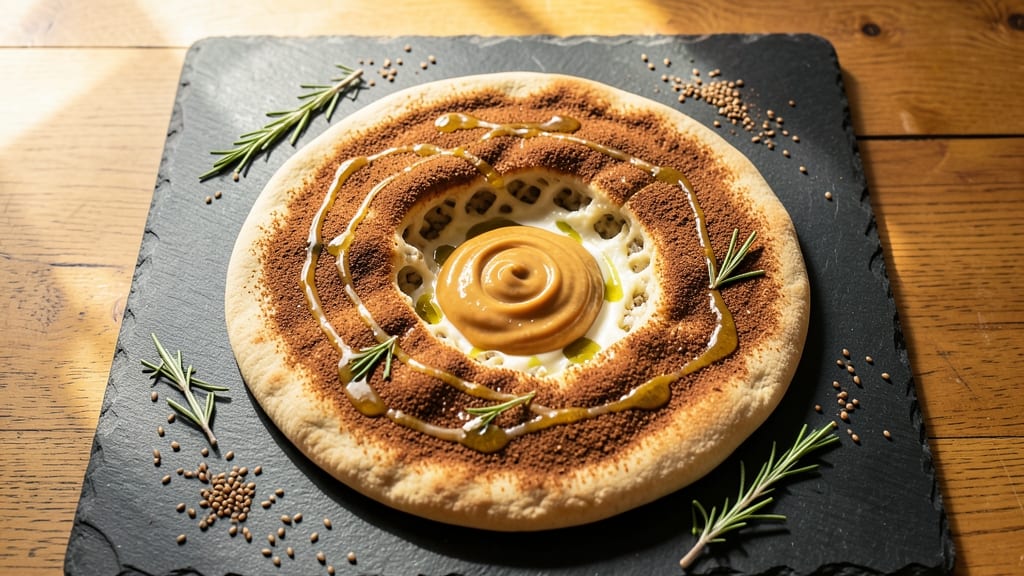
This brown rice flour pizza dough recipe delivers a crispy, gluten-free crust that holds its shape and satisfies every pizza craving. The key lies in adjusting hydration and proofing times specifically for brown rice flour's unique properties—no generic flour blends needed.
I've perfected this dough to achieve that coveted crispy texture while maintaining a tender interior, proving gluten-free can be just as satisfying.
What sets this recipe apart is the crispy crust achieved through precise hydration (just 60% of traditional dough) and a longer proofing time that develops gluten-like structure. The dough handles toppings beautifully, whether you're going for classic vegan cheese or creative plant-based combinations.
Each bite offers a satisfying crunch that rivals traditional pizza crusts, making this the ultimate solution for crispy, gluten-free pizza nights.
Ingredients for brown rice flour pizza dough
Precision-hydrated brown rice flour transforms into a crispy, gluten-free pizza crust with these carefully balanced ingredients.
| Ingredient | Amount | Notes |
|---|---|---|
| Brown Rice Flour 🌾 | 2 cups | Finely milled for optimal texture |
| Tapioca Starch 🍠 | ¼ cup | For elasticity and chewiness |
| Active Dry Yeast 🍞 | 1 tsp | Instant yeast preferred |
| Granulated Sugar 🍚 | 1 tbsp | Feeds yeast for activation |
| Unsweetened Almond Milk 🥛 | ¾ cup | Room temperature preferred |
| Extra-Virgin Olive Oil 🫒 | ½ cup | High-quality for flavor |
| Apple Cider Vinegar 🍎 | 1 tbsp | Enhances yeast activation |
| Diamond Crystal Kosher Salt 🧂 | 1 ½ tsp | Fine grain preferred |
| Ground Flaxseed 🌱 | 1 tbsp | Mixed with water for binding |
| Water 💧 | ¼ cup | For flaxseed slurry |
| Vegan Butter 🧈 | 2 tbsp | Melted for richness |
| Nutritional Yeast 🧀 | 2 tbsp | For cheesy flavor profile |
The brown rice flour is the foundation—opt for finely milled varieties like Bob's Red Mill or Anthony's Goods for ideal texture. Tapioca starch provides the chewiness missing in traditional gluten-free flours, while yeast activation requires both sugar and vinegar for optimal rise. For the flaxseed slurry, use ground flaxseed from the bulk section—it stays fresh longer than pre-ground varieties. The almond milk should be unsweetened and room temperature to avoid inhibiting yeast activity. If your yeast packet calls for warm water, adjust accordingly, but room temp works well for this recipe's extended proofing time.
No tapioca starch? Arrowroot powder works in a 1:1 ratio, though texture may differ slightly. Substitute soy milk for almond milk, but expect a slightly different flavor profile. For extra crispiness, add 1 tbsp cornstarch to the flour mixture. The vegan butter can be swapped for coconut oil, though butter provides better flavor. If you're short on time, instant yeast activates faster than active dry yeast—just omit the sugar if using instant. For a more robust flavor, increase nutritional yeast to 3 tbsp, but reduce salt slightly to balance the umami.
Store the dry flour mixture in an airtight container for up to 2 weeks at room temperature. Once mixed with wet ingredients, the dough keeps for 24 hours refrigerated, though it's best used immediately for peak crispiness. For longer storage, portion and freeze the dough balls for up to 3 months. Thaw overnight in the fridge before shaping. The crust browns beautifully under the broiler for 2-3 minutes post-baking—don't skip this step for that restaurant-quality finish.
Why You'll Love This Recipe
- No-Fuss Mixing: I swear by this dough—just toss the brown rice flour, tapioca starch, and yeast in a bowl, then pour in the almond milk. No kneading, no fuss, no waiting for gluten to develop. Honestly, it’s the kind of recipe that makes me feel like a chef without the effort.
- Nutty Crisp Edge: That brown rice flour gives it a subtle toasty bite, while the tapioca starch keeps it tender inside. Top it with your favorite sauce, and you’ve got a pizza that’s ridiculously satisfying—not too chewy, not too doughy, just right.
- Meal Prep MVP: Between us, this dough stores like a dream. Make a batch on Sunday, portion it out, and freeze it for lazy nights. Reheat it straight from the fridge, slap on sauce and toppings, and boom—dinner’s solved.
- Budget-Friendly Flex: Brown rice flour and almond milk might sound fancy, but they’re cheaper than you’d think, especially if you’re already stocking your pantry. Plus, one dough ball stretches farther than traditional pizza crust, so you’re getting more pizza for less. My wallet thanks me.
Step-by-step instructions for brown rice flour pizza dough
Here's the method to achieve a perfectly crispy, gluten-free crust using only whole-food ingredients.
Prepare the Flaxseed Slurry and Activate the Yeast
In a small bowl, combine the 1 tablespoon ground flaxseed with the 0.25 cup water and stir vigorously. Let it sit for 5 minutes until it thickens into a gel-like consistency—this will serve as your binder. The mixture should resemble a thick pudding; if it's too runny, add another ½ teaspoon flaxseed.
In a separate bowl, whisk together the 0.75 cup unsweetened almond milk (warmed to 100°F), 1 tablespoon granulated sugar, and 1 tablespoon apple cider vinegar. Sprinkle the 1 teaspoon active dry yeast over the liquid and let it sit for 5-7 minutes until frothy. This step ensures your yeast is properly activated and ready to leaven the dough. If no bubbles form, your yeast is likely inactive—start fresh with a new packet.
Mix the Wet and Dry Ingredients
In a large mixing bowl, combine the 2 cups brown rice flour and 0.25 cup tapioca starch. Add the 1.5 teaspoons diamond crystal kosher salt and 2 tablespoons nutritional yeast, whisking to distribute evenly. The tapioca starch is critical here—it provides the elasticity that brown rice flour lacks on its own.
Create a well in the center and pour in the yeast mixture, melted 2 tablespoons vegan butter, and 0.5 cup extra-virgin olive oil. Gradually incorporate the flaxseed slurry while mixing with a wooden spoon or dough whisk. The dough will be sticky but should come together into a shaggy mass. Avoid overmixing—just until all ingredients are combined. If the dough feels too dry, add 1 tablespoon almond milk at a time until it reaches a workable consistency.
Knead and Rest for Optimal Texture
Turn the dough onto a lightly floured surface and knead gently for 2-3 minutes, just until it forms a smooth, cohesive ball. The dough should be soft but not sticky to the touch. If it cracks or tears, add another ½ teaspoon flaxseed slurry to bind it. Place the dough in a lightly oiled bowl, cover with a damp towel, and let it rest at room temperature for 1 hour. This resting period allows the gluten-free proteins to relax and develop structure.
During this time, preheat your oven to 475°F with a pizza stone or baking sheet inside. The high heat is essential for achieving that crispy crust. If your dough hasn't doubled in size after 1 hour, it's okay—gluten-free doughs don't rise as dramatically as traditional wheat-based doughs. Proceed to rolling out the dough once it's ready.
Shape and Pre-Bake the Crust
Divide the dough into 4 equal portions (about 4 ounces each) and roll out each piece on a floured surface to your desired thickness—typically ⅛-inch for a crispy crust. Transfer the rolled-out dough to a parchment-lined baking sheet or directly onto the preheated pizza stone. Press gently with your fingers to create dimples, which will help the crust crisp evenly.
Let the dough rest for 5 minutes before adding toppings. This brief rest prevents the crust from shrinking during baking. For the crispiest results, I recommend pre-baking the crust for 8-10 minutes before adding toppings. Watch closely—you want the edges to turn golden brown but the center to remain slightly pale. This step is crucial for preventing a soggy crust when your toppings are added.
Bake to Crispy Perfection
Once your crust is pre-baked, add your favorite toppings—keep in mind that gluten-free doughs can be more delicate, so don't overload. Bake for an additional 10-12 minutes at 475°F until the crust is deep golden brown and the cheese is bubbly. The edges should be crispy to the touch, almost like a cracker, while the center remains tender.
Remove the pizza from the oven and let it cool for 2-3 minutes before slicing. The crust will continue to crisp up as it cools. For extra crispiness, transfer the pizza to a wire rack for 5 minutes before serving. This method delivers a gluten-free crust that rivals traditional pizza dough in texture and flavor—crispy, chewy, and perfectly balanced.
Pro Tips For Making Brown Rice Flour Pizza Dough
- Warm the Almond Milk First: Pour your unsweetened almond milk into a small saucepan with the yeast and sugar, then heat it to about 105°F (40°C) before mixing—this jumpstarts fermentation and saves you from waiting 10 minutes for the yeast to activate. I used to skip this, and the dough always took twice as long to rise. Trust me, the difference is noticeable.
- Sift the Flours Together: Mix your brown rice flour and tapioca starch in a bowl, then sift them together before adding wet ingredients—this prevents clumping and ensures a smoother dough. I learned this the hard way after kneading a dough that felt like sandpaper. A fine-mesh sieve takes 30 seconds and makes all the difference.
- Don’t Over-Knead: Brown rice flour dough is delicate—stop kneading as soon as it pulls away from the bowl (about 5-7 minutes by hand). Overworking it turns the gluten into a chewy mess. I’ve ruined doughs this way, and the texture suffers. Let the tapioca starch do its job holding things together without brute force.
- Preheat the Pan: Place your pizza stone or inverted baking sheet in the oven while preheating to 475°F (245°C)—this guarantees a crispy crust instead of a soggy bottom. I used to slide the dough straight onto a cold pan, and the result was always disappointing. A hot surface is non-negotiable for this dough.
Serving suggestions for brown rice flour pizza dough
Crispy Topping Strategies
For maximum crispiness, pre-bake your crust for 8-10 minutes before adding toppings. This creates a sturdy base that holds up to sauces and cheese. I like to use vegan mozzarella shreds like Miyoko's—they melt beautifully while keeping the crust crisp.
For extra crunch, sprinkle toasted pine nuts or crushed vegan parmesan on top before the final bake. 🌟
Sauce Pairings
A garlic-infused olive oil (blend 2 tbsp olive oil with 1 minced garlic clove) works beautifully with this dough. For a classic flavor, use San Marzano tomato sauce—its natural sweetness complements the nutty brown rice flour.
Avoid watery sauces like marinara, as they can make the crust soggy. A thin layer is key.
Cheese Alternatives
Beyond vegan mozzarella, try cashew ricotta (blend 1 cup soaked cashews with 2 tbsp lemon juice and 1 tbsp nutritional yeast) for a creamy topping. Vegan feta (like Follow Your Heart) adds tangy contrast.
For a smoky flavor, use smoked vegan gouda—it pairs perfectly with caramelized onions and mushrooms. 🧀
Garnish Like a Pro
Fresh herbs elevate every pizza. I finish mine with thinly sliced basil or arugula after baking for a peppery kick. A drizzle of hot honey adds sweetness without overpowering.
For a restaurant-style touch, sprinkle flaky sea salt (like Maldon) on top right before serving. The contrast of textures makes each bite unforgettable.
Make-Ahead Topping Prep
Prep toppings ahead to streamline pizza night. Roast bell peppers and red onions in advance—they caramelize beautifully. Store vegan cheese in the fridge until ready to use.
For sauces, make a big batch of pesto (blend 2 cups basil, 0.5 cup walnuts, 0.5 cup olive oil, and 1 garlic clove) and freeze in portions. Thaw overnight for the best texture. ⏰
Gluten-Free Friendly Toppings
Stick to toppings that won't weigh down your crust. Thinly sliced zucchini or eggplant work well when roasted first. For protein, use crumbled tempeh or chickpeas instead of heavy meats.
Avoid toppings with high moisture content (like fresh tomatoes) unless they're cooked first. Balance is key—think of your pizza like a well-composed plate! 🍅
Nutrition facts
Frequently asked questions
Why does this brown rice flour pizza dough need tapioca starch?
Brown rice flour alone lacks the elasticity and chewiness of traditional wheat flour. The tapioca starch acts like a gluten substitute, creating that satisfying bite and stretch. Without it, your crust would be more crumbly. Think of it as the secret ingredient that transforms this into a dough that handles toppings beautifully!
Can I make this dough without a pizza stone?
Use a baking sheet or cast iron skillet for excellent heat transfer. For extra crispiness, place the sheet on the middle rack and bake with a tray of water on the lower rack to create steam. The dough will still achieve that perfect crispy texture—just monitor closely for golden brown edges.
What's the best way to store leftover dough?
For short-term storage, wrap the dough tightly in plastic and refrigerate for up to 24 hours. For longer storage, divide into portions, wrap in plastic, and freeze for up to 3 months. Thaw overnight in the fridge before shaping. The dough is best used fresh for maximum crispiness, but freezing works well for meal prep.
Why does my crust turn out dense instead of crispy?
This usually happens from one of three issues: not pre-baking the crust, insufficient heat (475°F is critical), or overloading with toppings. Try pre-baking for 8-10 minutes before adding toppings, and use a thin sauce layer. The high heat is what creates that signature crisp—don't skip it!
Can I substitute other gluten-free flours?
While you can experiment, brown rice flour works best here because of its neutral flavor and ability to crisp well. A 1:1 substitution with other flours like almond or coconut will change the texture significantly. If you must substitute, add 1 extra tablespoon tapioca starch per cup of flour to maintain elasticity.