
Main Courses
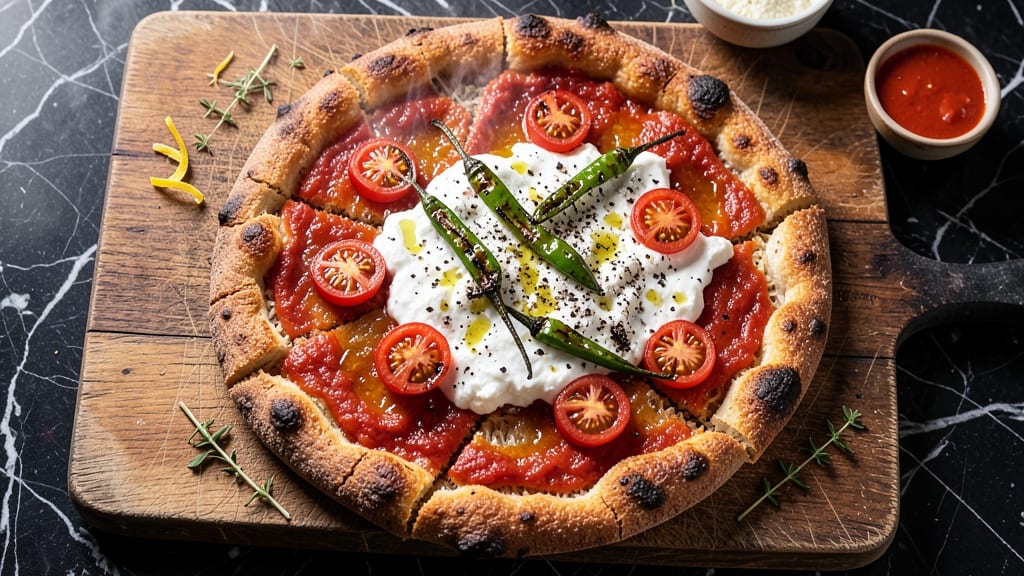
This brown rice flour pizza crust delivers the perfect gluten-free alternative—crispy edges, chewy centers, and all the satisfaction of traditional pizza without the guilt. The secret lies in the right balance of hydration and binding agents, creating a texture that holds toppings beautifully while baking.
I developed this recipe after years of testing gluten-free crusts, finally landing on a version that rivals classic dough in both flavor and structure.
The beauty of brown rice flour is its ability to create a naturally crispy crust when combined with the right leavening agents and hydration technique. Unlike other gluten-free flours, brown rice flour develops a satisfying bite when baked, making it ideal for pizza.
The recipe uses simple pantry staples—brown rice flour, water, oil, and baking powder—to create a sturdy yet flexible crust that supports even heavy toppings without falling apart.
What sets this crust apart is its foolproof method: no kneading required, just mix, rest, and bake. The dough develops flavor as it rests, while the baking process creates that coveted crispy-chewy contrast.
Whether you're vegan, gluten-free, or simply looking for a lighter crust, this recipe delivers restaurant-quality results at home.
Pair it with your favorite vegan cheese, fresh vegetables, or classic toppings for a pizza that’s as nutritious as it is delicious. The instructions walk you through every step—from mixing to baking—to ensure success every time. Let’s make pizza night guilt-free!
Ingredients for brown rice flour pizza crust
Simple pantry staples transform into a crispy, chewy gluten-free pizza crust that rivals traditional dough.
| Ingredient | Amount | Notes |
|---|---|---|
| Brown Rice Flour 🌾 | 2 cups | Finely milled for best texture |
| Warm Water 💧 | 1 ¼ cups | 110°F for optimal activation |
| Extra-Virgin Olive Oil 🫒 | ¼ cup | High quality for flavor |
| Baking Powder 🍞 | 1 tsp | Aluminum-free preferred |
| Salt 🧂 | ½ tsp | Fine sea salt preferred |
| Psyllium Husk Powder 🌿 | 1 tbsp | Key binding agent |
| Apple Cider Vinegar 🍎 | 1 tsp | Activates baking powder |
| Nutritional Yeast 🧀 | 1 tbsp | For cheesy flavor |
| Garlic Powder 🧄 | 1 tsp | Enhances crust flavor |
| Dried Oregano 🍃 | ½ tsp | Italian seasoning blend |
| Cornstarch 🌽 | 1 tbsp | Prevents sticking |
Brown rice flour is the star here—Bob's Red Mill or Anthony's Goods are my go-tos for consistent results. The psyllium husk might be new to your pantry, but it's what gives this crust its professional texture. Grab it in the baking aisle or health food section. For the olive oil, California-based brands like Corto or Otto add that fruity depth that makes the crust taste homemade. The warm water should be just below body temperature—too hot kills yeast activity, too cold doesn't activate properly.
No psyllium husk? Flaxseed meal mixed with water works in a pinch (1 tbsp flaxseed + 3 tbsp water = 1 tbsp psyllium), though texture will differ slightly. Substituting olive oil for avocado oil keeps it neutral if you're sensitive to olive flavor. The baking powder must be fresh—if it's more than 6 months old, toss it. For extra crispiness, add 1 tbsp arrowroot powder to the cornstarch. And if you're making vegan cheese pizza, the nutritional yeast becomes even more valuable—it's what gives that classic cheesy tang.
This dough keeps for 3 days in the fridge, wrapped tightly in plastic. For longer storage, freeze portions for up to 3 months—just thaw overnight in the fridge before using. The crust reheats beautifully in a 400°F oven for 5-7 minutes to restore crispiness. I like to pre-bake the crust for 8-10 minutes before adding toppings to prevent a soggy base. The baking powder activates fully during the first 20 minutes of baking, so don't rush it—patience gives you that perfect crispy-chewy texture.
Why You'll Love This Recipe
- Five-Ingredient Magic: I swear, this crust comes together with just a bowl and a spoon—no mixer, no kneading, no stress. Mix the brown rice flour with warm water and olive oil until it clumps like wet sand, then fold in baking powder and salt. That’s it. No waiting for dough to rise or rolling out stubborn puffs.
- Nutty Crispy Edge: Honestly, the flavor hits different. Brown rice flour gives this crust a subtle nutty depth that regular pizza just can’t match, while the olive oil keeps it tender inside. Bake it until the edges are golden and crispy—it’s like a cross between a cracker and a pizza, but better.
- Meal Prep MVP: Between us, this crust is my secret weapon for busy nights. I’ll prep a batch on Sunday, store it in the fridge, and pull it out whenever cravings strike. It reheats like a dream—just toss it in the oven for 5 minutes with your toppings, and boom, dinner’s saved.
- Budget-Friendly Flex: No fancy ingredients, no markup—just pantry staples that won’t break the bank. A bag of brown rice flour lasts forever, and you can stretch this recipe into personal pizzas, calzones, or even a crispy flatbread. Leftovers? Freeze them. They’re just as good cold or reheated.
Step-by-step instructions for brown rice flour pizza crust
This gluten-free crust delivers crispy edges and chewy texture using simple techniques.
Combine Dry Ingredients for Even Texture
In a large mixing bowl, whisk together the 2 cups brown rice flour, 1 tbsp psyllium husk powder, 1 tbsp nutritional yeast, 1 tsp garlic powder, 0.5 tsp dried oregano, 1 tsp baking powder, and 0.5 tsp salt. The psyllium husk powder is crucial here—it acts as a natural binder that mimics gluten's elasticity. Sift the ingredients through a fine-mesh sieve if you have one to eliminate any clumps that could create uneven texture in your crust.
I like to mix these dry ingredients first because they need to be thoroughly combined before adding liquids. The psyllium husk absorbs moisture differently than flour, so you want it evenly distributed. Use a whisk for about 30 seconds to ensure all ingredients are fully incorporated and no pockets of flour remain.
Mix Wet Ingredients to Create a Smooth Batter
In a separate bowl, combine the 1.25 cups warm water (about 110°F), 0.25 cup extra-virgin olive oil, 1 tbsp cornstarch, and 1 tsp apple cider vinegar. The warm water helps activate the psyllium husk powder while the vinegar enhances the baking powder's leavening action. Stir this mixture until completely smooth—there should be no streaks of oil or lumps of cornstarch.
Here's the thing—temperature matters. If your water is too hot, it can cook the psyllium husk before it fully hydrates. If it's too cold, the crust may turn out dense. The 110°F target gives you that perfect balance. Let the water sit for 2-3 minutes if it's not quite warm enough, or microwave it briefly if needed.
Form the Dough and Rest for Optimal Structure
Pour the wet ingredients into the dry ingredients and stir vigorously with a silicone spatula for 2-3 minutes until a thick, shaggy dough forms. You'll notice it starts out sticky but gradually comes together. The dough should be pliable but still slightly tacky—this is normal with gluten-free crusts. If it's too dry, add 1 teaspoon warm water; if too sticky, add 1 teaspoon brown rice flour.
Once combined, transfer the dough to a lightly oiled surface and knead gently for 1-2 minutes just to smooth it out. Don't overwork it—this isn't traditional pizza dough. Shape it into a ball, place it in a lightly greased bowl, cover with plastic wrap, and let it rest for 20 minutes at room temperature. This resting period allows the psyllium husk to fully hydrate and the dough to relax slightly, making it easier to roll out.
Prepare the Crust for Toppings
After resting, transfer the dough to a floured surface (use additional brown rice flour if needed to prevent sticking) and roll it out to your desired pizza thickness—typically about ⅛-inch thick for a crispy crust. For a 12-inch pizza, aim for a 12-inch diameter. The edges will naturally be thicker than the center, which gives that beautiful crispy texture when baked.
Transfer the rolled-out crust to a parchment-lined baking sheet. Here's where precision pays off: use a pizza stone or inverted baking sheet in your oven for 10 minutes before baking to preheat it. This ensures even cooking and prevents soggy spots. While preheating, brush the crust lightly with extra-virgin olive oil and sprinkle with additional garlic powder and salt if desired.
Bake to Crispy Perfection
Preheat your oven to 425°F with the stone or baking sheet inside. Once preheated, slide the prepared crust into the oven and bake for 12-15 minutes until the edges are deep golden brown and the crust sounds hollow when tapped. The center should still look slightly underdone—it will finish cooking when you add your toppings and sauce.
This crust holds up beautifully to traditional toppings. After baking, you'll have a crispy, slightly chewy base that's sturdy enough to support tomato sauce, cheese, and all your favorite toppings without becoming soggy. The nutritional yeast adds a subtle cheesy flavor that pairs perfectly with marinara or pesto, while the garlic and oregano give it that classic Italian pizza taste.
Pro Tips For Making Brown Rice Flour Pizza Crust
- Mix Like Batter: Combine the brown rice flour, warm water, olive oil, baking powder, and salt in a bowl—then stir until it forms a thick, sticky paste, not a loose dough. I used to overmix and end up with a gummy mess; now I stop when it clumps together like wet sand.
- Preheat the Pan: Heat your cast-iron or heavy skillet over medium-high heat for 3-4 minutes before adding the crust—this ensures even cooking and prevents sticking. Cold pans make for soggy, uneven edges, and nobody wants that.
- Skip the Overworking: Resist the urge to stretch or roll this dough like traditional pizza crust—it’ll tear. Instead, press it gently into the pan with your fingers or a spatula, then let it rest for 5 minutes before adding toppings.
- Oil the Pan First: Coat the pan with 1 tablespoon of extra-virgin olive oil before pouring in the batter—this creates a nonstick barrier and adds flavor. I learned this after scrubbing stuck-on crust off my favorite pan for the third time.
Health benefits of this recipe
Gluten-Free Advantage
This crust is a game-changer for anyone avoiding gluten—brown rice flour provides a naturally crispy texture without the need for gums or thickeners that can leave an aftertaste.
Unlike many gluten-free flours that result in dense, cake-like crusts, brown rice flour creates a sturdy yet flexible base that holds toppings beautifully. The psyllium husk powder acts as a natural binder, mimicking gluten's elasticity while adding fiber and essential nutrients. 🌾
High-Fiber Nutrition
Brown rice flour delivers a significant fiber boost compared to traditional white flour crusts—about 5 grams of fiber per serving—which supports digestive health and helps stabilize blood sugar.
The psyllium husk adds an extra 3 grams of soluble fiber per tablespoon, promoting gut health and keeping you full longer. This makes it an excellent choice for anyone focused on whole-food nutrition without sacrificing taste or texture.
Low-Glycemic Choice
With a glycemic index of just 35-40, this crust won't spike your blood sugar like refined white flour alternatives. The combination of brown rice flour and psyllium husk creates a slow-digesting carbohydrate that provides sustained energy.
This makes it ideal for diabetics or anyone monitoring blood sugar levels while still enjoying their favorite pizza night. The nutritional yeast adds an extra layer of protein and B vitamins, enhancing the crust's nutritional profile.
Vegan-Friendly Foundation
Completely free from dairy and eggs, this crust serves as the perfect base for vegan pizzas without requiring special ingredients. The nutritional yeast provides that classic cheesy flavor without any animal products, while the olive oil and garlic powder add depth that rivals traditional crusts.
It's a fantastic option for plant-based diets while still delivering that satisfying pizza experience.
Allergen-Free Benefits
This recipe avoids common allergens like wheat, dairy, and eggs, making it safe for those with multiple food sensitivities. The brown rice flour is naturally free from gluten, nuts, and soy, while the psyllium husk is derived from plantain seeds—a hypoallergenic ingredient.
The simple ingredient list means fewer potential allergens to worry about, allowing everyone at the table to enjoy pizza without concern. 💪
Rich in Micronutrients
Brown rice flour retains more of its natural nutrients compared to white flour, including magnesium, phosphorus, and B vitamins like thiamine and niacin. The nutritional yeast contributes additional B vitamins and zinc, while the olive oil provides heart-healthy monounsaturated fats.
This crust isn't just delicious—it's a nutrient-dense alternative that supports overall health while satisfying pizza cravings.
Nutrition facts
Frequently asked questions
Can I substitute white rice flour for brown rice flour?
While you can use white rice flour, your crust will lack the nutty flavor and higher fiber content of brown rice. For best texture, use a 1:1 substitution, but expect slightly less crispiness. The psyllium husk still works, but the crust may be more prone to cracking. Brown rice flour's bran adds that satisfying bite when baked.
Why does my crust crack when baking?
Cracking usually happens from uneven hydration or insufficient psyllium husk. Make sure your dough is slightly tacky but not sticky when rolling out. If it cracks, brush with olive oil before adding toppings to help seal it. For extra insurance, let the dough rest 30 minutes longer than recommended to fully hydrate the psyllium.
Can I make this crust ahead of time?
Shape the crust and refrigerate it for up to 3 days or freeze for 3 months. Thaw overnight in the fridge before baking. For best results, bake from frozen at 400°F for 18-20 minutes with a tray underneath to catch any moisture. The crust reheats beautifully in a 375°F oven for 5 minutes to restore crispiness.
How do I get extra crispy edges?
For maximum crispiness, roll the edges slightly thinner than the center and brush them generously with olive oil before baking. Bake on a preheated pizza stone or steel for 14-16 minutes total. The high heat caramelizes the sugars in the brown rice flour, creating that perfect crunch. A baking sheet underneath catches any drips for extra crispy bottoms.
What toppings work best with this crust?
This crust handles both traditional and creative toppings beautifully. For classic options, try marinara sauce with vegan mozzarella, roasted vegetables, or pepperoni. For something lighter, use pesto with sun-dried tomatoes and fresh basil. The sturdy texture supports even heavy toppings like barbecue chicken or buffalo cauliflower without becoming soggy. Always pre-bake the crust for 8-10 minutes before adding toppings.