
Side Dishes
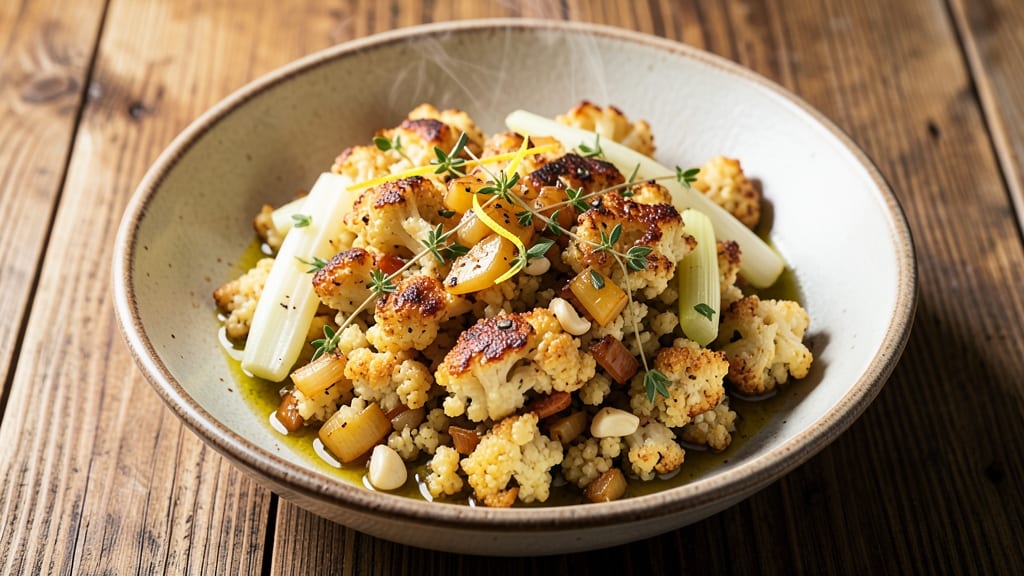
This cauliflower rice stuffing recipe delivers the perfect balance of crispy edges and fluffy centers without sacrificing texture or flavor. The secret lies in proper sautéing and seasoning, transforming simple cauliflower rice into a hearty, herb-infused side that rivals traditional bread stuffing.
Whether you're adapting it for vegan diets or keeping it classic, this method ensures every bite stays tender yet satisfying.
By roasting the cauliflower rice until golden and crispy while maintaining a moist interior, you create a stuffing that holds up beautifully—whether stuffed into bell peppers, baked in a casserole, or served as a standalone dish.
The herb infusion adds depth, making it versatile for holidays or weeknight meals. Ready in under 45 minutes, this recipe proves healthy doesn’t mean boring.
Ingredients for cauliflower rice stuffing
Herb-infused cauliflower rice transforms into crispy-edged, fluffy-center stuffing with these quality ingredients.
| Ingredient | Amount | Notes |
|---|---|---|
| Fresh Cauliflower Rice 🥬 | 4 cups | Freshly grated or pre-riced |
| Extra-Virgin Olive Oil 🫒 | ½ cup | For roasting and crisping |
| Yellow Onion 🧅 | 1 whole | Finely diced, about 1 cup |
| Celery Stalks 🥬 | 2 whole | Finely chopped, about 0.5 cup |
| Garlic Cloves 🧄 | 4 cloves | Minced for depth of flavor |
| Fresh Thyme Leaves 🌿 | ¼ cup | Chopped, stems removed |
| Fresh Rosemary 🌿 | ¼ cup | Finely chopped, stems removed |
| Fresh Sage Leaves 🌿 | ¼ cup | Chopped, stems removed |
| Vegetable Broth 💧 | 1 ½ cups | Low-sodium preferred |
| Nutritional Yeast 🧀 | ¼ cup | For umami depth |
| Diamond Crystal Kosher Salt 🧂 | 1 ½ tsp | Adjust to taste |
| Freshly Ground Black Pepper 🌶️ | ½ tsp | For balanced seasoning |
| Smoked Paprika 🌶️ | 1 tsp | For subtle smokiness |
| Fresh Parsley Leaves 🌿 | 0.1 cup | Chopped, for garnish |
The cauliflower rice is the foundation—freshly grated or pre-riced works equally well, but avoid pre-shredded bags with additives. For the best flavor, Whole Foods or Trader Joe's carry high-quality frozen cauliflower rice that's already riced and ready to use. Fresh herbs are non-negotiable here: Trader Joe's sells pre-chopped herb blends that save time, but nothing beats freshly chopped thyme, rosemary, and sage. Look for vibrant, fragrant herbs with no wilting. The vegetable broth should be low-sodium to avoid over-salting your dish—Imagine or Pacific Foods brands are reliable choices.
No fresh herbs? Dried thyme and rosemary at one-third the amount work in a pinch, but the flavor won't be as bright. Substitute the nutritional yeast with white miso paste (1 tsp) for umami if you're avoiding yeast. Out of smoked paprika? Regular paprika plus a pinch of liquid smoke mimics the effect. The onion and celery should be finely chopped to mimic traditional stuffing texture—a food processor does the job in seconds. For extra crispiness, toss the cauliflower rice with 1 tbsp cornstarch before roasting.
This stuffing reheats beautifully—store in an airtight container for up to 5 days in the fridge or 3 months frozen. For best texture, reheat covered with a damp paper towel in the oven at 350°F for 15-20 minutes. The herbs can be prepped ahead and stored in the fridge for 3 days in a sealed container. Double the recipe for holiday meals—it freezes exceptionally well in portion-sized containers. Garnish with fresh parsley right before serving to maintain vibrant color.
Why You'll Love This Recipe
- No Chopping Nightmare: I swear by this recipe on busy nights—just pulse the cauliflower in a food processor, and boom, you’ve skipped the tedious grating. The onion and celery get diced in under two minutes while the rice sautés, so you’re not stuck staring at a cutting board for 20 minutes.
- Savory Crispy Magic: That golden edge on the cauliflower rice? It’s all in the olive oil and garlic—just toast it low and slow until it’s caramelized but still tender. Honestly, it’s the kind of texture that makes you pause mid-bite, and it pairs perfectly with anything from roasted veggies to turkey.
- Stuffing for Everything: Between us, this isn’t just for Thanksgiving. Stuff it into bell peppers for a veggie-packed dinner, mix it into omelets for a low-carb breakfast, or even use it as a topping for baked potatoes. I’ve even sneaked it into tacos when I’m craving something hearty but lighter.
- Leftovers That Don’t Suck: Unlike traditional stuffing, this keeps beautifully for days—no soggy texture, just crispy bits you can reheat straight from the fridge. I’ll be real: I’ve had it cold in salads, warmed up in frittatas, and even mashed into a quick soup thickener. Zero waste, all flavor.
Step-by-step instructions for herb-infused cauliflower rice stuffing
Here's how to achieve that perfect balance of crispy edges and fluffy centers in your cauliflower rice stuffing.
Roast the Vegetables for Maximum Flavor and Texture
Preheat your oven to 425°F. In a large bowl, combine the 4 cups fresh cauliflower rice, 0.5 cup extra-virgin olive oil, 1.5 tsp kosher salt, 0.5 tsp black pepper, and 1 tsp smoked paprika. Toss thoroughly until every piece is evenly coated. Spread the mixture in an even layer on two rimmed baking sheets.
Roast for 15-18 minutes until the cauliflower rice is golden brown and slightly crispy at the edges. This roasting step is crucial—it develops deep flavor and creates that satisfying texture contrast we're after. While it roasts, finely dice the 1 whole yellow onion and 2 whole celery stalks, then mince the 4 cloves garlic. Set them aside for the next step.
Sauté the Aromatics and Prepare the Herb Mixture
Heat a large skillet over medium heat and add the diced onion and celery. Cook for 5-6 minutes until softened but not browned, stirring occasionally. Add the minced garlic and cook for another 30 seconds until fragrant—this is where the foundation of your stuffing's flavor develops.
In a separate bowl, combine the 0.25 cup chopped fresh thyme, 0.25 cup chopped fresh rosemary, and 0.25 cup chopped fresh sage. This herb blend will infuse your stuffing with complex, earthy notes. I like to use my fingers to gently crush the herbs slightly against the side of the bowl—this releases their essential oils and intensifies their flavor.
Combine All Ingredients and Bake to Perfection
Transfer the roasted cauliflower rice to a large mixing bowl. Add the sautéed onion and celery mixture, the herb blend, and the 0.25 cup nutritional yeast. Stir gently but thoroughly to distribute everything evenly. The nutritional yeast adds that savory umami depth that makes this stuffing truly exceptional.
In a separate saucepan, warm the 1.5 cups vegetable broth over medium heat until just simmering. Pour this hot broth over the cauliflower mixture and stir again. The heat from the broth will help steam the cauliflower, creating that light, fluffy texture we want in the centers.
Bake Until Golden and Crispy
Transfer the stuffing mixture to a greased 9x13-inch baking dish. Smooth the top with a spatula and bake at 375°F for 20-25 minutes until the top is deep golden brown and the edges are crispy. Here's the professional tip: If you want extra crispiness, broil for 2-3 minutes at the end, watching closely to prevent burning.
Remove from the oven and let rest for 5 minutes before serving. This resting period allows the juices to redistribute throughout the stuffing. Garnish with the 0.1 cup chopped fresh parsley just before serving to add a bright, fresh finish that cuts through the richness of the herbs and roasted vegetables.
Pro Tips For Making Cauliflower Rice Stuffing
- SOAK THE CAULIFLOWLER FIRST: Fresh cauliflower rice releases more water than bagged versions—toss it in a colander, sprinkle with 1 teaspoon salt, and let it drain for 10 minutes. This cuts down on soggy stuffing later, especially if you’re baking it. (Yes, even if you’re impatient like me, give it those 10 minutes.)
- SWEEAT ONIONS LOW AND SLOW: After dicing the onion, cook it in olive oil over medium-low heat for 8-10 minutes until translucent but not browned. Rushing this step burns the onions and turns your stuffing bitter—trust me, I’ve done it. The goal is soft, sweet onions, not crispy bits.
- CHOP CELERY FINE—LIKE ONIONS: Skip the thick chunks. Dice celery into 1/8-inch pieces to match the onion’s texture, so it cooks evenly and blends into the stuffing instead of staying crunchy. (Your future self will thank you when you take that first bite.)
- USE GARLIC BUTTER AT THE END: Toss the cooked cauliflower rice, onions, and celery with 2 tablespoons softened butter and 3 minced garlic cloves after removing from heat. This prevents burning the garlic and keeps the flavors bright. (Sounds weird, but it works—no more bitter garlic notes ruining your dish.)
Pro cooking tips for this dish
Roasting for Crispy Edges
Roasting the cauliflower rice at 425°F for 15-18 minutes is the game-changer for texture. Spread it in an even layer on your baking sheets—I use two half-sheet pans to prevent overcrowding.
The high heat caramelizes the natural sugars, creating those irresistible crispy edges while keeping the centers tender. Don't skip this step! 🔥
Herb Infusion Technique
For maximum herb flavor, crush the fresh thyme, rosemary, and sage leaves between your fingers before adding them to the stuffing. This releases their essential oils and intensifies their aroma.
I like to do this in a small bowl while I'm sautéing the onions and celery—it only takes 30 seconds but makes a world of difference. 🌿
Broth Temperature Matters
Always use hot vegetable broth when combining it with the cauliflower mixture. The heat helps steam the cauliflower, creating that light, fluffy texture we want in the centers.
I warm the broth just until it simmers—about 2-3 minutes on the stove—and then pour it over the cauliflower while it's still hot. This simple step prevents soggy stuffing. ✨
Baking Dish Choice
Use a 9x13-inch baking dish for even baking, but if you're making this for stuffing bell peppers or other vegetables, divide it into portion-sized containers. I recommend glass Pyrex dishes because they distribute heat evenly and make it easy to see when your stuffing is golden brown.
Grease it well to prevent sticking!
Broiling for Extra Crisp
For that restaurant-quality crispy top, broil your stuffing for 2-3 minutes at the end of baking. Watch it closely—broilers can be aggressive! I like to keep my oven door slightly ajar to allow steam to escape, which helps prevent burning while still achieving that perfect golden crust. 💫
Resting Before Serving
Never skip the 5-minute rest after baking. This allows the juices to redistribute throughout the stuffing, ensuring every bite is moist and flavorful. I often garnish with fresh parsley right after resting—it adds a pop of color and freshness that makes the dish look as good as it tastes. 💛
Nutrition facts
Frequently asked questions
Can I use pre-riced frozen cauliflower rice instead of fresh?
Yes! Pre-riced frozen cauliflower rice works perfectly—just thaw and drain it well before roasting. For best texture, spread it on a baking sheet and pat dry with a paper towel to remove excess moisture. This prevents soggy stuffing and ensures crispy edges.
How do I make this stuffing vegan?
This recipe is already vegan! Simply use extra-virgin olive oil instead of butter and ensure your vegetable broth is plant-based. The nutritional yeast adds umami without animal products. For extra richness, stir in 1 tablespoon vegan butter at the end of baking.
Can I prepare this stuffing ahead of time?
Assemble the stuffing up to 24 hours ahead and refrigerate it in an airtight container. Bake it straight from the fridge (add 5-10 minutes to the baking time) or reheat it in the oven at 350°F for 15 minutes before broiling for crispiness.
What's the best way to reheat leftovers?
Cover with a damp paper towel and reheat at 350°F for 15-20 minutes until warmed through. For extra crispiness, broil for 2-3 minutes at the end. Avoid microwaving—it makes the stuffing rubbery. Store leftovers in an airtight container for up to 5 days.
How can I make this stuffing gluten-free?
This recipe is naturally gluten-free! Just ensure your vegetable broth is certified gluten-free and check nutritional yeast labels for cross-contamination warnings. If using store-bought broth, opt for brands like Pacific Foods or Imagine that guarantee gluten-free ingredients.