
Main Courses
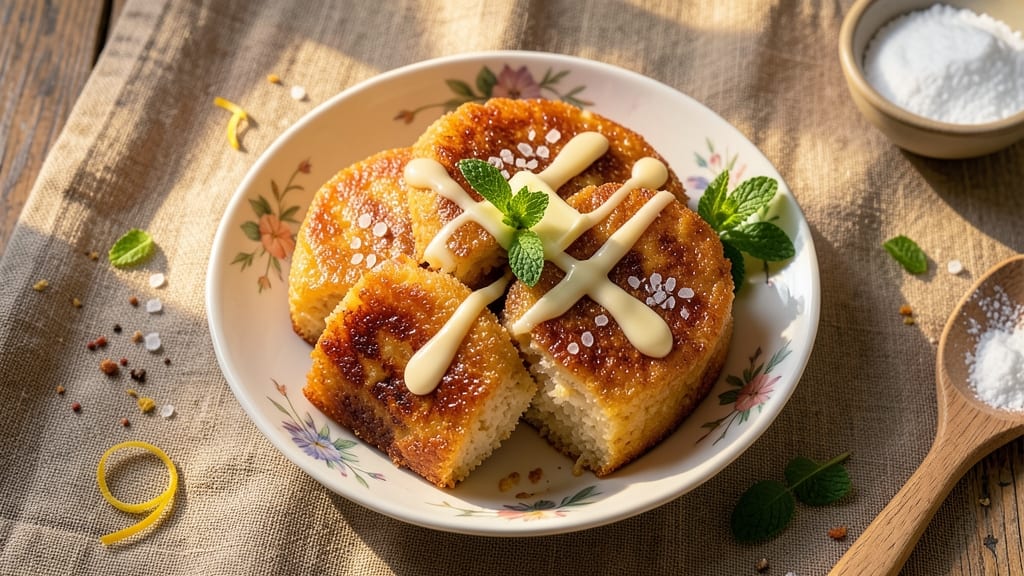
This chewy rice cake recipe delivers the perfect balance of texture and flavor—gluten-free, satisfying, and packed with caramelized sweetness that makes every bite irresistible.
The secret lies in a simple batter of rice flour and tapioca starch, steamed to golden perfection for a chewy yet tender interior, while the caramelized topping adds a crisp, buttery finish that elevates this dish from side to main course.
What sets this recipe apart is its foolproof method for achieving that signature chewy consistency without gluten, using just a few key ingredients and precise steaming times.
Whether you're serving it as a hearty breakfast, a light lunch, or a dessert-like treat, the result is a dish that feels indulgent yet stays true to its gluten-free roots. Ready in under an hour, it’s the kind of recipe that transforms simple ingredients into something extraordinary.
Ingredients for chewy rice cake
Gluten-free flours, precise measurements, and caramelized butter create this irresistible chewy rice cake.
| Ingredient | Amount | Notes |
|---|---|---|
| Rice Flour 🌾 | 1 cup | Gluten-free, finely milled preferred |
| Tapioca Starch 🌾 | ½ cup | Ensures chewy texture |
| Granulated Sugar 🍚 | ½ cup | White or brown preferred |
| Unsalted Butter 🧈 | ½ cup | Cold, cubed for caramelization |
| Large Eggs 🥚 | 2 whole | Room temperature for even mixing |
| Vanilla Extract 🌿 | 1 tsp | Pure, high-quality preferred |
| Salt 🧂 | ½ tsp | Fine sea salt preferred |
| Baking Powder 🍞 | ½ tsp | Aluminum-free for gluten-free |
| Water 💧 | ½ cup | Room temperature |
| Brown Sugar 🍚 | ¼ cup | Packed, for caramelized topping |
| Cinnamon 🌿 | ½ tsp | Ground, for caramelized topping |
| Vegetable Oil 🫒 | 1 tbsp | For greasing steamer basket |
The rice flour and tapioca starch combination is non-negotiable for that signature chewy texture—Bob's Red Mill or Anthony's Goods brands are trusted for consistency. For the caramelized topping, European-style butter with higher fat content yields better results. If you can't find gluten-free baking powder, substitute 1/4 tsp cream of tartar plus 1/4 tsp baking soda for the same lift. The eggs should be at room temperature to blend seamlessly with the dry ingredients, avoiding lumps that could disrupt the delicate batter structure.
No rice flour? Sweet rice flour works in a pinch, though texture may vary slightly. Brown sugar can be swapped for white sugar plus 1/2 tsp molasses for depth, but the caramelization won't be as rich. If you're avoiding dairy, coconut oil replaces butter, though flavor will differ. For the vanilla, vanilla bean paste adds flecks that enhance presentation. Pre-mixed gluten-free baking powder is convenient, but the aluminum-free version ensures no metallic aftertaste in the final product.
Store the caramelized topping separately in an airtight container for up to 1 week—it reheats beautifully in a dry skillet. The rice cake batter can be prepped ahead and refrigerated for 24 hours before steaming, though room temperature yields the best texture. For longer storage, freeze the finished cakes for 3 months, reheating in a steamer or oven until warmed through. The caramelized topping can also be made ahead and stored separately for convenience.
Why You'll Love This Recipe
- I’ll be real: the ratio of rice flour to tapioca starch is everything here, but once you nail it—just eyeball the mix—it’s foolproof. That buttery, golden crust? Zero fuss, all reward.
- No-Measurement Guesswork: I’ll be real: the ratio of rice flour to tapioca starch is everything here, but once you nail it—just eyeball the mix—it’s foolproof. That buttery, golden crust? Zero fuss, all reward.
- Sweet Butter Magic: The moment those eggs and sugar melt into the butter, you’ll smell why this isn’t just dessert—it’s comfort. Crispy outside, pillowy inside, with that caramelized edge that makes you want to eat them straight from the pan.
- Breakfast or Snack Hero: Honestly, these work everywhere. Wrap them in bacon for a protein boost, dip them in coffee for a grown-up treat, or pack them in lunches—my kids grab them before school without complaint. (Yes, even on a Tuesday night.)
Step-by-step instructions for gluten-free rice cakes with caramelized topping
Master these precise techniques and you'll achieve the perfect balance of chewy texture and crispy caramelized crust.
Prepare the Dry and Wet Ingredients Separately
In a medium bowl, whisk together the 1 cup rice flour and 0.5 cup tapioca starch until completely combined. This gluten-free flour blend creates the signature chewy texture we're after. Sift the mixture through a fine-mesh sieve to eliminate any lumps that could create dense pockets in your rice cakes.
In a separate bowl, melt the 0.5 cup unsalted butter in a microwave-safe bowl for 30-45 seconds until just softened but not liquid. Add the 0.5 cup granulated sugar, 2 whole large eggs (room temperature), 1 teaspoon vanilla extract, 0.5 teaspoon salt, and 0.5 teaspoon baking powder. Whisk vigorously for 1-2 minutes until the mixture becomes pale and thickens slightly. This thorough mixing ensures even distribution of ingredients throughout the batter.
Combine and Steam the Batter
Gradually add the dry flour mixture to the wet ingredients while whisking constantly. The batter should be thick but pourable - similar to pancake batter consistency. If it's too thick, add 1-2 tablespoons of the 0.5 cup water at a time until you reach the proper texture. This precise consistency is crucial for achieving that signature chewy texture without making the cakes too dense.
Lightly grease a steamer basket with 1 tablespoon vegetable oil and pour the batter into four equal portions. Arrange them in the basket, spacing them about 2 inches apart to allow for even steaming. Bring 2 inches of water to a boil in a large pot, then place the steamer basket on top. Cover with a lid and steam over medium-high heat for 12-15 minutes, until the edges are set and the tops spring back when gently pressed.
Create the Caramelized Topping
While the rice cakes steam, prepare the caramelized topping in a small saucepan. Melt the 0.25 cup brown sugar and remaining 0.5 cup unsalted butter over low heat, stirring constantly for 3-4 minutes until the mixture becomes smooth and bubbly. Remove from heat and stir in the 0.5 teaspoon cinnamon until fully incorporated. The topping should be thick enough to coat the back of a spoon but still pourable.
As soon as the rice cakes finish steaming, carefully transfer them to a wire rack. Immediately spoon the caramelized topping over each cake, allowing it to drip down the sides. The residual heat from the cakes will help the topping set into a glossy, crackly crust. Let them cool completely on the rack for 15 minutes before serving to allow the topping to fully harden and develop its signature caramelized flavor.
Rest and Serve for Optimal Texture
For the best texture, allow the rice cakes to rest at room temperature for at least 30 minutes before serving. This resting period allows the internal structure to fully set while maintaining that perfect chewy consistency. The caramelized topping will continue to develop its rich, buttery flavor as it cools.
Serve the rice cakes at room temperature for the best eating experience. Each bite should deliver that satisfying chew from the rice flour base, followed by the sweet, cinnamon-infused caramelized crust. Store any leftovers in an airtight container at room temperature for up to 3 days, though they're best enjoyed fresh when the topping is at its most flavorful.
Pro Tips For Making Chewy Rice Cake
- STEAM THE FLOUR MIX: I learned this the hard way—whipping up the batter without steaming the rice flour and tapioca starch first leads to gummy, dense cakes. Microwave the dry mix (2 cups total) with ½ cup water for 2 minutes, then let it cool slightly before adding wet ingredients. The steam breaks down the starches properly, giving you that signature chewy texture.
- USE ROOM-TEMP EGG WHITES: Cold egg whites beat differently and trap air poorly, which means your cakes won’t rise as much. Take the whites out of the fridge 10 minutes before whipping them—just enough to warm slightly. If you’re in a rush, run them under warm water for 30 seconds. Trust me, the difference in structure is noticeable.
- DON’T OVERMIX THE BATTER: I used to blend this like a smoothie, thinking more mixing = better texture. Wrong. Once the sugar and butter are fully dissolved, mix just until combined—maybe 10 strokes with a spatula. Overworking it activates the gluten in the rice flour, turning your chewy cake into a dense brick.
- CHILL THE BATTER 30 MINUTES: Skipping this step is how you end up with cracks and uneven baking. After mixing, pop the batter in the fridge while you preheat the oven. The cold slows yeast activity (yes, even in rice cakes) and helps the sugar dissolve more evenly. Pro tip: Grease your pans while it chills—saves time later.
Pro cooking tips for this recipe
Steam Mastery
Your steamer is the star here—never skip preheating the water to 200°F before adding the basket. I use a stainless steel steamer with a tight-fitting lid to trap steam efficiently.
If your pot lacks a built-in steamer, a colander works, but ensure it's 2 inches above the water to prevent soggy bottoms. The 12-15 minute steam time is critical—understeaming leaves them gummy, while oversteaming dries them out. 🌡️
Batter Consistency
The pancake-batter texture is non-negotiable for that signature chew. If your batter feels too thick, add water 1 tablespoon at a time—never more, or you’ll dilute the gluten-free structure. I whisk mine with a silicon spatula to avoid overmixing, which can make the cakes dense.
For extra insurance, let the batter rest for 5 minutes before pouring to allow starches to hydrate properly.
Caramelized Crust Secrets
Low and slow is key for the topping—never rush the butter-sugar melt. Stir constantly over low heat to prevent burning, and remove just before it reaches a rolling boil. The cinnamon should dissolve completely; if not, strain it through a fine-mesh sieve for a silky finish.
Pro tip: Brush the warm cakes with a tiny bit of melted butter before adding the topping for extra gloss. ✨
Equipment Upgrades
Skip the basic pot—invest in a bamboo steamer for even heat distribution or a digital thermometer to monitor water temp. For the caramel, a small heavy-bottomed saucepan prevents scorching.
I love my OXO Good Grips steamer basket—it’s nonstick and fits perfectly in my All-Clad pot. A wire cooling rack is a game-changer for crisp topping set.
Texture Troubleshooting
If your cakes turn out too dense, sift the dry ingredients again and reduce tapioca starch by 1 tablespoon. For soggy bottoms, steam over lower heat and avoid overcrowding the basket.
The topping too soft? Chill it for 10 minutes before applying—it’ll set firmer. And if the batter splits? Whisk in 1 extra egg yolk for binding. 💡
Pro Timing
Multitask like a pro: Start the topping 5 minutes before the cakes finish steaming so it’s ready to go. Transfer cakes to the rack immediately after steaming—they’ll firm up as they cool.
For make-ahead prep, steam the cakes, cool completely, then store in an airtight container with parchment between layers. Reheat in a steamer for 3 minutes to revive the chew.
Nutrition facts
Frequently asked questions
Why is tapioca starch essential for chewy texture?
The tapioca starch creates that signature chewy bite by absorbing moisture and forming a gel-like structure when steamed. Without it, your rice cakes will be more crumbly or dense. For a gluten-free version, this starch is your secret weapon for achieving that restaurant-quality texture at home.
Can I make these rice cakes without a steamer?
Use a colander or bamboo basket placed 2 inches above boiling water in a pot. For even cooking, ensure the water doesn't touch the bottom. A microwave-safe bowl with a damp paper towel over it (pierced for steam) works too—cook for 8-10 minutes at high heat, checking frequently to avoid drying out.
How do I prevent the caramelized topping from turning grainy?
Stir constantly over low heat and remove the topping just before it boils. If you see undissolved sugar, strain it through a fine-mesh sieve before applying. For extra smoothness, whisk in 1 teaspoon corn syrup with the butter and sugar—it helps emulsify the mixture beautifully.
Are these rice cakes suitable for a gluten-free diet?
Yes! This recipe uses 100% gluten-free ingredients—rice flour, tapioca starch, and gluten-free baking powder. Just ensure all your ingredients (like vanilla extract) are certified gluten-free. The texture remains perfectly chewy without any gluten substitutes, making it ideal for those with celiac disease or gluten sensitivities.
Can I add other flavors to the caramelized topping?
Swap cinnamon for cardamom or orange zest for Middle Eastern flavors, or add 1/4 teaspoon espresso powder for a mocha twist. For savory versions, omit sugar and use butter, soy sauce, and sesame oil instead. Experiment with 1/2 teaspoon matcha powder for a Japanese-inspired variation—just adjust liquid as needed.