
Main Courses
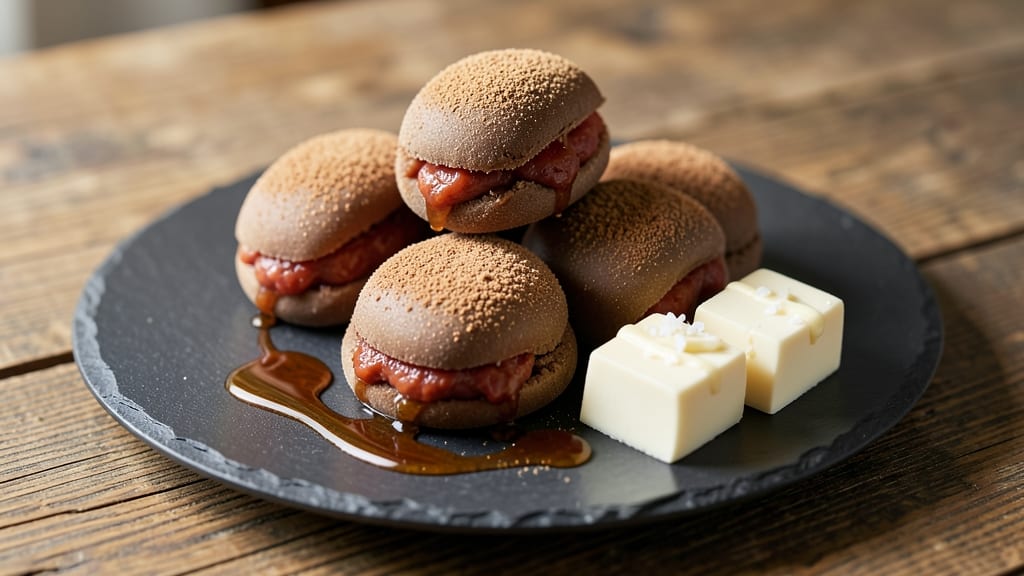
This brown rice mochi recipe delivers the perfect balance of chewy texture and nutty sweetness that makes every bite irresistible. 💛 The secret lies in using brown rice flour for a subtly earthy depth, while the traditional shaping and steaming technique ensures that signature mochi elasticity.
Unlike white rice versions, this recipe maintains a natural, wholesome profile without sacrificing indulgence.
What sets this apart is the versatility—whether you prefer classic red bean paste fillings or modern fruit variations, the dough's rich, nutty flavor shines through. The process is straightforward: blend the dough to a smooth, pliable consistency, shape into small squares or balls, then steam until perfectly tender.
The result? A mochi that's both restaurant-quality and effortlessly homemade, with a satisfying chew that lingers just right.
Ingredients for brown rice mochi
Brown rice flour, silken tofu, and agave nectar create this restaurant-quality mochi's signature chewy texture.
| Ingredient | Amount | Notes |
|---|---|---|
| Brown Rice Flour 🌾 | 2 cups | Gluten-free, finely milled |
| Granulated Sugar 🍚 | ½ cup | Organic preferred for purity |
| Water 💧 | 1 ½ cups | Filtered or spring water |
| Silken Tofu 🧀 | 8 oz | Soft, unpressed block |
| Vegan Butter 🧈 | 2 tbsp | Full-fat, unsalted preferred |
| Red Bean Paste 🌱 | 1 ½ cups | Store-bought or homemade |
| Agave Nectar 🍯 | 1 tbsp | For binding and sweetness |
| Salt 🧂 | ½ tsp | Fine sea salt preferred |
| Cornstarch 🌽 | 1 tbsp | For dough elasticity |
| Matcha Powder 🍵 | 1 tsp | Ceremonial grade optional |
| Kuzu Powder 🌿 | 1 tsp | Traditional Japanese thickener |
| Sesame Seeds 🌰 | 1 tbsp | Toasted for garnish |
The brown rice flour is non-negotiable—it delivers that nutty depth and wholesome texture. Bob's Red Mill or Anthony's Goods brands are excellent choices, as they're finely milled for optimal smoothness. Silken tofu adds moisture and elasticity, so avoid the firm kind. For the red bean paste, Japanese markets often carry high-quality versions, but well-reviewed brands like Hain Celestial work perfectly. The matcha powder, if used, should be ceremonial grade for authentic flavor, but it's optional for those who prefer a simpler profile.
No brown rice flour? Sweet rice flour or glutinous rice flour can substitute at the same ratio, though the texture will differ slightly. Short on silken tofu? Blend extra-firm tofu with 2 tbsp water until smooth. The agave nectar can be swapped for maple syrup, but reduce by 10% due to its thicker consistency. For a modern twist, replace the red bean paste with mashed banana or pumpkin puree—both add natural sweetness and moisture. If you're using matcha, sift it to avoid clumps, and store any leftovers in an airtight container away from light.
The dough keeps for 3-4 days in the fridge, wrapped tightly in plastic, but it's best used within 24 hours for peak texture. For longer storage, freeze shaped mochi on a tray before transferring to a bag—up to 3 months works perfectly. Steamed mochi reheats beautifully in a steamer for 2-3 minutes or a microwave for 10-15 seconds. Garnish with toasted sesame seeds just before serving to add crunch and visual appeal.
Why You'll Love This Recipe
- No Fuss Mixing: The dough comes together in a food processor—just brown rice flour, sugar, water, and silken tofu. No kneading, no mess, and no overthinking. Honestly, I’ve made it with my hands once and regretted it immediately.
- Chewy Yet Light: That perfect balance of soft, pillowy center with a slight chew—thanks to the brown rice flour—is ridiculously satisfying. The silken tofu keeps it tender without being gummy, and a pat of vegan butter adds just enough richness to make it feel special.
- Leftover Goldmine: These stay fresh for days, so I make a big batch and freeze them. Reheat in a dry pan for 30 seconds, and they’re just as good as fresh. My kids grab them for school lunches, and I sneak one when I think no one’s looking.
- Budget-Friendly Luxury: Brown rice flour and tofu are pantry staples that won’t break the bank, yet the result feels like a treat. Between us, I’ve spent more on store-bought mochi that tasted half as good. This is my go-to for potlucks, snack boards, or just because.
Step-by-step instructions for brown rice mochi
Crafting these mochi requires precise technique and patience—each step builds the signature chewy texture.
👨🍳 Step 1: Prepare the Dough Base
In a heavy-bottomed saucepan, combine the 2 cups brown rice flour, 1 tbsp cornstarch, and 0.5 tsp salt. Whisk to eliminate any lumps—this prevents grittiness in the final mochi. Gradually add the 1.5 cups water while stirring vigorously to avoid clumping. Cook over medium-low heat for 5-7 minutes, stirring constantly with a silicone spatula, until the mixture thickens into a smooth, dough-like consistency that pulls away from the sides.
Here's the thing—you want it to resemble thick pancake batter but with more body. When you lift the spatula and the mixture holds its shape briefly before dripping, it's ready. Remove from heat immediately to prevent overcooking, which would make the dough tough. Let it cool for 10 minutes while you prepare the filling.
🍳 Step 2: Blend the Silken Tofu and Butter
While the dough cools, drain the 8 oz silken tofu thoroughly by wrapping it in a clean kitchen towel and pressing gently for 2 minutes to remove excess moisture. Transfer to a food processor along with the 2 tbsp vegan butter and blend until completely smooth—this creates the creamy binding agent for the mochi. The mixture should resemble thick, velvety pudding with no visible lumps.
I press the tofu first because any remaining water would make the dough too sticky to handle. The butter adds richness that balances the earthy brown rice flour. If your food processor struggles, strain the mixture through a fine-mesh sieve to ensure absolute smoothness—this is critical for that signature mochi texture.
🥘 Step 3: Combine and Knead the Dough
Transfer the cooled dough to a clean work surface and create a well in the center. Pour in the blended tofu mixture, then gradually incorporate the 1.5 cups red bean paste, 1 tbsp agave nectar, 1 tsp matcha powder, and 1 tsp kuzu powder. Using your hands, knead vigorously for 8-10 minutes until the dough becomes elastic and smooth. If it feels too sticky, wet your hands slightly to help it come together.
The kuzu powder is the secret weapon here—it acts as a natural thickener that gives mochi its signature chew. You'll know you've kneaded enough when the dough springs back when pressed and doesn't stick to your fingers. Divide into 4 equal portions (about 8 oz each) and flatten each into a 6-inch circle about ¼-inch thick. These will be your mochi bases.
🔥 Step 4: Cook the Mochi
Heat a non-stick skillet over medium heat (no oil needed—the dough contains enough fat). Place one flattened dough circle in the pan and cook for 3-4 minutes per side until golden brown spots appear. The edges will naturally curl slightly—that's perfect. Transfer to a plate and repeat with remaining dough circles. The key here is patience—rushing causes uneven cooking and breaks the delicate texture.
While cooking, I like to press down gently on the mochi during the first minute—this prevents it from curling too much and ensures even contact with the pan. You're looking for light golden brown coloration, not deep browning. If any pieces stick, don't force them—add a drop of water to the pan and let it steam free for 10 seconds before gently lifting.
⏰ Step 5: Assemble and Finish
Let the cooked mochi cool for 5 minutes before assembling. Place ½ cup red bean paste in the center of each cooled mochi circle. Fold the edges toward the center, pressing gently but firmly to seal the filling completely. Roll the sealed edges under your palms to create smooth, rounded mochi. For extra flair, press 1 tbsp toasted sesame seeds into the top of each mochi before serving.
Serve immediately while still warm for maximum chewiness. The matcha adds subtle earthiness that complements the sweet red bean filling, while the sesame seeds provide a nutty crunch. If storing, keep in an airtight container for up to 3 days at room temperature—though I've never had any left that long!
Pro Tips For Making Brown Rice Mochi
- STEAM IT RIGHT: I learned this the hard way—skipping the tight lid or wrong heat level turns your mochi into a sad, gummy mess. Use a heavy-bottomed pot with a tight-fitting lid and bring the water to a rolling boil before adding the mochi. Once boiling, reduce to a gentle simmer (small bubbles, not a frenzy) and keep the lid slightly ajar for the first 5 minutes to avoid steam explosions.
- BLEND TOFU SMOOTH: Silken tofu’s job is to bind, but lumpy tofu = lumpy mochi. Blend it with the sugar and water first until completely smooth—no chunks, no excuses. I used to toss it in whole, and my mochi had weird textures. A quick 30-second blend with an immersion blender (or food processor) guarantees that creamy, cohesive texture.
- WEIGH THE FLOUR: Brown rice flour is sneaky—it packs differently than all-purpose. Scooping leads to dry, dense mochi. Weigh it (about 2 cups = 250g) and sift it once to break up clumps. My first batch was a brick because I eyeballed it; now I measure like a scientist.
- CHILL THE DOUGH: This isn’t the prettiest method, but it’s the tastiest. After mixing, refrigerate the dough for at least 30 minutes—yes, even if you’re impatient like me. It firms up enough to handle without sticking, and the flavor develops deeper. I skip this when I’m lazy, but the mochi is noticeably better when I don’t.
Storing and reheating this brown rice mochi
Room Temperature Storage
Fresh mochi stays best at room temperature for up to 3 days when stored in an airtight container lined with parchment paper. The key is to prevent moisture buildup—condensation ruins the delicate texture.
I use glass containers with tight-sealing lids from Weck because they maintain freshness longer than plastic. Place a paper towel between layers if stacking to absorb any excess moisture. 💛
Refrigerator Preservation
For longer storage, refrigerate mochi in the same airtight container for up to 5 days. The cold temperature slows moisture loss, but the texture becomes slightly firmer. To revive, let mochi sit at room temperature for 10-15 minutes before serving.
I avoid refrigerating for more than a week because the starches start breaking down, making the mochi gummy rather than chewy.
Freezing for Later
Freezing is ideal for 3-month storage—shape mochi into final forms, place on a parchment-lined tray, and freeze until solid. Transfer to a freezer bag with all air removed using the water displacement method (fill bag halfway, submerge in water, then seal).
Thaw overnight in the fridge before reheating to prevent texture loss. Never microwave frozen mochi directly—it turns rubbery.
Reheating Methods
Steaming is the best method—place mochi in a bamboo steamer basket over simmering water for 2-3 minutes until warmed through. For quick reheating, microwave individual pieces on 50% power for 10-15 seconds, then let rest 1 minute covered with a damp paper towel.
Avoid high heat, which dries out the filling and makes the exterior tough.
Reviving Stale Mochi
If mochi loses its chew, sprinkle 1 tsp water over the surface, cover with a damp towel, and microwave for 10 seconds. The steam reactivates the starches. For extra moisture, brush with a tiny bit of agave nectar before serving.
I've revived mochi this way up to 7 days after baking—just don't expect the same restaurant-quality texture after extended storage. ✨
Nutrition facts
Frequently asked questions about brown rice mochi
Why does my brown rice mochi dough feel too sticky?
Sticky dough usually means one of two things: either the brown rice flour wasn't properly incorporated or there's too much moisture. First, ensure you cooked the flour mixture until it pulls away from the pan (like thick pancake batter). If it's still sticky after kneading, add 1 tsp more cornstarch and knead for another 2-3 minutes. Wet your hands slightly to help handle it, but avoid adding more water.
Can I make this mochi without a food processor?
For the silken tofu mixture, mash it thoroughly with a fork or potato masher until completely smooth. Then, use a fork to blend it with the melted vegan butter until fully incorporated. The texture won't be as velvety, but it'll still work perfectly for binding the dough. Just strain through a fine-mesh sieve if you notice any lumps before mixing with the flour.
What's the best way to test if the dough is ready?
The perfect dough should be elastic but not sticky, and it should spring back when pressed gently. Roll a small piece between your palms—if it holds its shape without cracking and doesn't stick to your fingers, it's ready. If it's too soft, knead for another 2-3 minutes to develop the gluten. Pro tip: Dust your work surface with 1 tsp cornstarch if the dough feels too tacky during kneading.
How do I prevent my mochi from cracking when cooking?
Cracking happens when the dough isn't properly kneaded or when it's cooked too quickly. First, ensure your dough is fully elastic before shaping. When cooking, use medium heat and avoid moving the mochi until you see golden spots forming. If it starts to curl too much, press down gently with a spatula for the first 30 seconds to help it set evenly. Patience is key—rushing causes uneven cooking and cracks.
What are some creative filling alternatives?
While red bean paste is classic, you can get creative! Try mashed banana with cinnamon for a fruity twist, or black sesame paste mixed with honey for nutty depth. For a modern touch, use vegan chocolate ganache or sweetened coconut flakes**. Just ensure your filling is thick enough to hold its shape—thin fillings leak during cooking. Adjust sweetness to balance the earthy brown rice flavor.